
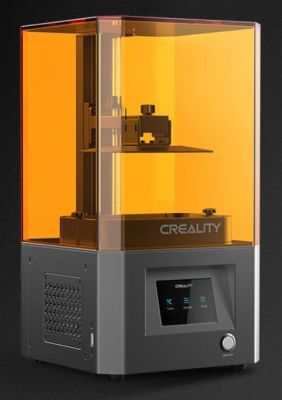
My initial experience with a 3D printer came in 2020, when I got access to a buddy’s Creality LD-002R SLA printer. This was one of those awkward transition phases for SLA printers, where inefficient RGB LCDs finally got replaced by monochrome LCD panels, thus massively reducing the required exposure time and increasing the LCD panel’s lifespan.
The closely related Creality LD-002H is a monochrome SLA printer, but as this wasn’t the one that this friend opted for we had to learn the ropes on this more old-school printer. In terms of specifications this meant a build volume of 119 mm x 65 mm x 160 mm to play with and a claimed 26.1 µm resolution. Despite some struggles along the way, this machine churned out impressively high levels of detail with whatever cheap resin we threw at it, and even the post-printing processing became easy once we added a flex plate to the build plate and tweaked the cleaning and curing steps.
Despite all these positives, we both drifted away from resin printing, mostly due to the still messy and smelly printing process. FDM printers seemed like a better deal, especially after said buddy got his mittens on a used IDEX FDM printer. I would eventually go through a rather loathsome Creality Ender V2 experience before ending up with my current-day Elegoo Neptune 4, and resin printing seemed to be a thing of the past for me. Until recently, that is.
Things Have Changed
Despite not having access to a resin printer any more, I still kept up to date on newly released hobbyist-level 3D printers of any type, as well as progress in technologies. Here I rather liked the digital light processing (DLP) types of resin printers, as they ditched the LCD and UV light source for a MEMS micro-mirror and laser setup for big power and weight savings. Unfortunately DLP resin printers appear to have fallen by the wayside again due to a variety of reasons, one of them apparently being scaling limitations with available DLP light engines and the manufacturers for the latter seemingly uninterested in this market.
Thus consumer SLA printing is still generally done with mono LCDs, which do not quite have the same efficiency and crisp edges for individual pixels as DLP, but which otherwise have come a long way, with better optics and light sources. A big push has also been towards larger build volumes, so despite new SLA printers tacking on more ‘K’s to their display resolution, the effective resolution isn’t that much better than a 2020 budget model. The real question is probably whether that’s even needed based on my own experiences printing fine details.
Perhaps the most exciting change is that with overall user-friendliness, such as easier bed levelling, the preventing of resin smells wafting out of the printer into the room, heated resin vats for reliable print results and UV-blocking lids that you can flip open instead of having to gently lift off the printer with dirty gloves while you desperately try not to drop it whilst scrambling to find a free spot to put it safely down.
Although the Creality LD-002R lists air filtration with a carbon filter, this was more filtration of the homeopathic variety. Instead of filtering anything, the tiny, noisy fan effectively blasted unfiltered, resin-rich air into the room. Thus one of the first thing we did was disabling this ‘feature’ by turning off the fan and sealing the air hole. This immensely improved the printing experience even with less optimal airflow in the room.
Picking A Resin Printer
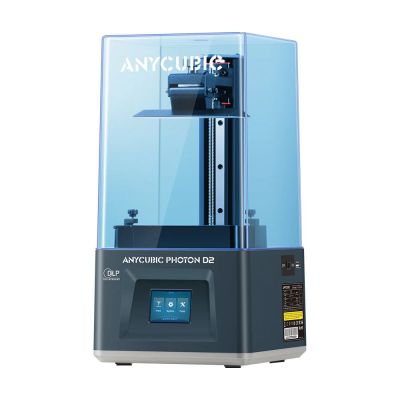
The selection of resin printers to pick from these past years has been nothing short of overwhelming, even if you ignore the veritable flood of slightly different variations from certain manufacturers. Here DLP printers seemed different enough even with their small build space, to the point that I almost got one. Of course the long-awaited successor DLP printers never appeared, and the small build space was somewhat rough and put me off from an impulse buy.
Thus getting an SLA printer as a friend for my FDM printer seemed like the only option, but lacking real project motivation that idea got put on the backburner. It’s really hard to justify a purchase if you cannot justify such a financial expense, after all.
That’s when I suddenly got motivation shoved into my face, in the form of Uniformation contacting me about giving their GK3 Ultra SLA printer a shot. This would be a no-strings-attached chance to have a poke at what looked to be a rather nice and capable printer, even if its price tag of around $1,300 makes it something for people who really know that this is the resin printer they want.
I had heard of this Uniformation company before, as a smaller company that scored a pretty big hit with the somewhat-troubled-but-very-interesting GKtwo SLA printer, which had also featured on my shortlist at one point. The GK3 successor to the GKtwo had been baking in the resin printing community for more than a year by the time I got contacted, with gradual improvements over that time based on community and reviewer feedback.
This is quite different from most 3D printer companies who generally push out a new model in a take-it-or-leave-it sense, so I took them up on their offer for this printer to either play with or use as a very fancy coffee table, whatever I wanted. Based on the sheer verbal abuse I have read aimed at Uniformation during the GK3 development phase on especially sub-reddits, it makes me fairly confident that all major issues were fixed, and that at the very least it’ll be a massive upgrade over the LD-002R that’s pretty much my reference point.
Setting Up
In the world of 3D printers, it would seem that the idea of a flatpack parcel with your new 3D printer – as with my Ender 3 v2 and Neptune 4 bed slingers – has come to an end. A modern CoreXY kinematics FDM printer arrives fully assembled with only few exceptions – like Prusa 3D’s DIY kit offerings – so you’re looking at a very big box that weighs a lot. The similarly priced Prusa CORE One+ for example comes in at a cool 22.5 kg without packaging.
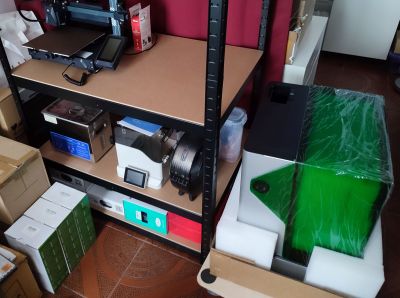
The GK3 Ultra ups that to 35 kg, so I had a rather unhappy delivery bloke lug the ~40 kg box up a few steps from his van to where I could use furniture rollers to walk it over to its new home, next to the FDM printer in a sturdy rack. Lifting the printer into the rack was consequently also a bit of a chore, though less due to the weight and more due to the lack of any good places to grip it. I had to put on some good gloves for extra grip and to prevent the aluminium case from cutting into my flesh.
With that chore done, I could finally admire the fine mess that I had gotten myself into. First of all, the build volume is pretty massive, at 300 x 160 x 300 mm, almost fully beating the Neptune 4’s 225 x 225 by 265 mm. The GK3 Ultra is notably quite deep, at about 40 cm before adding space for the power and Ethernet cables, not to mention the provided Wi-Fi dongle if that’s more your thing.
Much of this extra space is taken up by the resin dispenser system, which I’ll cover more later. Within the rack you’ll need at least 85 cm between the two shelves if you want to put a resin bottle into the slot that’s conveniently placed on the top. Fortunately you can also pour resin directly into the vat and even make the flippy lid removable, but it’s a pretty hefty unit either way.
After liberating a lot of foam and goodies from the inside of the printer, I was finally able to start commissioning it. This involved removing a lot of protective film, running the exposure test to verify that the LCD and UV light source are working, and best of all a quick confirmation that the pre-levelled build plate was still level. Compared to the faffing about with four bolts on the LD-002R’s build plate assembly and sheets of A4 paper that I was used to, this was a massive improvement.
Time To Print
The resin that got sent along with the printer uses a special bottle style, which fits in the GK3’s resin feeding system. You slot the entire bottle into the hole on the top of the printer, from where it should automatically slot into all the tubing and widgets that are supposed to handle the resin flow. My only misgivings with this design is that each of these special cartridge-like bottles are only rated for ten insertion/removal cycles, after which you have to buy a new one.
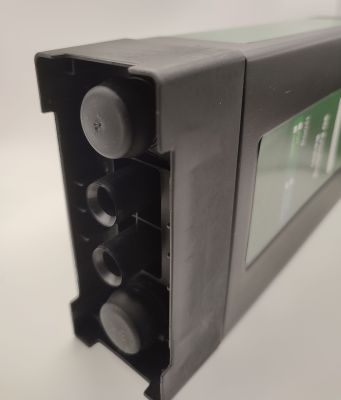
If you use non-Uniformation resin and are pouring resin into a special bottle, then this can be a bit of a pain, if only to keep track of just how many times you have inserted said bottle before you suddenly have it start draining fully into the vat, or whatever the failure mode here is. Fortunately you can also disable this feature if you’d rather pour the resin directly into the vat, which is probably what I’ll end up doing with typical resin bottles rather than use the provided empty special bottle.
Since the only bottles of non-expired resin that I have lying around use this automatic resin feeding system, I’ll be be giving it a shot. A total of two resin types are available to me, one is the water-washable type that’s supposedly not as smelly as the standard resin that I have always used, and which can be cleaned with plain water instead of IPA.
The other type of resin is ABS-like, which as the name suggests is a ‘tough’ kind of resin, targeting similar use cases as ABS, ASA and kin. For the test I’ll print everything with both WW and ABS, as well as in PLA on the FDM printer, to test both overall workflow, printing of fine detail, water-tight parts, heat-resistance and durability.
Test Setup
For a first printing round, I have so far printed a range of parts on the Neptune 4 in white PLA, and for the GK3 Ultra I will initially just use the ABS-like (AL) clear-blue resin, to not have to switch resins just yet, which is another fun topic to cover. These prints include a range of items like bottles, a miniature figurine and a bunch of LEGO Technic-compatible parts. The latter two serve to give dimensional accuracy a good workout, along with basic durability testing.
The print results and my initial findings will be in the next article, as this one is getting on in words. I’m also more than happy to consider any requests for aspects to test and questions to answer here. Although I have so far printed FDM parts in PLA, I’ll probably also be printing some parts in PETG and conceivably also TPU. Since I only have an open style FDM printer, engineering-grade materials such as ABS, ASA, etc. are naturally not available to me, for both practical and health-related reasons.












I have often wondered if additive and subtractive methods can be used in the same box—with femtosecond lasers more available as here:
https://hackaday.com/2026/07/18/cross-sectioning-crickets-with-a-femtosecond-laser/
A 3D printer could get close to a final shape, to be hewn down more exactly…with perhaps a tad more if the object were to be electroplated
I seem to remember ice printers.
Liquid water seems to come in two different forms, and an ice print could be jammed into a powder-bed and perhaps left to sublimate instead of melting, leaving a near-perfect mold.
Perhaps a laser off to one side could help what is being poured stay hot.
An add on box to the side?
I would love a resin printer… that I could use and someone else maintained. X) Pardon the wall of text but I’m gonna dump my thoughts here because maybe I’m wrong and someone can school me on that.
It’s just too much even if they’ve massively improved. I really do not want to have to deal with a messy liquid that can cure under my skin if I got it on me and then stepped into the light.
I would be super paranoid because that’s the type of person I am but I feel like the paranoia would just add additional stress to my life.
There’s also the fact that if I were to ever quit/stop then I’d just have all these things hanging out that I should probably actually dispose of properly instead of just shoving into the garbage.
FDM may be ‘lower resolution’ (no i am not sure if that is the correct term and forgive me for using brackets here; i hate how had’s comment system changes my double-dash em dashes to one solid one) but slapping a roll of filament on the printer and occasionally applying some grease is certainly a lot less effort.
Layer lines suck but I was printing extremely large pieces of ASA/ABS on a bambu A1 nearly maxing out the height limit (until I got my snapmaker u1 anyway) using naught but an A1 in a box and a small PC fan attached to a small window vent to keep the fumes down and so acetone smoothing got rid of those no problem.
I suppose it would’ve been nice to print things with a lot of smaller details but I’m not a minifig kinda person so at the end of the day it isn’t something I’d find terribly useful on a day-to-day basis.
Again I’d love it… but I don’t have a use case and so I just kinda stare at them from afar and find myself not envying those who have to maintain them. Especially when it feels like my FDM printers (and subsequent spare parts, supplies, filament and project hoard) already take up a significant amount of space in my home.
Looking forwars to reading more of your (mis)adventures!
Resin printers still seem to be doomed to the same fate as plasma TVs. They excel in specific applications (miniatures, small parts, jewelry) but the downsides make them a hard sell for the general public.
Kind of said of 3D printing and VR. Niche, niche, and niche, but not in that order.
Hobby Stores could probably print things on demand for customers…not just sell injection molded kits.
I’d like to see a right-to-print movement that supercedes patent/trademark laws.
You can have that – the same places you buy your PCBs from also offer CNC services and resin 3D printing. You can access to some of the fancier resin materials that the consumer machines don’t really work with. Also the printers are located in an industrial building where they should be, not in your laundry room with the window open.
my friend did that … by asking to store it at my house lmao.
I have ran a photon mono x’s as my sla printer since when they came out in 2020 I think and I went for it because it was a large build volume though a few have come along with larger since of course, its still quite respectable. Fitted with the obligatory magentic spring bed plate and I run a pi zero-g as a remote otg usb stick so I can add sliced models via the lan and it exposes the pi camera for remote viewing, and I integrate the status to home assistant so I can start, control and monitor print progress remote also. The slicer I just run the original software in a kvm instance running windows so I can just move it round between linux boxes.
I have a fdm also, and they have different jobs. SLA for precise ornate parts that dont need a lot of structural strength or moulds etc, or the fdm’s for the opposite.
Having both types avoids the “if the only tool you have is a hammer, treat everything as a nail” trap.
Yes the SLA is messier and less suited to a bedroom corner imho, I used to use a magnetic stirrer with in a tupperware sat on top and filled with ethanol burner fuel at first, but then I picked up a wash and cure plus secondhand at a great price and use IPA, and now my workflow is don disposable gloves, spring off plate, flex and pull part off over the ipa tank of the wash-and-cure, wash then swap to the curing setup and its done and dispose of gloves. I dont drain the resin tank each use unless I’m changing resin type or color, but I have a close fitting light blocking cover for it that goes on when its not in use.
My son has my old elegoo mars still that I had prior to the anycubic, and he manages with my old setup, and leaves parts to cure out on his uni apartment balcony, so it can be done :)
“Since I only have an open style FDM printer, engineering-grade materials such as ABS, ASA, etc. are naturally not available to me, for both practical and health-related reasons.”
Hey now, I’ve been printing ABS on an open FDM printer today and I still have days to live! cough cough
Sometimes you need the heat resistance, like for M.2 2230 to 2280 extenders that are under tension and touch a hot SSD. Big parts are a complete no go though, I’ve had prints fail because the ABS warped so hard it lifted the print plate off the magnetised print bed.
I rarely print intricate and detailed parts but every now and again would like to. My Prusas are mainly used for automotive parts and have been great at this but I still hanker after a resin printer for the occasions I see something decorative that looks really cool and know FDM won’t reproduce.
“I’d like to see a right-to-print movement that supercedes patent/trademark laws.”
hold your breath….it will happen real soon. Trust me.
i appreciate that this is an article instead of a youtube video! thanks!
but i didn’t see the punchline…is it still too much mess / smell / fuss? it seems like the answer tends to yes :)
i’m a little interested in the resin features, but the mess has always scared me away. especially since i print about one project a month and i don’t use much material, i figure the resin in my tank would always be super old (years).
With most of the 3D printering removed, or rather reduced to FEP swaps and platform leveling, it comes down to whether you like the uncured resin exposure during vat handling, resin filtering, parts removal, parts cleaning and the cleanups after, the liquid waste diaposal and the space requirements of it all.
I find that it gets in the way of prototyping, a lot.
I have projects that nees the resolution, so when you need it, you need it (but still wish you didn’t)
all this right here. resin for special use cases (transparent parts) but when you want to iterate, make changes to materials, do a quick partial print to test fit in the real world, well, the Mighty 4K has been sitting idle for almost a year (and before printing one part, a year before) while the fdm unit almost never sits idle. The voron 0 build is almost done and there’s a 2.4 craigslist rescue awaiting attention after that.
This is a “part 1”, so no punchline yet.
Once I learned about resin sensitivity I decided to stay FDM.
I do have occasional access to a friend’s resin printer, and they keep it on a balcony which should cure anything left lying out.
On different printers
https://techxplore.com/news/2026-07-ai-personalities-individual-3d-printers.html
I find SLA to be quite easy to use and I’ve never had any problems with mess. A lot of the posters issuers could be handled by developing a decent work flow.
Mine is down to a single pair of dispoable gloves (same as I use for any chemical related workshop task), 4 regular kitchen paper towels, and a spray bottle of IPA. never get anything on me, and always fully clean the machine fully between uses. Typically I have the machine ready to go before the curing process has completed. I’m not using anything fancy, an Anycubuc Photo Mono X and there wash/cure station. I did however purchase an additional wash tub, so I keep one with IPA and another with water.
SLA parts are generally easier to post process, just dial in your support structure contact points so they easily peel off. I’ve rarely made anything that was so large it required any sort of heavy duty support structure, even my ~150mm diameter globular lamp shades were produced using lightweight support structures.
If it has any sort of fine detail, the SLA printer is normally a better choice than my FDM prnters. As another posted said, “Having both types avoids the “if the only tool you have is a hammer, treat everything as a nail” trap.”.
I had not considered not draining the tank between uses; that would reduce my paper towel consumption by another towel and save me a little time. I might consider that next time I’m doing regular batches (typically I’m doing one of prototypes).
A good workflow is king for SLA.
Anything I care about though, I farm out to a service like CraftCloud, MJF or SLS PA12.
Yeah, SLA workflow is absolutely the most important thing. Pouring in resin is easy, as is the levelling process (even with manual bolts) compared to FDM. Once you have the printed parts dripping liquid resin into the vat and you’re faced with the whole post-processing task, that’s when the fun starts.
I have done the paper kitchen towel & spray bottle of IPA in the past, but I have been sneaking some peaks at what others are doing for manual processing. Although you can just get one of those bulky wash & cure stations and pour in a few litres of IPA, I much prefer the silicone mat/tray and manual touch.
When I did all the resin printing on the old Creality unit, I’d generally just use the same standard grey or black resin and keep pouring in more when it ran low. Switching resins is a pain, so I was happy to just use ‘standard’ resin back then.
Of course, with ABS-like, standard, WW, etc. resins you could theoretically mix them too for interesting results, but usually you will have to do the drain, clean, refill dance.
Not as easy as FDM post-processing, but once you get that routine down, it’s not too bad.
I’ve used this exact printer! The shop that I work at picked one up as a complement to our large format FDM but we’ve only used it a dozen or so times. I’ll save my opinions on it for later so as not to influence the coming article but I’m looking forward to part 2!
Maya, would you like to try printing OpenBrush? https:// github.com /GTsutsk /OpenBrush /blob /a04d3d89a81db998f42c5407a69877a7235e359b /docs /OPENBRUSH_Manual_EN .pdf (remove the spaces) from Burg Giebichenstein Kunsthochschule Halle University of Art and Design on your resin printer? Or the other OpenBrush from Cambridge University https:// mobile-systems .cl .cam .ac .uk /papers /openbrush25 .pdf (again, remove the spaces) ?
I still feel like even basic PETG FDM parts are still mechanicaly superior and tougher than the brittle stuff that seems to come from resin printers. Not to mention toughness of TPU… I would totaly love to have resin printer if there was resin as cheap, virtualy non-toxic and tough as PETG filament.
Maya, would you consider resin printing the OpenBrush project from Burg Giebichenstein Kunsthochschule Halle University of Art and Design (Wörn & Tsutskiridze, 2025) ? Or the Cambridge University project of the same name (Yang et al, 2025) ?
Might as well remove this comment since I only posted it when it looked like the earlier one didn’t survive the filter
postprocessing is still a PITA. cleaning/curing etc. materials change is messy and slow. either you’re cleaning vats and whatever FEP the system uses, or you have stack of vats and then you’re still on the hook cleaning them up. Something fails and falls off the plate? more hassle. I started with resin, ran with a couple different printers for 2 years, went to FDM almost 3 years ago and have only used the whole resin workflow setup once, and thats for making transparent parts (fake crystals for cosplay parts). FDM, I can pull one filament, switch to another in under a minute. and Im currently running a dual head printer so color changes are instant. materials selection is so much better too.
I’m a functional print kind of guy and resin printers do have one excellent functional use case: silicone molds
If the final part is silicone then molds can be printed directly, or you can make a mold for a silicone mold to cast urethane or other resin
I have a resin printer that I rarely use. When I bought it I wanted to do this but I haven’t had a need. However I am loath to give up the capability.
Also re:water washable resin
sounds great, not so much in reality. Regardless of what solvent you use it is now haz waste, even if you use water you can’t just pour it down the drain. IPA is actually much easier to dispose of. You can simply stick a pan of it in the sun, let it evaporate, and dispose of the solids. IPA is also just a better solvent