Python With Braces

python

If there’s one thing about Python that’s slightly disconcerting, it’s the complete lack of braces, or as they’re called in American English, suspenders. A feature of every variety of C, Java, PHP, Perl, and a whole bunch of other very powerful languages, braces make things more legible and don’t rely on precise indentation. [Ruby] and [Eran] have come up with a way to use these punctuation marks with Python in a project they call Python with Braces.

As its name implies, Python with Braces doesn’t care about indentation: you’re free to make you code extremely ugly, or write your code properly in K&R style. Each line is terminated in a semicolon, and blocks of code with only one statement don’t require curly braces, just like C and Java.

Right now [Ruby] and [Eran] have a Windows installer with an OS X package on its way. Executing a Python with Braces script only requires executing it with a ‘pythonb’ executable instead of the normal ‘python’ executable.

Controlling Motors Without A Microcontroller

serial

Think you need a microcontroller or a proper motor driver to control a motor? Not really. Because RS-232 serial ports are a hack in and of themselves, you can control two motors with only a serial port and a bridge driver.

Instead of using the data pins on the serial port, this circuit works on with the DTR and RTS control signals of an RS-232 interface. Unlike the data lines of a serial port, these control signals are high when they’re enabled and can also provide a small amount of current – enough to control a pair of pins on a TA7291P bridge driver.

The rest of the circuit consists of a few resistors and a pair of motors, and the software simply turns the DTR and RTS lines on and off. It’s enough for a small robot to waddle across a table, and given the correct driver is simple enough to mash together out of parts from a junk drawer.

The Two Component Random Number Generator

attiny10

[Karl] was in need of a hardware random number generator, but is needs had a few caveats: it needed to be cheap, and sufficiently random. Random number generation can get quite crazy with Geiger tubes, lava lamps, and radioactive decay, but a much smaller solution was found in an 8 pin AVR microcontroller.

The solution uses AVRentropy, a library that uses the watchdog timer’s jitter in AVR microcontrollers to provide cryptographically secure random numbers. Setting up the circuit was easy – an ATtiny45 microcontroller was connected to a cheap chinese USB to serial converter. Three wires, and the circuit is complete. The code was simple as well; it’s just a call to initialize the entropy and write the bits to the serial port.

There are a few drawbacks to this build. Because the entropy library must wait until enough entropy is gathered, it can only produce about two 32-bit numbers per second. That’s all [Karl] needed for his application, though, and with an enclosure made from a wine cork and marble, he has the prettiest and smallest random number generator around.

Wow. Such Mining Rig. So Amaze.

After hearing about cryptocurrencies like Bitcoin, Litecoin, and Dogecoin, [Eric] decided he would have a go at designing his own mining rig. The goals of the project were to have a self-contained and stackable mining rig that had all the parts easily accessible. The result is this awesome computer enclosure, where GPU mining and traditional woodworking collide.

For mining all those coins, [Eric] is using five R9 280x GPUs. That’s an impressive amount of processing power that ended up being too much for the 1500W power supply he initially planned to use. With a few tweaks, though, he’s managing about 2.8 Mh/s out of his rig, earning him enough dogecoins to take him to the moon.

In the video below, you can see [Eric] building his rig out of 4×8 framing lumber. This isn’t a slipshod enclosure; [Eric] built this thing correctly by running the boards through a jointer, doing proper box joints with this screw and gear-based jig, and other proper woodworking techniques we don’t usually see.

Continue reading “Wow. Such Mining Rig. So Amaze.”

Driving RGB Pixel LEDs With CAT5 Cable

cable-test

[Teknynja] was working on a project where he needed to drive a few strips of Adafruit Neopixels – WS2812 LED strips – that were located several feet apart. These LED strips draw a lot of current, and are very timing sensitive; anything more than a few feet of wire between the microcontroller and the LED strip will probably result in missed data, voltage drops, dimming LEDs, and possibly a non-functional strip.

The solution, as in all matters concerning long distance transmission of data, was CAT5 cable. [Teknynja] used RS-422 drivers and receivers to pull this task off, with 75174 line drivers receiving signals from a Teensy 3.0, and 75176 bus transceivers reading everything at the other end of a 20 foot cable.

For the power drop issue, [Teknynja] is feeding 12V into a few of the wire pairs in the cable and using a cheap  LM2596 buck converter to step everything down to 5V at the strip.

With a fairly simple circuit, [Teknynja] was able to drive a few strips of WS2812 LEDs through 20-foot lengths of CAT5 cable with ease; it worked just the same as if the pixels were connected directly to the Teensy on a workbench.

Using A Computer To Read Braille

braille

[Matthiew] needed to create a system that would allow a computer to read braille. An electromechanical system would be annoying to develop and would require many hardware iterations as the system [Matthew] is developing evolves. Instead, he came up with a much better solution using a webcam and OpenCV that still gets 100% accuracy.

Instead of using a camera to look for raised or lowered pins in this mechanical braille display, [Matthiew] is using OpenCV to detect the shadows. This requires calibrating the camera to the correct angle, or in OpenCV terms, pose.

After looking at the OpenCV tutorials, [Matthiew] found a demo that undistorts an image of a chess board. Using this same technique, he used fiducials from the ARTag project to correctly calibrate an image of his mechanical braille pins.

As for why [Matthiew] went through all the trouble to get a computer to read braille – something that doesn’t make a whole lot of sense if you think about it – he’s building a braille eBook reader, something that just screams awesome mechanical design. We’d be interested in seeing some more info on that project as well.

Building A Tape Recorder In 1949

tape

After telling a few stories about how he built a tape recorder as a 16-year-old boy in post-war Germany, [Hans] was finally cajoled into retelling this story in a proper form, giving the Internet one more example of how clever old-school tinkerers could be.

In 1949, [Hans] was but a wee lad of 16 and having built a crystal and tube radio set at 13 and 14 respectively desperately wanted a tour of the local radio station in Hamburg. A kind engineer responded to a letter and a month after requesting a tour [Hans] and his friend found themselves being guided around a proper radio station. One of the most impressive pieces of technology at the time was a tape recorder, which the engineer demonstrated by recording and playing back the voices of [Hans] and his friend. This was the first time [Hans] had ever heard his voice played back and instantly knew he needed to build one of these for himself.

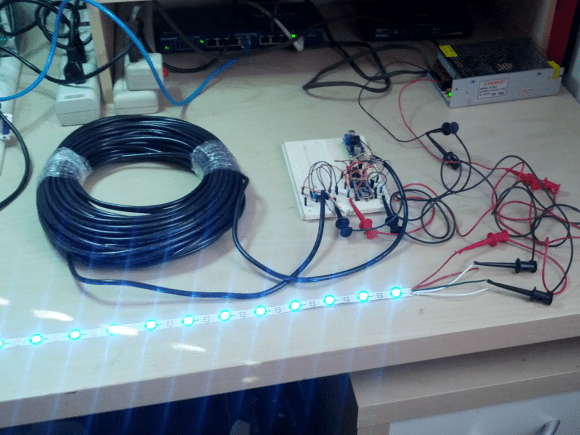
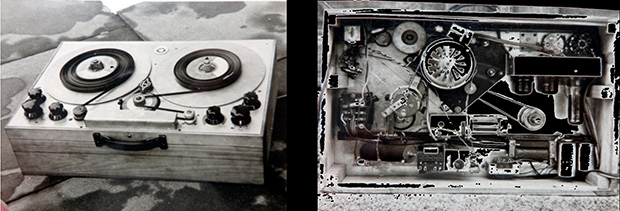
Technical details on the theory and operation of a tape recorder were sparse, but [Hans] managed to come up with an amplifier, tape transport mechanism, a recording and playback head, and homemade magnetic tape made from a reel of iron filings glued to a reel of 8mm film stock.

Testing the equipment, [Hans] and his friend found the device simply wouldn’t work; the homemade magnetic tape was simply too thick, and you couldn’t just go out and buy a reel of magnetic tape. Undeterred, they mailed BASF, the only manufacturer of magnetic tape, and after a month received a 1000m reel of tape.

With tape that worked, [Hans] set about improving his recorder with a tape transport mechanism built from a turntable and a new recording head. This time, his tape recorder worked. When word got around of this amazing machine that could record music, [Hans] was invited to record the local symphony and the speeches for a senior group.

The first commercial reel to reel recorders were released in Germany a little more than a year after [Hans] completed his project, making this one of the more impressive DIY projects we’ve seen.