Getting Boxeebox Root And Making It Useful Again

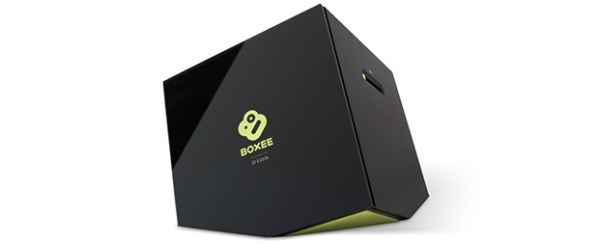
When it was released just three years ago, the Boxee Box – a set-top box designed to run the Boxee HTPC environment – was a pretty cool little device. Even though it was somewhat crippled from the get-go, the Boxee Box had a lot of neat features including a remote with a QWERTY keyboard, the ability to stream media over a home network, and automatic scraping of IMDB for proper info for all your torrented media. Team Boxee recently left for Samsung, and the severs have been shut down, but that doesn’t mean your Boxee Box has outlived its usefulness. Here’s a few hacks to get your Boxee Box up and running again, sent in by [Ryan].

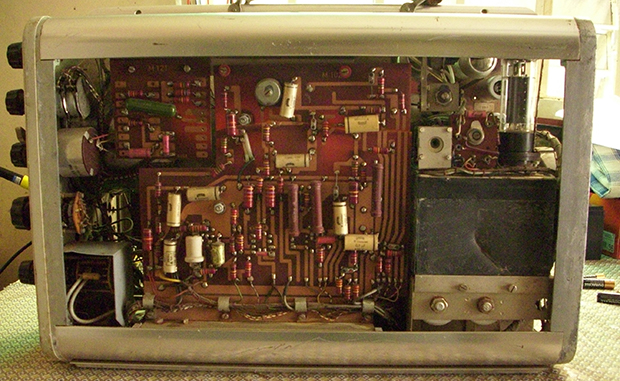
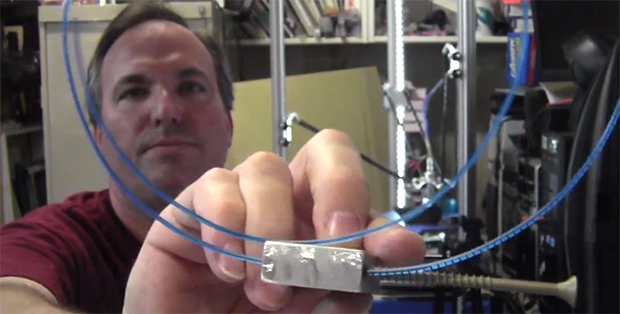
Last year at DEFCON 20, [GTVHacker] demonstrated two ways to get root on the original Boxee Box. The first is a software root method that runs a shell script on every boot. The second is a far more elegant hardware modification that involves cutting two traces and soldering wires to a UART adapter.

Root is fine, but what the Boxee Box really needs is an update to its media player. Boxeehack does just this and only requires a USB stick for installation. Boxeehack puts back some of the default XMBC functions that were removed from the Boxee Box, and gives anyone running this media center root.

It may be old and unsupported, but there’s still plenty of life left in the Boxee Box. They’re also pretty cheap, so if you’re looking for a small media player for your TV, you might want to think about picking one of these boxes up.

On Not Getting Metal Fume Fever With Galvanized Conduit

galv

You can find galvanized steel pipes at Home Depots and construction sites all around the world. These relatively thin-walled steel pipes would make for great structural members if it weren’t for the fact they were covered in a protective layer of zinc. This layer of galvanization lends itself to crappy welds and some terrible fumes, but badass, TV personality, and hacker extraordinaire [Hackett] shows us how to strip the galvanization off these pipes with chemicals available at any hardware store.

Since the galvanization on these pipes covers the inside and the outside, grinding the small layer of zinc off these pipes is difficult at best. To be sure he gets all the zinc off this pipe, [Hackett] decided to chemically strip the pipes with a cup full of muriatic acid.

The process is simple enough – fill a cup with acid, dunk the ends of the pipes, and clean everything up with baking soda. A great way to turn scrap pipe into a usable material, make a cool paper mache volcano, and avoid ‘ol galvie flu

Continue reading “On Not Getting Metal Fume Fever With Galvanized Conduit”

Bode Plots On An Oscilloscope

bode

Bode plots – or frequency response graphs – are found in just about every piece of literature for high-end audio equipment. It’s a simple idea, graphing frequency over amplitude, but making one of these graphs at home usually means using a soundcard, an Excel spreadsheet and a multimeter, or some other inelegant solution. Following a neat tutorial from [Dave Jones], [Andrew] came up with a very simple way to make a Bode plot in real-time with an oscilloscope, a microcontroller, and a few off-the-shelf parts.

The basic idea behind [Dave Jones]’ impromptu Bode plotter is to configure a frequency generator to output a sine wave that ramps up over a period of time. Feed this sine wave through a filter, and you have amplitude on the vertical axis of your ‘scope and frequency on the horizontal axis. Boom, there’s your Bode plot.

[Andrew] did [Dave] one better by creating a small circuit with an Arduino and an AD9850 sine wave generator. Properly programmed, the AD9850 can ramp up the frequency of a sine wave with the Arduino outputting sync pulses every decade or octave of frequency, depending if you want a linear or log Bode plot.

It’s a nifty little tool, and when it comes to building test equipment from stuff that just happens to by lying around, we’ve got to give it up for [Andrew] for his really cool implementation.


Rescuing An SD Card With An Arduino

A few days ago, one of [Severin]’s SD cards died on him, Instead of trashing the card, he decided to investigate what was actually wrong with the card and ended up recovering most of the data using an Arduino and an immense amount of cleverness.

SD cards can be accessed with two modes. The first is the SDIO mode, which is what cameras, laptops, and other card readers use. The second mode is SPI mode. SPI is slower, but much, much simpler. It turned out the SDIO mode on [Severin]’s card was broken, but accessing it with an Arduino and SPI mode worked. There was finally hope to get files off this damaged card.

[Severin] used a few sketches to dump the data on the SD card to his computer. The first looked at the file system and grabbed a list of files contained on the card. The second iterated over the file system and output all the files in hex over the serial port. With a bit of Python, [Severin] was able to reconstruct a few files that were previously lost forever.

Even though the SD card was completely inaccessible with a normal card reader, [Severin] was able to get a few files off the card. All the sketches and Python scripts are available on the Githubs, ready to recover files from your broken SD cards.

Tearing Down An Ultrasound Machine From 1963

hehsiemens

Vintage electronics are awesome, and old medical devices doubly so. When [Murtaugh] got his hands on an old ultrasound machine, he knew he had to tear it apart. Even if he wasn’t able to bring it back to a functional state, the components inside make for great history lesson fifty years after being manufactured.

This very primitive ultrasound machine was sold by Siemens beginning in 1963 as a, “diagnostic ultrasound unit for the quick evaluation of cerebral hemorrhage after accidents.” This is barely into the era of transistors and judging from [Murtaugh]’s teardown, nearly the entire device is made of vacuum tubes, capacitors, and resistors. The only solid state component in this piece of equipment is a bridge rectifier found in the power supply. Impressive stuff, even today.

In the end, [Murtaugh] decided this device wasn’t worth repairing. There were cracks all the way through a PCB, and he didn’t have any of the strange proprietary accessories anyway. Still, this junkyard score netted [Murtaugh] a bunch of old tubes and other components, as well as a nifty CRT that came with a wonderful ‘Made in West Germany’ label,.

A Deck Screw Extruder

deck

A lot of great ideas happen in the middle of the night, and for [Werner] it’s no different. One night he came up with an idea for a new 3D printer extruder, and after a very basic prototype, we’d have to say he might be on to something. It’s basically a deck screw acting as a worm gear to drive filament, but this simple idea has a lot of really cool advantages.

There are two really interesting features of this extruder, should [Werner] ever decide to flesh out his idea into a real prototype. First, the stepper motor for this extruder can be extremely small and mounted directly above the extruder. This opens up the doors to easily creating multi-extrusion printers that can handle more than one filament. Secondly, using a deck screw as a worm gear means there is a huge area of contact between the plastic filament and the driver gear.

Whereas the usual extruder setup only makes contact with the plastic filament along one or two splines of a hobbed bolt, [Werner]’s design drives the filament along the entire length of the deck screw worm gear. This could easily translate into much more accurate extrusion without all the fiddling around with springs and hobbed bolts today’s extruders have.

In any event, it’s a very interesting idea, and we’d love to see [Werner] or someone else make a functioning extruder with this design.

Getting SPI On A Router

router

Cheap routers such a s the TP-LINK 703n and the TP-LINK MR3020 (seen above) can be used for much more than just connecting your laptop to your cable modem. They’re actually very small Linux boxes and with OpenWRT, you can control every aspect of these tiny pocket-sized computers. It’s frequently been suggested that these routers are awesome substitutes for the usual methods of getting Internet on a microcontroller, but how do you actually do that? The onboard serial port is a great start, but this also dumps output from the Linux console. What you need here is an SPI connection, and [ramcoderdude] has just the solution for you.

Linux already has a few SPI modules, but these are only accessible with kernel drivers. Traditionally, the only way to access SPI is to recompile the kernel, but [coderdude] created a kernel module that allows any device running the Attitude Adjustment OpenWRT image to dynamically allocate SPI busses.

He’s already submitted this patch to the OpenWRT devs, and hopefully it will be included in future updates. Very cool, we think, and something that can open a whole lot of doors for hacking up routers very easily.