A Cable Box Becomes A Network Time Display

DVR

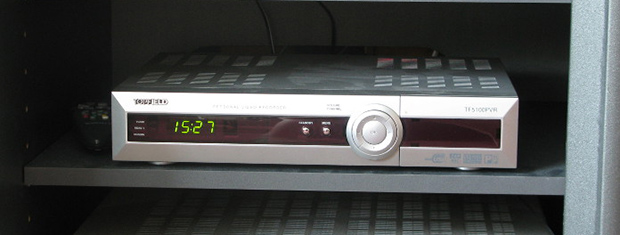
In 2011 [Erkki]’s DVB box gave up the ghost. It had been a fixture of his media center for quite a while, decoding cable and recording shows faithfully for years. A flaky power supply will bring down the mightiest machine, though. and the Topfield box eventually found itself in disuse. One thing [Erkki] liked about this cable box is its wonderful green LED clock – even after the box had been declared dead, he still used it as a clock. Not wanting to keep a faulty machine on life support, [Erkki] decided to strip the guts and replace them with a networked Arduino that receives time over a network

[Erkki] originally used an Arduino and an ENC28J60 Ethernet module to receive time from an NTP server and spit it out onto the LCD display. A full Arduino for this kind of job, especially one that’s a more or less complete project, is a bit overkill so [Erkki] designed a PCB to put his ‘duino to better use.

One interesting bit about this build is that [Erkki] found it completely broken one day. Figuring this was a problem with the microcontroller, he first fried the ATMega with 9 volts – the reasons escape us, however – and started work on programming a new chip. After looking at different ports on his NTP server with a microcontroller, [Erkki] realized he had reset his network switch recently, meaning the previous microcontroller was working perfectly.

In the future, [Erkki] hopes to add some new features to this 8×4 seven-segment display sitting in a large box; something like reading off the temperature, checking IRC and his physical mailbox, and notifying him when someone is at the front door.

A Cold Cathode Audio Visualizer

CC

Finally, cold cathode lights can be used for much more than illuminating the inside of your computer or making your whip look like it can hover. [James] discovered if he varied the voltage going into the inverter, only a certain amount of the tube would light up. Give a hacker an interesting observation and enough time, and eventually he’ll come up with something really cool. In this case, it’s a cold cathode audio visualizer, powered by fluorescent tubes doing unexpected things.

The build details are a little scant, but we were able to coax an imgur album of [James]’ build. He’s using these 20″ CCFL lights with the stock digital inverters replaced with TDK CCFL inverters.

The digital control of this build is provided by an Arduino Mega and a custom shield. We’re guessing the graphic EQ is provided by an MSGEQ7 chip, and the inverters themselves are powered through the Mega’s PWM pins. It’s a lot like an IN-9 Nixie graphic EQ, only much, much bigger. [James] is planning a larger version of this build, dubbed the Mega speKtrum and we can’t wait to see that build along with a proper writeup.

A Full-auto Gauss Gun Probably Won’t Hurt Much

While it may only be able to shoot a few cans right now, we certainly wouldn’t want to be in front of [Jason]’s fully automatic Gauss gun capable of firing 15 steel bolts from its magazine in less than two seconds.

The bolts are fired from the gun with a linear motor. [Jason] is using eight coils along the length of his barrel, each one controlled by an IGBT. These are powered by two 22 Volt 3600mAh LiPo battery packs.

As for the mechanical portion of the build, the bolts fired from this gun are actually 6.5mm nails, cut off and sharpened. These are chambered from a spring-loaded magazine, with each new bolt put into the breech with a small solenoid retracting for an instant. The frame is constructed from a square aluminum tube with additional pieces cut with a hacksaw and bent with an impromptu bench vise brake. If ever there was a person deserving of a bench top shear/brake, [Jason] is the man.

The muzzle velocity of these bolts is about 40 m/s, with a muzzle energy that’s about 3% of a .22 LR round. Not deadly, but more than enough for picking off a few cans and bottles in a garage. You can see the video of this futuristic Gauss machine gun below.

Continue reading “A Full-auto Gauss Gun Probably Won’t Hurt Much”

Replacing Knurled Thumb Screws

Screw

[Pete] bought himself an old South Bend lathe, but unfortunately some of the thumb screws were missing from this fine old machine. Originally, the lathe had knurled thumbscrews, and with a thumbscrew from Ace hardware the lathe itself was functional, but by no means looking its best. With a lathe you can make just about anything, so [Pete] decided he would make his own knurled thumbscrews and bring this lathe back to life.

Knurling is a diamond or linear pattern of indentations usually found on fancy metal knobs, flashlights, and other equipment that needs a good grip. While there are knurling tools for lathes, [Pete] decided to use his knurlmaster – a handheld device that looks like a pipe cutter – to cut a few knurls into a steel bar.

As for making this knurled bar into a proper thumbscrew, [Pete] shows us two methods: the first is tapping the knurled steel, putting in the right screw for the job, and securing the parts with Loctite. The second method involves cutting the threads on the lathe, an excellent example of how a lathe can make just about anything, even parts for itself.

Making Digi-Key Much, Much Prettier

digi

We all love Digikey, but of all the major component retailers out there, their web interface really isn’t that great. A lot of online sources for parts are much, much prettier, but nothing a good Greasemonkey script can’t fix. This is all the work of [Ben], and adds a ton of really, really useful features to the Digikey web interface.

First up is a whole bunch of pictures right at the top of the search results. If you’re looking for pin headers or weird connectors, this is an astonishing useful feature that will help you select the right part faster. After that is a ‘helper’ button for voltages. As you know, selecting a part with a 5V input requires clicking multiple options including 3.3-5V, 2.3-6V, and 5-40V. Clicking on the helper button and entering 5 V will select all the entries in the filter that contain a 5V part.

[Ben]’s project has been tested with Firefox and Chrome with Greasemonkey extensions. Head on over to his project page for a much better demo of all the features for this really great tool.

Turning A Rubidium Standard Into A Proper Tool

Rb

You can find rubidium frequency standards all over eBay and various surplus dealers. They’re actually quite interesting devices, able to generate a 10 MHz sine wave with enough precision to be a serviceable atomic clock. While these standards can find themselves very useful in a lab, they’re only a component, and not a working-out-of-the-box device. [Gerry] decided he would fix that, turning his rubidium standard into a proper piece of bench equipment, all in a single afternoon.

[Gerry]’s first step was finding a proper enclosure for his new piece of equipment. Most of the time, choosing an enclosure is practice in the art of compromise. This time, though, [Gerry] found the perfect enclosure: an old piece of video distribution equipment. On the back of this box, there are a ton of BNC plugs, perfect for attaching to random lab equipment and feeding them a signal from the rubidium standard.

After going through the video circuit and changing the 75 Ohm outputs to 50 Ohms, [Gerry] wired up an eBay power supply, fan, and a small circuit with an 8-pin PIC to complete his new tool. The rubidium standard does get freakishly hot, but hopefully mounting it to a large aluminum box with a bit of cooling will keep all the added electronics in working order.

[Gerry] did all this in just under 5 hours. An impressive feat, given that he probably spent that much time editing the video, available below.

Continue reading “Turning A Rubidium Standard Into A Proper Tool”

Centimeter-level Precision GPS For $900

[Colin] and [Fergus] have been working with GPS for years now, and like most builders of really cool things, they’re often limited by the precision of off-the-shelf GPS units. While a GPS receiver is usually good for meters of accuracy,  this just isn’t good enough for a lot of projects. What you need is centimeter-level accuracy, something the guys have managed to do with their Piksi GPS receiver.

Where most GPS receivers only look at the data coming from the GPS satellites orbiting overhead, the Piksi uses another technique, real-time kinematics (RTK), to determine the receiver’s location with exacting precision. The basic idea behind RTK is to look at the carrier frequency of the GPS signals at 1575.42 MHz. This frequency has a wavelength of 19 cm, compared to the alternating 1s and 0s of the that are transmitted at around 1 MHz, or about 300 meters between each bit. While centimeter-level precision isn’t possible with only one receiver, two of these Piksi boards – one base station and one on a vehicle, connected via radio link – can make for a very exacting high-accuracy GPS receiver.

Previously, commercial RTK GPS systems have cost thousands of dollars – making a quadcopter or other homebrew project that relies on this level of precision nonsensical. [Colin] and [Fergus] have built hardware that can bring the price of this setup to under $1000. As a bonus, the Piksi board can also receive from other constellations such as Galileo and GLONASS. A very impressive piece of hardware, and we can’t wait to see the applications.