Chrome In The Pwn2Own Contest

Google has announced that it will be sponsoring a $20,000 prize at the 2011 CanSecWest Pwn2Own Contest. $20,ooo will be given to the first person to escape Chrome’s sandbox through Google-written code in the first day. If researchers are unsuccessful on the first day, then days two and three will be opened up to non-Google-written code. In addition to the cash, there is also a Google CR-48 running ChromeOS offered as a prize, but it will not be the actual platform used to hack Chrome. We look forward to seeing what comes out of this contest.

[via GearLog]

RepRapped Transistors

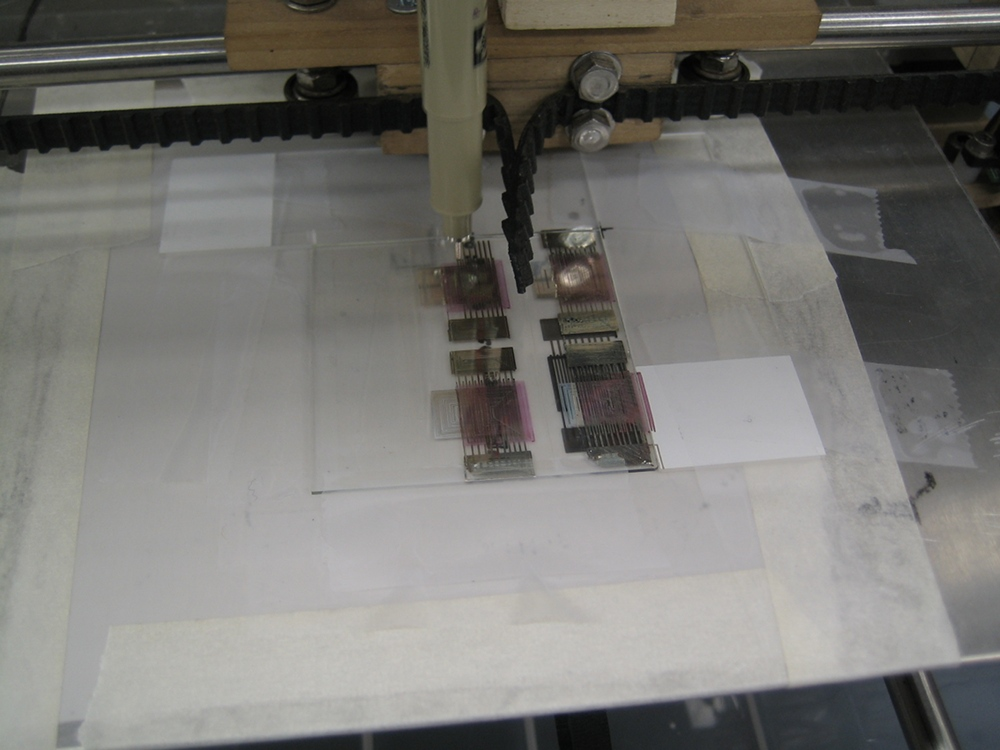
[Mr. Kim] and [John Sarik] made a presentation(pdf) at last weekend’s Botacon conference on how they made organic field-effect transistors (OFETs). A wooden RepRap, the fancifully named Unicorn from Makerbot (or printed from Thingiverse), hacked felt pen, a handful of chemicals, and a couple of pieces of lab equipment were needed to print (plot) out transistors. We were unable to attend the conference, so this is what we inferred from the slides. Silver ink is printed onto a glass slide to form the gate regions, cured and partially masked-off. A layer of CP1 Resin is spin-coated onto the slide to form the dielectric barrier between the gate and the semiconductor, the drain, and source regions. Silver ink is once again used, this time to print out the drain and source regions. The last thing printed is P3HT dissolved in toluene to form the semiconductor region. It would be interesting to see this process modified so that all coatings and curing can be done without removing the slide from the printer.

Garage Monitor Has An Extra Arduino

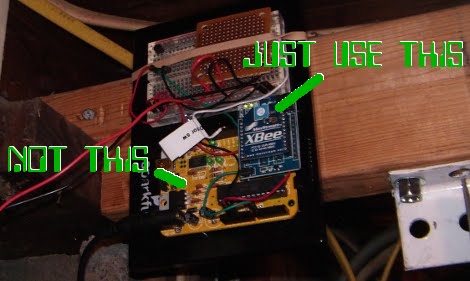
[Jody] wanted to know when his garage door was open. He details his setup which uses a temperature sensor read by an Arduino to send over XBee radio to a computer running a Windows Service. We have seen this twice before, and is noteworthy as a lesson. The XBee radios have the ability to read analog data, relay digital signals, and a lot more. This means the Arduino is completely unnecessary. For example, the Tweet-a-Watt uses two of an XBee’s ADCs to measure voltage and current in a Kill-a-Watt power meter. Programming an XBee is really simple, with the help of tutorials from SparkFun and Adafruit. A bit of programming and soldering should get [Jody] back his Arduino. We hope this note will help you find more creative uses of XBees without microcontrollers.

[Via Make]

Hacked LED Christmas Lights

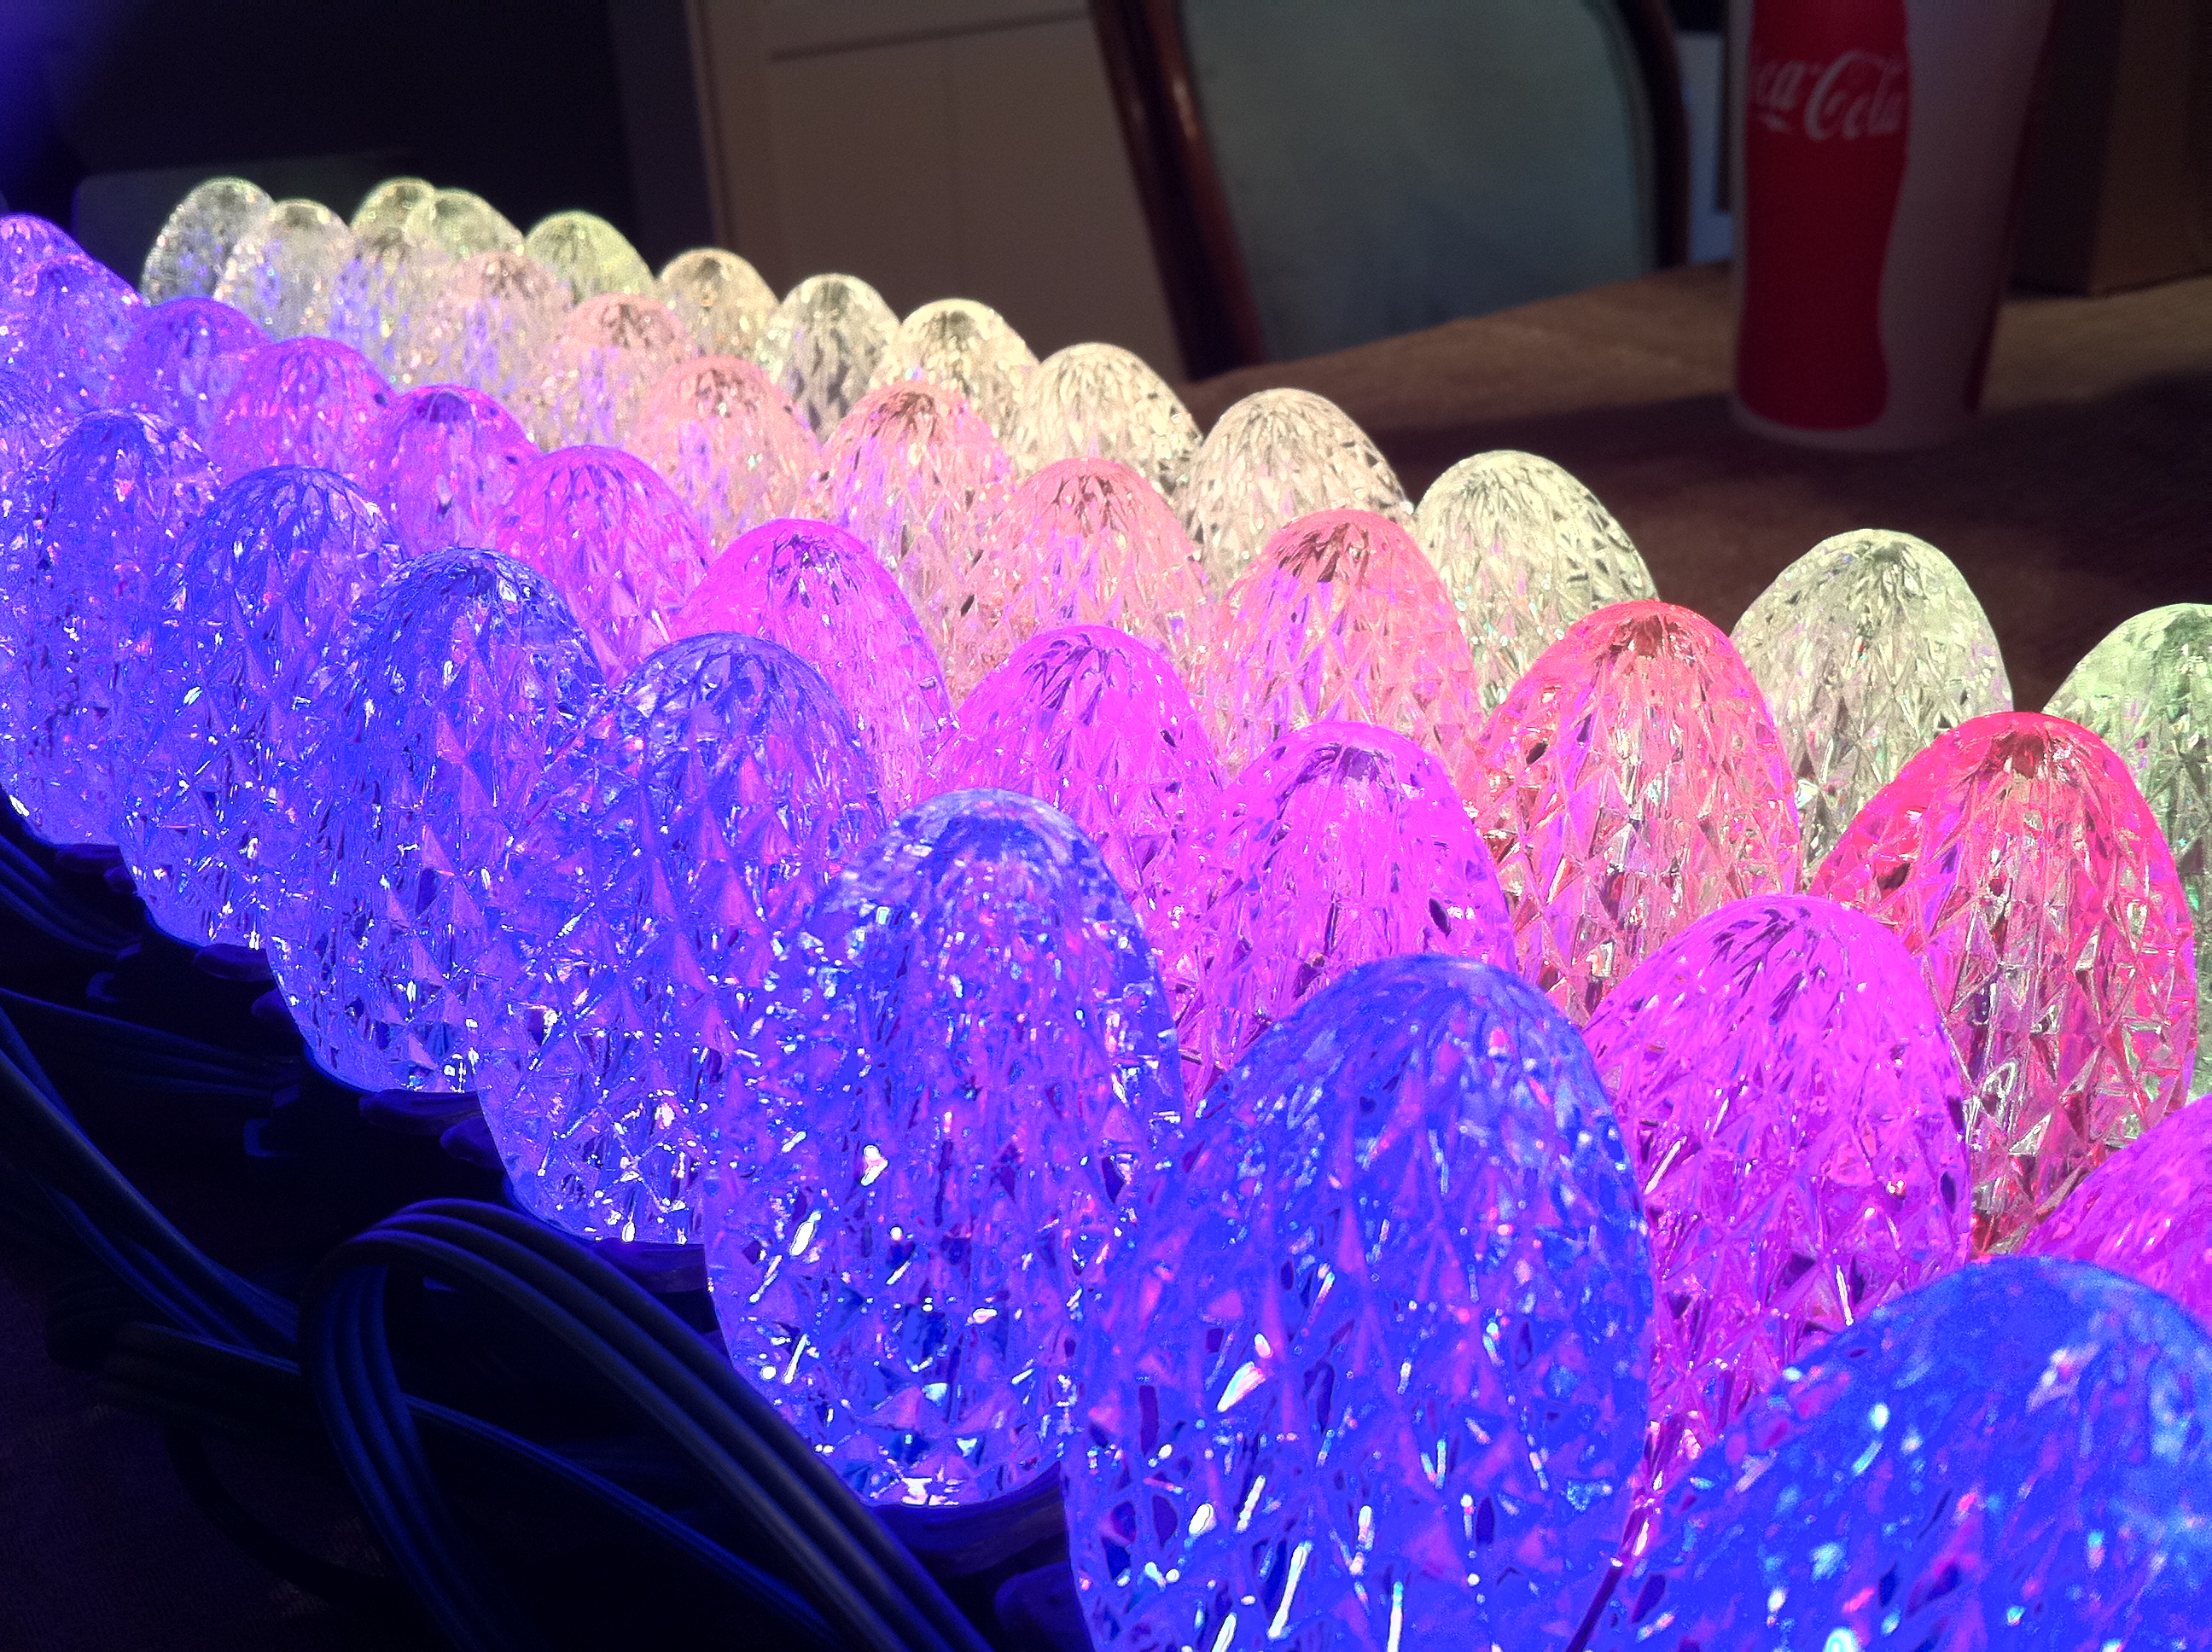
[Robert] wanted more out of his GE Color Effects G-35 LED Christmas lights. He reverse engineered and then hacked the protocol the lights use to communicate so that he can control each bulb. A 26-bit frame contains a 6-bit address, an 8-bit brightness value, and a 12-bit color value. The daisy chain topology of the data bus allows for modular bulbs with addresses enumerated during the startup of the string of lights. With this information, a 5 volt capable microcontroller is able to control a whole string of these lights with a refresh rate of up to 24Hz. In this case, [Robert] used an ATtiny13A microcontroller to control the string of lights. You can see a video of them in action after the break.

Also taken apart and analyzed, were the wireless transmitter and receiver that came with the lights, revealing a cheap ISM band receiver and transmitter module pair. Perhaps they will be useful for another project. We look forward to seeing people put these hacked lights to use throughout the year.

[via Make]

Continue reading “Hacked LED Christmas Lights”

DIY OLEDs

[Jeri Ellsworth] has put together a couple of videos that cover how she made her own organic light emitting diodes, or OLEDs. In the first video, after the break, it discusses the difference between regular, rigid semiconductor LEDs and organic LEDs. The video then goes on to show how to make an OLED as successive layers of materials. Indium tin oxide (ITO) on glass forms a transparent anode. That is then coated with PEDOT:PSS, a conductive polymer mix that is used as a hole transport layer. Then a red diamond ruthenium complex is added to create the emissive layer. The cathode layer is a low work function metal, initially, gallium indium eutectic alloy then later other metals were shown to work. The second video, shows how to juice a glowstick and make OLEDs with the liquid. The dye in blue glowsticks, 9,10-Diphenylanthracene, is an organic semiconductor and will emit light as an electric current is passed through it. The glow stick method seems to have some problems as the ITO coated glass plate is degraded by the glowstick chemicals. It would be interesting to see if using the porous aluminum or similar technique from [Jeri]’s flexible electroluminescent displays could be used as an electrode.

Continue reading “DIY OLEDs”

Lessons In Electric Circuits

Are you looking for a good source of information to get started into making and hacking electric circuits? We would like to refer you to Lessons in Electric Circuits. Even if you have good knowledge of electronics, this is another tool you can use. The book is a work in progress and will have some incomplete and pending areas, but the basic theory parts to get started are all there. It has six volumes: DC, AC, Semiconductors, Digital, Reference, and Experiments. The DC and AC volumes are the most complete. If your eyes are already glazing over thinking you already know all of this stuff, then the most interesting volume for you may be the Experiments, which contains a number of sample circuits like transistor amplifiers and 555 timer circuits. The best part of this book it that it is free, but as with most free things, you can make it better by contributing.

Via Adafruit Industries.

Beginner Concepts: LEDs And Laws

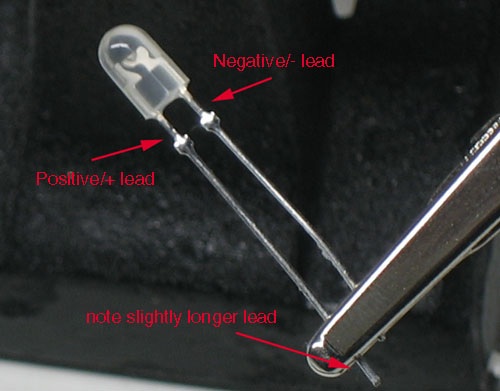
Adafruit has a new LED tutorial for people wanting to get started with electronics. It is full of useful diagrams, pictures, and quizzes to help make sure you are understanding the concepts. This is the real basic stuff here: LEDs, resistors, and the laws from Kirchhoff, and Ohm. It starts out explaining the parts of an LED. Then variations of LEDs: illumination versus indication, clear versus diffused, brightness, color, and size. The mass of the tutorial covers how and why an LED’s brightness can be changed by a resistor and why a resistor is needed to keep an LED from burning out. Such as how Kirchhoff’s Voltage Law works with Ohm’s Law to help you determine the proper resistor for an LED. If you found useful the other beginner concepts posts about Analog Circuits and Electronics basics from the Giz, you should find this tutorial to be useful.