Hacked Kobo Becomes A Weather Display

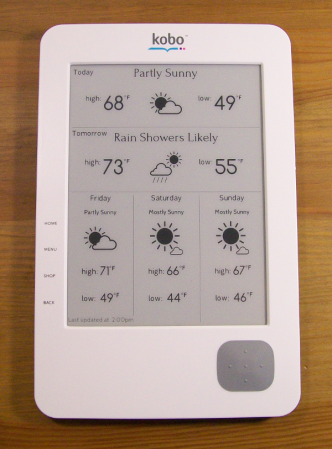
The Kobo e-reader has been hacked for a while now. It’s pretty easy to enable telnet access by modifying some files. Once [Kevin] was able to telnet into the device and draw to the display, he created the Kobo Wifi Weather Forecast. This hack was inspired by the Kindle weather display that we discussed in the past, but this version runs entirely on the Kobo.

The weather report software is written in Python using the pygame library. After loading the software package onto a Kobo, a few commands are run over telnet to set up Python and run the display. Since Python and pygame run on the Kobo, it allows for direct access to the e-ink display.

There’s a lot of possibilities for a internet connected e-ink device running custom graphics code. It’s asking to be turned into any kind of display you can imagine. What ideas do you have for a custom e-ink display? Let us know in the comments.

RPi Video With Pygame

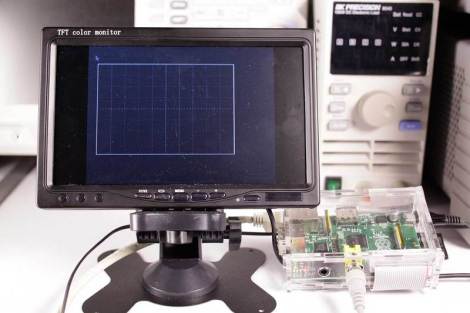
Adafruit has a new tutorial on creating video with an RPi and pygame. The goal is to create custom user interfaces on low cost hardware, powered by the easy to use pygame library. The tutorial walks through getting your RPi set up to run pygame, creating a basic pygame script that controls the framebuffer, and drawing an oscilloscope display on the screen.

This tutorial uses Adafruit’s WebIDE as a development environment. This is an excellent solution for working on video display, since you can develop the code on a networked computer and view the shell while running your graphical application. This is very useful for debugging, since you can just print information to your WebIDE console.

There’s a lot of potential for this setup. It would be ideal for creating any kiosk application. Maybe an announcement display, interactive kiosk, or even a programmable logic controller type user interface? What else could you build with a RPi attached to a LCD touchscreen?

Check out a video of Adafruit’s display in action after the break.

Continue reading “RPi Video With Pygame”

LiPo Powered Stellaris Launchpad

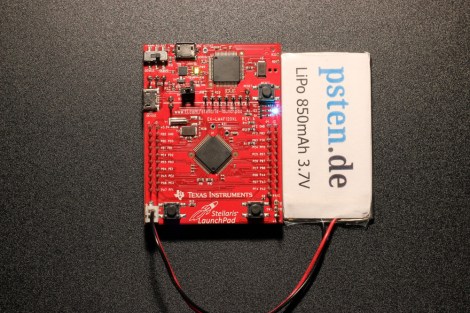
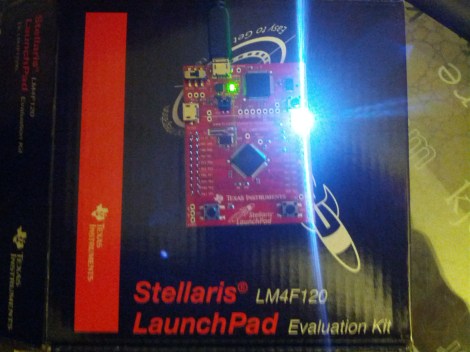
Want mobile power for your Stellaris Launchpad development board? [Philipp] was looking to add some lithium power for the Launchpad. He used an off the shelf single cell LiPo battery and connected it to the 5V rail of the Launchpad board. It didn’t work.

So [Philipp] started looking through the schematics and noticed that the regulator was working fine, but the Stellaris wasn’t starting up. He tracked down a voltage supervisor connected to the Stellaris reset pin. After some investigation, it was clear that this supervisor was holding the device in reset.

The solution is a quick and dirty hack: cut the trace that connects the reset line to the voltage line. With this modification, the device starts up from the LiPo without any issues. [Philipp] does note that you should be careful about battery under-voltage and over-voltage. This hack doesn’t handle charging the LiPo battery, but we’ve discussed that in the past.

Using StellarisWare With The Launchpad

In our last Stellaris how-to we got the board working and set some registers to turn on the LED. This time we’ll start using StellarisWare Driverlib, which provides drivers for the microcontroller’s peripherals including GPIOs, UARTs, ADCs, and so on. These libraries make it easier to control the peripherals. We’ll build the Driverlib project, create a project from scratch to use the library, and run a simple LED blinking example.

Continue reading “Using StellarisWare With The Launchpad”

DIY Tin Plating For Bus Bars

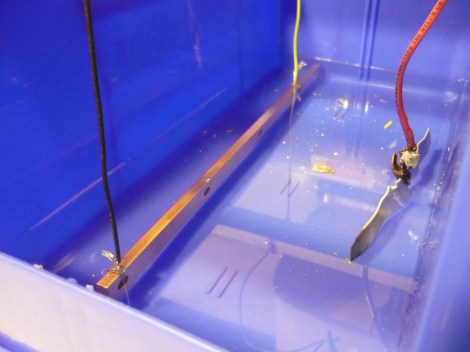
Copper bus bars are commonly used instead of wire for carrying high currents. [Dane] needed some bus bars for a project, but he was worried about corrosion. His solution was tin electroplating the bus bars to lower the risk of corrosion while keeping the conductivity high.

The process requires only two chemicals: hydrochloric acid and tin. The electrolyte solution is made by dissolving tin into the acid. Then the bus bar is placed in a diluted solution and a 1 A current is run through it. The result is a fine coating of tin on the copper, which will not corrode in water.

[Dane] mentions that he’d like to try the process with silver solder in the future, since it is easier to find than tin. He also wants to find a way to measure the amount of tin deposited onto the bus bars. This process could be helpful for anyone who needs some corrosion resistant high current conductors.

Check out a video of the plating process after the break.

Continue reading “DIY Tin Plating For Bus Bars”

Artemis Synthesizer Kit

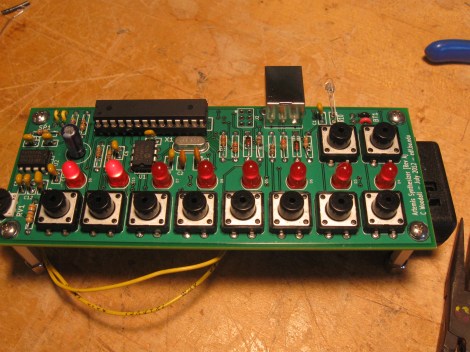
The Artemis Synthesizer was created as a kit for Boston University’s Artemis Project. This project aims to teach female rising high school freshmen about computer science with hands-on activities. [Chris] based the kit on a ATMEGA328P microcontroller and a MCP4921 digital to analog converter. It can be used in a keyboard mode, where the buttons toggle various notes of the scale, or in a sequencer mode, where the buttons are used to toggle pre-programmed sequences.

[Chris] wanted the kit to be usable by the students after the workshop, so he used an optical link dubbed the “Optoloader” to program new sequences and waveforms into the device. A web based application allows for waveforms and sequences to be built in the browser, then programmed by holding a phototransistor up to a blinking square. The square flashes black and white corresponding to a Biphase Mark Code encoded message. This is decoded by the microcontroller on the synthesizer and stored in memory. As a result, no special hardware is needed to play new waveforms and sequences.

[Chris] has a thorough write up for the project, including feedback surveys from the students. He plans to add more specific information about the Optoloader in the future.

Check out a video of the kit in action after the break.

Continue reading “Artemis Synthesizer Kit”

Getting Started With The Stellaris Launchpad

We’ve already given an overview of the Stellaris Launchpad, but lets look at the first steps to running code on the device. First we’ll get the development software working, then we’ll build and run a very simple example.

TI allows use of the full version of their IDE, Code Composer Studio, with the Launchpad’s on-board debugger. To work with Stellaris microcontrollers, you’ll also need to grab StellarisWare. This free software package contains support for the Stellaris devices including peripheral drivers, a USB library, and code examples. Finally, you’ll need the ICDI drivers to communicate with the debugger. TI has all the required software for this board available here. See the TI getting started directions for a walk-through of how to install the required software.

Continue reading “Getting Started With The Stellaris Launchpad”