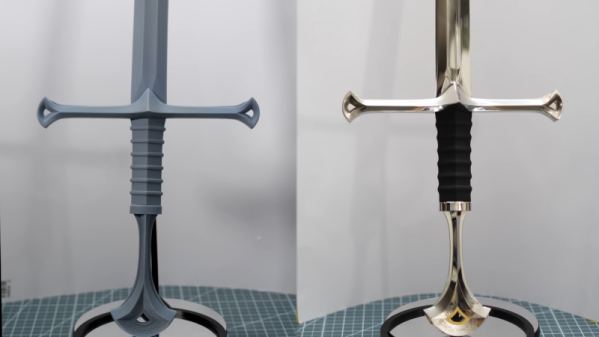
Electroplating 3D prints is a good way to get a pretty nice coating on even a basic PLA part, but generally you’re expected to dunk the entire part into a big vat with electrolyte after coating it with the requisite conductive paint layer. This is great for small parts, like a ring you’d put on a finger, but gets rather silly when it’s a much larger part, such as the one in [Hendrik]’s recent video. Out of curiosity he tried to see whether rotating the part through a much smaller vat would still get you an even coating, or not.
Perhaps ironically this process required building a custom vat out of acrylic, as well as an entire rig to hold up the part and gently rotate it. This highlights the main disadvantage of this approach, in that unless you’re doing a small production run or otherwise get to re-use the rig a lot it’s a lot of extra effort.
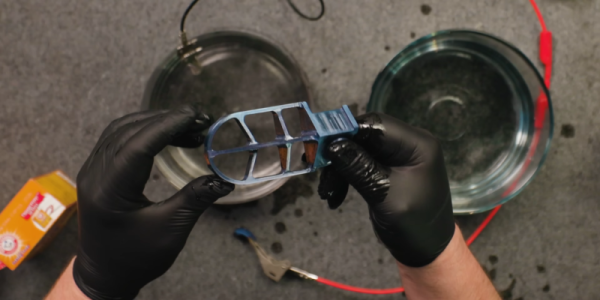
That said, the rotation is controlled by an ESP32 and a stepper motor along with a requisite stepper driver, with the most exotic part being the whole custom PCB and enclosure, all of which can be used repeatedly. With all of that tested and confirmed working, the part to be plated was sanded, sprayed with conductive paint and hooked up to the rotating rig for an overnight run.
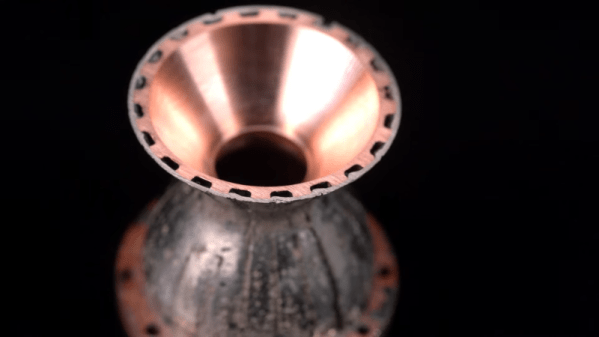
Following that the part’s new copper coating was polished before more layers of electroplating were applied to get the desired two different colors from different metals. Along the way no issues were found with this method of rotating electroplating, so if you regularly struggle with oversized parts to electroplate, this would seem to be a viable method.
Continue reading “Electroplating 3D Prints Without Requiring A Big Vat”