Artemis Synthesizer Kit

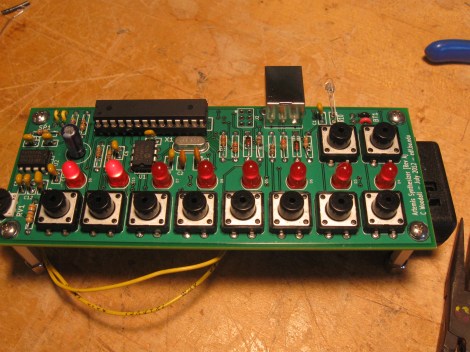
The Artemis Synthesizer was created as a kit for Boston University’s Artemis Project. This project aims to teach female rising high school freshmen about computer science with hands-on activities. [Chris] based the kit on a ATMEGA328P microcontroller and a MCP4921 digital to analog converter. It can be used in a keyboard mode, where the buttons toggle various notes of the scale, or in a sequencer mode, where the buttons are used to toggle pre-programmed sequences.

[Chris] wanted the kit to be usable by the students after the workshop, so he used an optical link dubbed the “Optoloader” to program new sequences and waveforms into the device. A web based application allows for waveforms and sequences to be built in the browser, then programmed by holding a phototransistor up to a blinking square. The square flashes black and white corresponding to a Biphase Mark Code encoded message. This is decoded by the microcontroller on the synthesizer and stored in memory. As a result, no special hardware is needed to play new waveforms and sequences.

[Chris] has a thorough write up for the project, including feedback surveys from the students. He plans to add more specific information about the Optoloader in the future.

Check out a video of the kit in action after the break.

Continue reading “Artemis Synthesizer Kit”

TouchIt Fabulously With Other People On The Internet

[John] from MIT is working on a project to bring a little bit of interactivity to the hacks he does. Because his hacks receive much more attention on the Internet than in real life, [John] made it so clicking a button in your browser can change something in the real world. He calls his creation TouchIt Fabulously (check out that URL!), and it allows a queue of people on the Internet to take part in a real-world hack.

The basic idea of [John]’s build is very simple: a microcontroller connected to the Internet and a 7-segment display receives button presses from random people on the web. [John] did a lot of work to make sure everything is ‘fair’ when a lot of people are hitting his server by including per-IP queuing and rate limiting.

Right now, it’s just a 7-segment display connected to the Internet with a live video stream. With each press of a button, the counter decrements by one, and the person to take it all the way to zero gets to put their comment up on the web site.

If this build receives a lot of interest, [John] plans on turning it into a much bigger build that will control the lights in his office, shoot ping-pong balls at him, and an interactive display where people can draw graffiti in one of MIT’s many hallways.

Now that [John]’s build is up on Hackaday, we look forward to the stress testing our readers will graciously provide.

Thanks go to [Steve Baconmeister] for sending this in and having the best fake name ever.

Making A Game Boy Color Louder

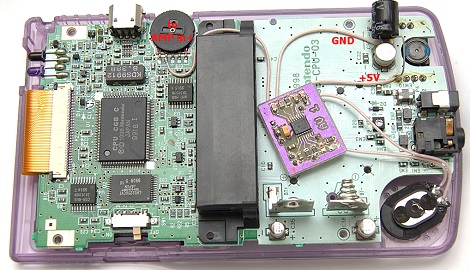
When [Anton] picked up an old translucent purple Game Boy Color, he noticed a nearly complete lack of sound coming from the speaker. This simply would not do, so [Anton] replaced the speaker and soldered in a 2 Watt amp, making his Game Boy very loud indeed.

After cracking open his Game Boy, [Anton] noticed the speaker was rusted. He replaced it by soldering in a speaker from a Motorola cell phone, fixing the most immediate problem. After plugging in a few batteries, he still noticed a nearly complete lack of sound.

Turning to his electronics junk drawer, [Anton] pulled out a TI TPA2000D1 Class D amplifier. This tiny amplifier is able to provide 2 Watts to a speaker and is very power efficient given it’s Class D pedigree.

After making a PCB and wiring up his amp to the Game Boy’s circuit board, [Anton] spent a little time tracking down the source of some high-frequency hissing. As it turns out, the power regulators and converters on a 15-year old Game Boy aren’t of the highest quality, but after adding a few capacitors [Anton] got everything under control.

Now [Anton]’s Game Boy has very loud, crystal-clear sound. Considering the lengths chiptune artists take modifying old ‘brick’ style game boys for use with Little Sound DJ or nanoloop, [Anton]’s build could become a worthwhile modification for musicians looking for a little more oomph to their performance.

Digital Marker Communicates With Touch Screen

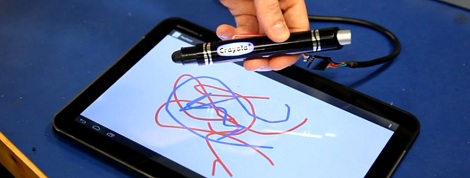
In an effort to be more relevant to children that just aren’t impressed with crayons and markers anymore, Crayola released the ColorStudio HD pen. Instead of ink, this pen is filled with electronics that communicate with a tablet to draw different colors in the Crayola ColorStudio app.

[Rob Hemsley] had done some work with capacitive touch screens before, so when he heard the clicking of a tiny relay inside the pen, he automatically knew how it worked. Of course this meant tearing apart the Crayola marker to look at the electronics, but [Rob] also went so far as to replace the microcontroller, allowing you to craft your own ColorStudio HD pen.

The digital Crayola marker communicates with the app by switching a relay on and off very quickly. This completes a circuit between the user’s hand and the touch screen, allowing the tablet to interpret the desired color by measuring how many touches are received per second.

Inside the pen, [Rob] found an RGB LED, a relay, and a PIC microcontroller. Not having any experience with PICs, [Rob] changed out the ‘micro to an ATtiny44 and started writing some firmware with the help of the Arduino IDE.

[Rob]’s updated version functions exactly like the stock version, communicating with the Crayola app by pulsing the relay to indicate the selected color. Even though the Crayola app only has three possible colors, [Rob] says it’s feasible to program the digital pen to send an RGB color value to a tablet, allowing you to choose what color to draw with on the pen.

You can see a video of [Rob]’s updated pen after the break.

Continue reading “Digital Marker Communicates With Touch Screen”

Open Source Android Thermostat

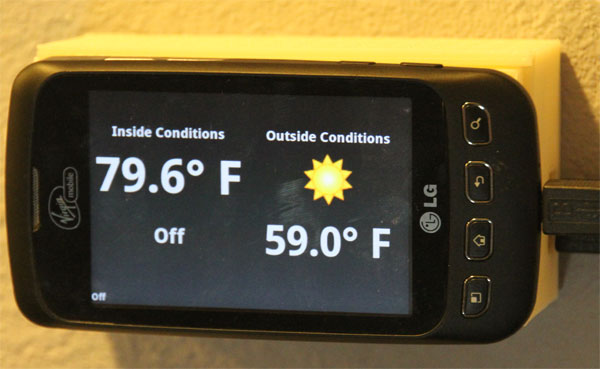
Put that old Android phone to good use by mounting it on the wall as a smart thermostat. This open source hardware and software project lets you replace your home’s thermostat with an Android device which adds Internet connectivity and all that comes with the increase in computing power.

The brunt of the hardware work is taken care of by using an IOIO board which makes it easy to interface any Android device with the simple hardware which switches your HVAC equipment. We’ve been waiting for the launch of the new IOIO design and if it comes in at a lower price as has been rumored that makes this project in the price range of the least expensive of programmable thermostats (assuming you already have an Android device to devote to it). Simply etch your own board to host the relays and voltage rectifier and you’re in business.

There is a client and server app, both free in the Play Store. The server runs on the wall-mounted device with the client offering control via a network connection. The features of the system are shown off quite well in the video after the break.

This sounds like a perfect use for that phone you ripped out of the pages of a magazine.

Continue reading “Open Source Android Thermostat”

Cellular Vehicle Information And Control

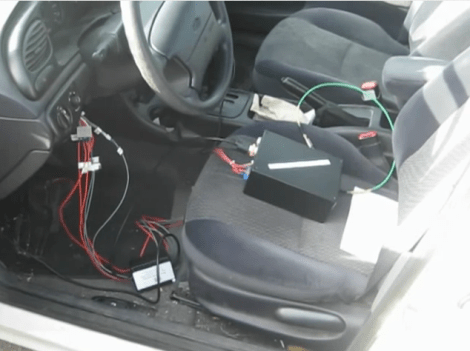
This hardware, which was built as a Computer Engineering project by [Bryon] and his classmates, gives you feedback and control of a car though a cellular phone network. It uses text messages to communicate with a control device. This can be pretty much any cellphone, but in the clip after the break they show off an Android app which puts a pretty GUI in front of you and abstracts away the tedium of specially formatted messages.

At the heart of the system is an Arduino Mega board. It has a cellular shield with an external antennae for connectivity. A GPS device, relay board, and ODB-II module provide feedback and control to the system. The relays allow the car to be started and the doors to be locked. The GPS and ODB-II module can send back location and vehicle information (anything available from the car’s sensors). There were some issues with the text messages being blocked during testing. The team thinks that the automated back-and-forth triggered some kind of spam filter from the telecom.

There’s still more work to be done if they want to actually drive the car via remote control.

Continue reading “Cellular Vehicle Information And Control”