diy rc hovercraft

DIY RC Hovercraft Makes Batman Action Figure Envious

[Bauwser] had some spare RC Helicopter parts laying around and cobbled together an RC Hovercraft. It worked but not to his liking. That’s okay though, he know it was just a prototype for what was to come; a fully scratch built hovercraft with parts spec’ed out specifically to make it handle the way [Bauwser] wanted.

He started out by sketching out some cool faceted shapes that would both look good and be easy to construct. Sheets of a light but rigid foam were then cut into the appropriate shapes and glued together to create a three-dimensional body. The foam was then covered with a layer of fiberglass and resin to add some strength. A hole was cut in the body to mount a 55mm ducted fan which provides the required air to fill the skirt and lift the vehicle. Another ducted fan is mounted at the back of the craft and points rearward. This ducted fan provides the forward thrust and a servo vectors this fan in order to make turns.

[Bauwser] sewed the skirt himself. It is made out of an old beach tent. The fabric is extremly light and flexible, perfect for a hovercraft. During the test runs, dirt and debris was getting trapped in the skirt tube. A quick trip back to the sewing machine to add some gauze netting fixed that problem and keeps debris collection to a minimum. In the end, [Bauwser] shows what a great DIY RC build can look like with a little planning and experimentation.

Need more DIY RC hovercrafts? Check this out

Video after the break…

Continue reading “DIY RC Hovercraft Makes Batman Action Figure Envious”

Laser Trip Wire

Laser Trip Wire With Keypad Arming

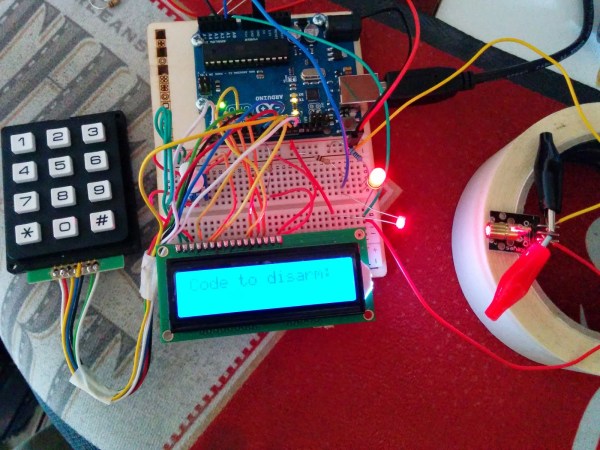
Most of us have had a sibling that would sneak into our room to swipe a transistor, play your guitar or just mess with your stuff in general. Now there’s a way to be immediately alerted when said sibling crosses the line, literally. [Ronnie] built a laser trip wire complete with an LCD screen and keypad for arming and disarming the system.

The brains of the project is an Arduino. There’s a keypad for inputting pass codes and an LCD screen for communicating if the entered code is correct or not. [Ronnie] wrote his own program using the keypad.h, liquidcrystal.h and password.h libraries. A small laser pointer is shined at a Light Dependent Resistor which in turn outputs an analog signal to the Arduino. When the laser beam is interrupted, the output voltage drops, the Arduino sees that voltage drop and then turns on the alarm buzzer. The value that triggers the alarm is set mid-way between the values created by normal daylight and when the laser beam is hitting the LDR. [Ronnie] made his code and wiring diagram available for anyone who’s interested in making their own laser trip wire.

Hopefully, [Ronnie’s] pesky little brother didn’t watch his YouTube video (view it after the break) to find out the secret pass code. For a laser trip wire sans keypad, check out this portable one.

Continue reading “Laser Trip Wire With Keypad Arming”

OctoPrint On Router

Dumpster Dive Results In 3D Print Server Project

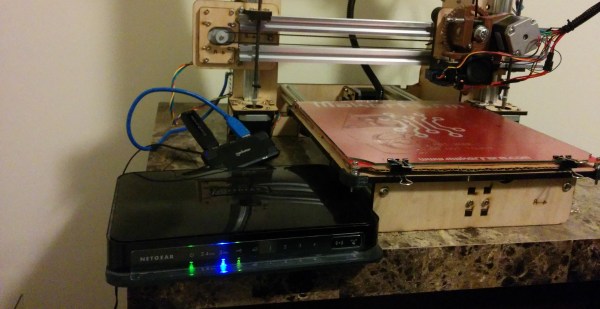
3D Printers are super convenient when you need a part quickly. However, they can be seriously inconvenient if the 3D printer has to be tethered to your computer for the duration of the entire print. [Matt] purchased a Makerfarm i3v printer and has been using it a bunch. The only thing he wasn’t crazy about was having it occupy his computer while printing objects. Then one day [Matt] was dumpster diving (don’t roll your eyes, we all do it) and found a Netgear WNDR3700v1 WiFi router. This particular router has a USB port and it made [Matt] think, “can I use this to run my printer?

[Matt] started by checking out 3D print server software OctoPrint and found out that it was entirely written in Python. He had a feeling that he could get Python running on that found Netgear router. The first step was to install OpenWrt to the router and configure it as a client. That was straight forward and went well.  The router only had one USB port so a hub was necessary in order to connect a USB drive and the printer. The USB drive was necessary because the router itself did not have enough memory for OctoPrint. Installing OctoPrint to the router was a little complicated and took a bit of trial and error but [Matt] figured out the best method and documented that on his site for anyone interested in doing the same. So now, [Matt] can use his computer’s web browser to access OctoPrint on the Netgear router, start a print and go back to using his computer without fear of a failed print. OctoPrint and the router are now solely responsible for controlling the printer.

If you’re interested in more ways to remotely control your printer, check this out.

diy usb charger

DIY Phone Charger Born From Cyclone Disaster

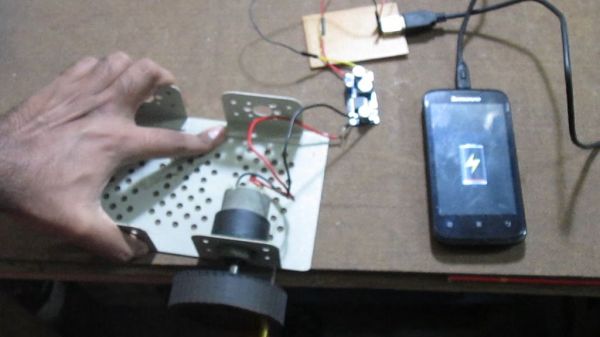
As convenient as cell phones are, sometimes these power-hungry devices let us down right at the worst time. We’re talking about battery life and how short it is in modern cell phones. Sure that’s totally inconvenient sometimes but it could be way worse. For example: during a natural disaster. A cyclone hit [Ganesh’s] home city and the entire area had lost power for 10 days. He couldn’t plug in his phone to charge it even if he wanted to. After realizing how dependent we are on the electrical grid, he did something about and built a phone charger out of parts he had kicking around.

The charger is quite simple. The user cranks on a DC motor and the output power goes into a LM2596-based step-down voltage regulator. The output of the regulator is then connected to a female USB connector so that any USB cord can be plugged in. As long as the motor is cranked fast enough to put out at least 8vdc, a steady stream of 5v will be available at the USB connector. Max current output of the system has been measured at 550mA.

[Ganesh] admits this isn’t a practical every-day charger but in a pinch it will certainly do the trick. It is even possible to build a makeshift charger out of a cordless drill.

Continue reading “DIY Phone Charger Born From Cyclone Disaster”

Atari CNC Pendant

Atari 2600 Controller Now Controls CNC Plasma Cutter

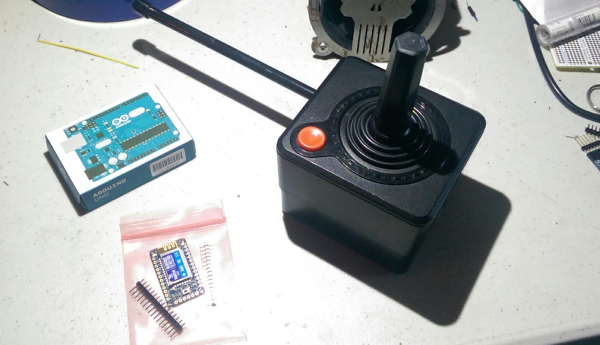
When using any CNC machine the system has to understand where the part to be machined is physically located. This is most commonly done by jogging the tool to a position relative to the part and then indicating to the controller that the tool is indeed at that position. Hobby CNC enthusiasts [Jeremy] and [Yakob] wanted an easy, convenient (and even fun) way to zero their plasma cutter. They decided to make a wireless jog pendant capable of moving and zeroing their machine….. and it’s built into a retro game controller!

The housing is a wireless Atari 2600 controller. Most of the innards were taken out and replaced with a BlueFruit EZ-Key module that takes input signals from the stock joystick and button switches and, in turn, emulates a Bluetooth keyboard signal that is understood by a PC. Most PC-based CNC Control Software’s have keyboard shortcuts for certain functions. This project takes advantage by using those available keyboard shortcuts by mapping individual pin inputs to specific keyboard key presses.

The X and Y axes are controlled by pushing the joystick in the appropriate direction. Pressing the ‘fire’ button zeros the axis. Even though the remote is working now, these two guys want to add a rotary encoder so that they can make minor Z axis height adjustments on the fly since sometimes the metal they are plasma cutting isn’t completely flat.

If you’re interested in making CNC Pendants out of old tech, check out this once-was TV remote.

dash board pc case

Dashboard PC Case Build Utilizes Honda Civic Gauge Cluster

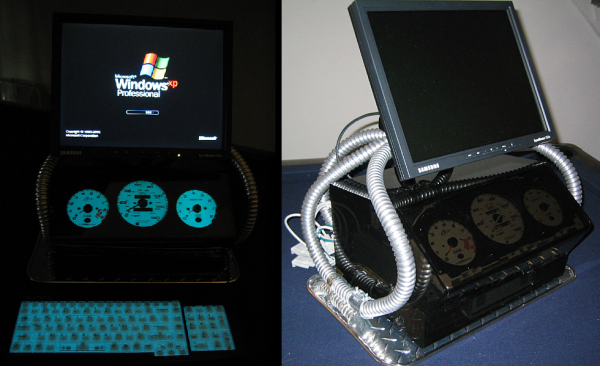
The last thing you’d expect to see adorned on a computer case is an Indiglo gauge cluster straight out of a Honda Civic…. but that is exactly what [Envador] has created. He was driving around town one evening when a car past him. The blue glow of the passing car’s dash board was extremely noticeable and caught his attention in a positive way. Any computer nerd would, of course, immediately think “hey, that would make a cool computer case“. [Envador] then set out on a mission to make it happen.

Clearly, the focus of the case is the gauge cluster. It was taken out of a Honda Civic found in a junkyard. And it just wouldn’t be cool enough to just have the gauges light up, they definitely had to display some sort of info from the computer. CPU, RAM and hard drive usage seemed like pretty good parameters to display. [Envador] expected that each of the 3 gauges would accept a pulsed signal to move the needle. After tearing down the gauge panel he found only the tachometer worked that way. The other two gauges worked by some unknown means. Instead of messing around with figuring those two out, the mechanical components of the rogue gauges were replaced with those of two aftermarket tachometers. The stock needles and indiglo backlighting were kept.

To move the now-3 tachometer needles, [Envador] used a product called PCTach that connects to the PC via serial cable. It works with accompanying software to monitor PC information and output the necessary signals to make the tachometers move according to the PC’s performance. The computer case, itself, was fabricated from smoked acrylic behind which sits the gauge cluster. A matching backlit keyboard finishes off the look nicely.

Water Tank Monitoring System Is Now Slug-Proof

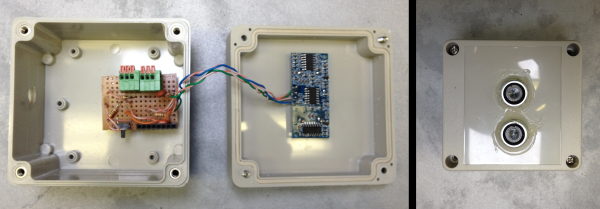
[Peter] is doing his part toward protecting the environment and conserving water. He’s built a rainwater collection system complete with an underground storage tank. Since he wanted to monitor the water level in the tank, he made a level indicating system. Everything was going well until one day out of nowhere it stopped working, only returning 0’s as the level. [Peter] took a look and found that I slug had made its way into the electronics enclosure and slimed up the traces on the PCB, causing short circuits.To fix the problem [Peter] decided to redesigned the system. This time it would be built into an all-weather electrical box. The system uses a standard hobby ultrasonic range finder to measure the distance from the top of the tank to the level of the water. Two holes cut into the electrical box allow the sender/receiver components to peek outside of the enclosure. Any gaps were then filled with sealant. [Peter] also added a thermistor to measure the temperature inside the tank.The sensor values are read by an Arduino and sent wirelessly to [Peter]’s computer via a pair of XBee’s and a second Arduino with an ethernet shield. The data are sent in 3 minute intervals and automatically stored in a MySQL database for quick reference of level and temperature trends. Now [Peter] can monitor his rain water remotely and adjust his usage habits accordingly. Want to read more about water tanks? Check out this overflow monitor system.