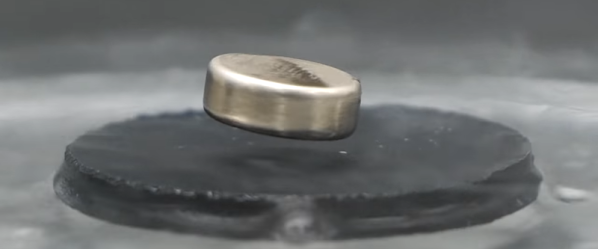
We always enjoy [NileRed’s] videos. His latest shows how he made some relatively high-temperature superconducting ceramic. After finding what appeared to be some really good instructions on the Internet, [NileRed] found there were some things in the paper that didn’t make sense. You can watch the video, below.
The superconductor was YBCO, sometimes known as 123 because of the ratio of its components. Turns out that most of the materials were available online, except for one exotic chemical that he had to buy from a more conventional source.
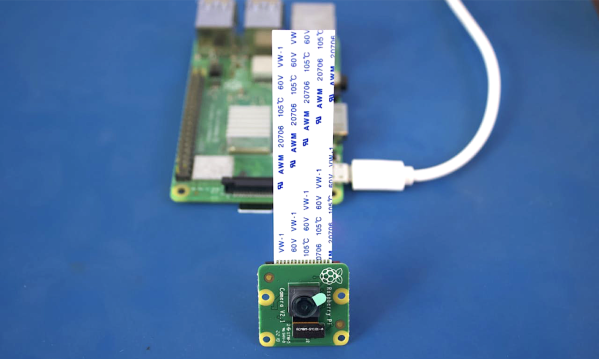
She had to download MATLAB’s Raspbian image to allow the Pi to interpret MATLAB commands over a custom server. That setup is mostly pretty easy and she does a good job walking you through the setup on her project page.
With that, now she can control the Pi in MATLAB: configure the camera, toggle GPIO, etc. The real fun comes with the facial detection program. In addition to opening up a live video feed of the Pi camera, the program outputs pixel data. [Monica] was mostly just testing the stock capabilities, but wants to try detecting other objects next. We’ll see what cool modifications she’s able to come up with.
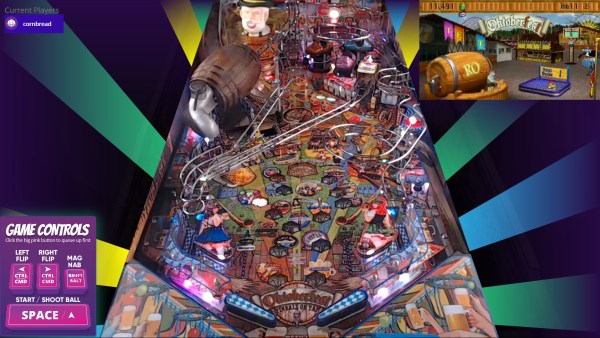
We don’t really miss going out to bars all that much, unless you’re talking about the one downtown with all the pinball machines. Don’t get us wrong — pinball emulators have gotten crazy good, and you can find exact digital replicas of most machines to play on your phone or whatever. But it just doesn’t compare to the thrill of playing a real cabinet.
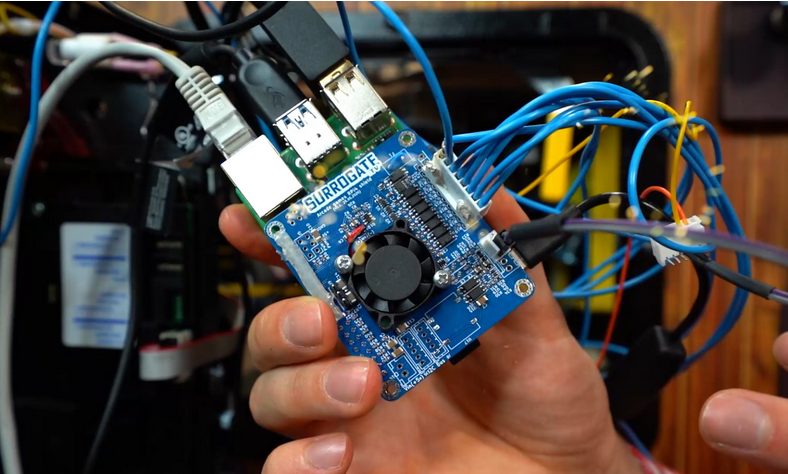
Don’t despair, because for the next couple of weeks, you can queue up to play on a real Oktoberfest pinball machine that’s sitting in Espoo, Finland. The controls are hooked up to a Raspberry Pi 4 through a custom HAT, along with a camera pointed at the playfield and another focused on the backglass screen. The game development/video streaming company Surrogate is hosting a tournament over the internet, and will be giving prizes to the top ten high rollers.
We usually have to wait until the holiday season to come across these remote-reality gaming opportunities. Having played it several times now, we recommend spamming the flippers until you get a feel for the lag. Also, just holding the flippers up while the ball is in the upper half of the playfield will catch a lot of balls that you might otherwise lose due to flipper lag, and sometimes they end up back in front of the launcher to shoot again. After the break, check out a brief but amusing video of setting up the cameras and Pi that includes a taste of the Oktoberfest music.
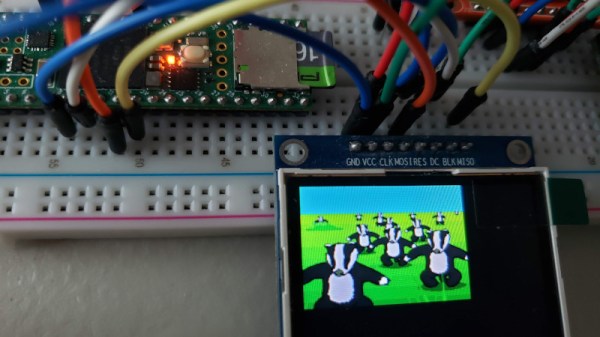
Despite being cooked up by Compuserve back in the late 1980s, GIFs have seen a resurgence on the modern internet, mostly because they’re fun. However, all our small embedded systems are getting color screens these days, and they’d love to join in the party. [Larry Bank] has whipped up a solution for just that reason, letting embedded systems play back short animated GIFs with limited resources.
[Larry] does a great job of explaining how the GIF format works, using LZW compression and variable-length codes. He talks about how the design of the format presents challenges, particularly when working with microcontrollers. Despite this, the final code works well, and is able to work with most animated GIFs of the right dimensions and construction. 24K of RAM is required, and image width is limited to 320 pixels. Images can be loaded from flash, memory, or SD cards, and he notes that best performance is gained with a microcontroller with fast SPI for writing to screens quickly.
It’s a great piece of software that promises to add a lot of charm, or silliness, to microcontroller projects. It also simplifies the use of animations, which can now be designed on computers rather than by using onboard graphics libraries. GIF really is the format that never seems to die; we’ve featured cameras dedicated to the form before. Video after the break.
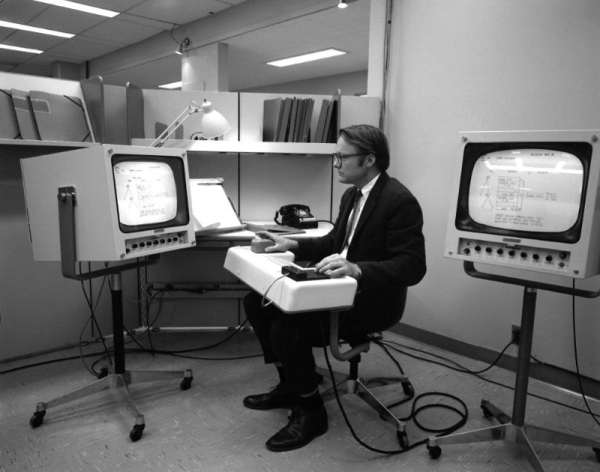
Bill at the controls at Stanford Research Institute. Image via MSN
Every piece of technology starts with a vision, a vague notion of how a thing could or should be. The computer mouse is no different. In fact, the mouse was built to be an integral part of the future of personal computing — a shift away from punch cards and mystery toward a more accessible and user-friendly system of windowed data display, hyperlinks, videoconferencing, and more. And all of it would be commanded by a dot on the screen moving in sync with the operator’s intent, using a piece of hardware controlled by the hand.
The stuff of science fiction becomes fact anytime someone has the means to make it so. Often times the means includes another human being, a intellectual complement who can conjure the same rough vision and fill in the gaps. For Douglas Engelbart’s vision of the now-ubiquitous computer mouse, that person was William English.
William English was born January 27, 1929 in Lexington, Kentucky. His father was an electrical engineer and William followed this same path after graduating from a ranch-focused boarding school in Arizona. After a stint in the Navy, he took a position at Stanford Research Institute in California, where he met Douglas Engelbart.
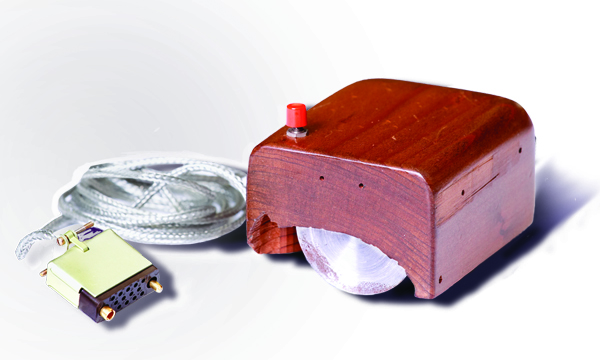
The first computer mouse, built by William English in the 1960s. Image via Wikipedia
Engelbart showed William his notes and drawings, and he built the input device that Englebart envisioned — one that could select characters and words on the screen and revolutionize text editing. The X/Y Position Indicator, soon and ever after called the mouse: a sort of rough-yet-sleek pinewood derby car of an input device headed into the future of personal computing.
William’s mouse was utilitarian: a wooden block with two perpendicular wheels on the bottom, and a pair of potentiometers inside to interpret the wheels’ X and Y positions. The analog inputs are converted to digital and represented on the screen. The first mouse had a single button, and the cord was designed to run out the bottom, not the top.
For many of us, this whole pandemic thing has produced some unexpected upsides. One of [George Turvey]’s was finding a nice new scenic route to work that goes by a lake with bike trails. [George] thought it might be nice to go fishing after work, and use a folding bike to cover a lot of ground while looking for good spots on the shore. There was just one problem — riding a bike while transporting tackle is awkward.
Milling won out, at least for the initial proof of concept, and result is a modular mock-up that combines a milled Kydex connector and tackle box holder with a double-barrel PVC rod holder. This way, [George] had a prototype in a fraction of the time it would have taken to design and print it. Cast your line past the break to see how fast [George] can switch gears into fishing mode.
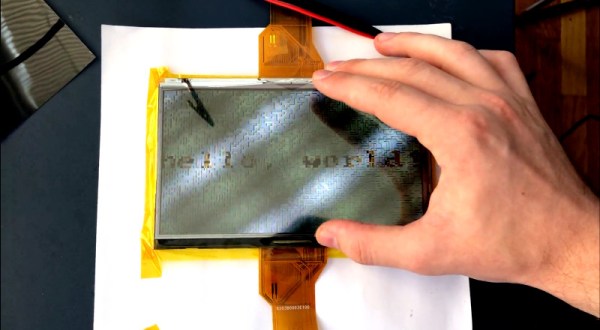
In a traditional communications system, when a message is decrypted and the plaintext is displayed on screen, there’s a possibility that any other software running could capture the screen or memory state, and thus capture the secret data. To get around this, [Max]’s device uses a concept called visual cryptography. Two separate, independent systems with their own LCD each display a particular pattern. It is only when the two displays are combined together with the right filters that the message can be viewed by the user, thanks to the visual XOR effect generated by the polarized nature of LCDs.
The device as shown, working with both transparent OLEDs and traditional LCDs, is merely a proof of concept. [Max] envisions a device wherein each display is independently sourced, such that even if one is compromised, it doesn’t have the full message, and thus can’t compromise the system. [Max] also muses about the problem of side-channel attacks, and other factors to consider when trying to build a truly secure system.