Sonic Screwdriver Meets TV-B-Gone

sonic

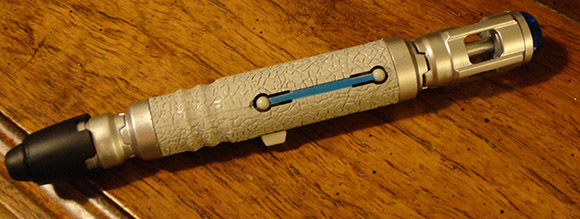
[furrysalamander] has a friend that is a really big Doctor Who fan. It happens that this friend has a birthday coming up, and [furrysalamander] wanted to get her something amazing. A Sonic Screwdriver is always a great gift, but [furrysalamander] wanted to put his personal touch on it. He ended up adding a TV-B-Gone to [10]’s screwdriver, turning a fictional deus ex machina into a functional device.

The body of the Sonic comes from this replica of [10]’s screwdriver from Think Geek. Inside, the screwdriver has space for a battery a circuit board to control the lights and sound normally expected of a sonic screwdriver. [furrysalamander] added a freeform circuit composed of an ATtiny85, a transistor, LED, and a few resistors to add the ability to turn just about any TV off.

Of course [furrysalamander] needed to program the ATtiny with the TV-B-Gone firmware, and lacking any AVR development tools he used a Raspberry Pi’s GPIO pins to write the firmware to the microcontroller. That’s something we’ve seen before, but [furrysalamander] is a champ for including the process in his Instructable.

The end result is a Sonic Screwdriver that doesn’t work on wood and can’t break a deadlock seal. It turns off TVs just fine, though, and looks great to boot. You can check out a demo of [furrysalamander]’s sonic in action after the break.

Continue reading “Sonic Screwdriver Meets TV-B-Gone”

Automatic Volume Control Puts The Kibosh On Loud TV Commercials

automatic-tv-volume-control

If you’re having a hard time tuning out those loud commercials why not let your electronics project do it for you? This is an Arduino-based setup which adjusts television volume when it goes above a certain threshold. It uses a microphone, rather than a direct audio signal, so you can set it based on what is actually heard in the room.

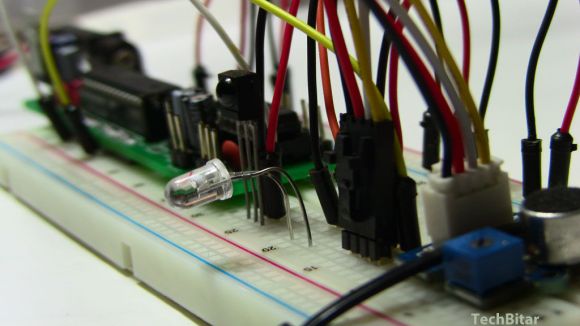
The control scheme uses the IR LED and IR receiver seen on the breadboarded circuit above. The receiver lets you teach your volume up and down buttons from your remote control to the system. The one failing we see in the design is that the volume level is hard-coded, requiring you to flash new code to make adjustments (perhaps an enterprising reader could add a potentiometer for making easy adjustments?).

We can’t help but be reminded of the setup which reads the closed caption info to mute topics you’ve added to a blacklist.

TV Show Inspires This Smaller Pong Paddles Hardware Hack

smaller-pong-paddles

When we read “smaller paddles” we immediately thought of the physical controllers that you hold in your hands. But this hack alters the size of the virtual Pong paddles displayed on the TV screen.

We remember quite well the episode of That 70’s Show where Red and Kelso take apart their Pong machine to hack it. The video after the break which [Blues Image] put together shuffles scenes from that episode in with images of his hack. The characters are adamant that the game is too easy and reducing the size of the virtual paddles is the only thing that will make it fun again. After building his own hardware from the original schematics, [Blue Image] figured this challenge was worth a try.

His solution is in the form of two man-in-the-middle boards which insert a way to reroute the pins without altering the main board. One of the chips is used to draw the paddles, the other checks for collisions with the ball. By changing the pin-out the paddles are reduced from fifteen pixels down to seven.

Continue reading “TV Show Inspires This Smaller Pong Paddles Hardware Hack”

Pictures From Weather Satellites With A USB TV Tuner

europe

Several times a day, a NOAA weather satellite passes over your head, beaming down pictures of weather systems and cloud formations. These transmissions aren’t encrypted, and given the requisite hardware it’s possible for you to download these images from space as [Lovro] shows us in a tutorial video.

To get these near real-time satellite pictures, [Lovro] used one of those USB TV tuners we’ve grown so fond of. A somewhat specialized antenna is required to receive the right hand polarized transmissions from NOAA weather satellites, but with a few bits of wood and wire, [Lovro] made a helical antenna to listen in on the weather satellites transmitting around 137 MHz. After gathering a whole bunch of data from the satellites with SDRsharp, [Lovro] used an image decoder to turn an audio file into a picture taken from space just hours ago.

This isn’t the first time we’ve seen images from a NOAA weather satellite downloaded with a software defined radio; last year [hpux735] did just that with a somewhat inexpensive Softrock SDR. [Lovro]’s use of a USB TV tuner to receive the transmission from NOAA satellites is a lot easier on the pocketbook, though, with the largest expense being an investment in time to build a helical antenna.

Beautiful Tube Amp Uses A TV Tube

tube-amp-i

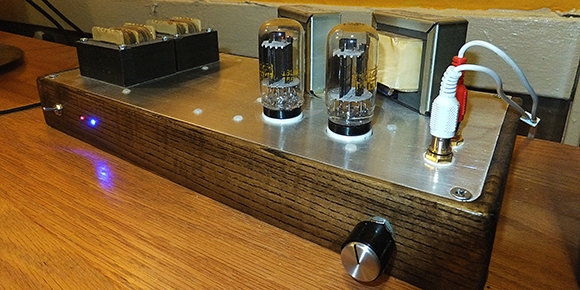
Most audio tube amps we see use common tubes – usually a 12AX7 for the preamp and one of the more common power tubes such as an EL34.[Daniel], on the other hand, decided to build his own audio tube amp with a 13EM7, a tube originally used for a television’s vertical oscillator. The resulting project is a wonderful stereo amp that sounds really good, to boot.

[Daniel] picked up the idea of using a 13EM7 tube from [Fred Nachbaur]’s MiniBlok SET amplifier. This very tiny 1-watt tube amplifier uses a single tube originally designed for use in old, old televisions. The secret behind this build is the fact this tube is actually two triodes in one package; one side of the 13ME7 has tons of gain but not much power, making it perfect for a preamp. The other side has a lot of power, useful for delivering two watts of power into a speaker.

After [Daniel] etched a few boards for his amp, he milled out a piece of wood for the chassis. When everything was mounted he had an awesome looking stereo amplifier that also sounds great.

Dimming The Living Room Lights Using Your TV Remote

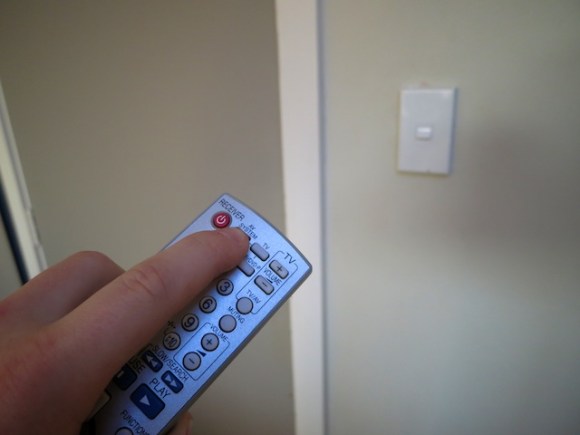
As part of a complete home theater setup [Andy] wanted to be able to control the lights from his couch. He started thinking about the best way to do this when he realized that his TV remote has buttons on it which he never uses. Those controls are meant for other components made by the same manufacturer as the TV. Since he doesn’t have that equipment on hand, he built his own IR receiver to switch the lights with those unused buttons.

He monitors and IR receiver using an AVR microcontroller. It is powered from mains via the guts from a wall wart included in the build. Also rolled into the project is a solid state relay capable of switching the mains feed to the light circuit. [Andy] mentions that going with a solid state part mean you don’t get that clicking associated with a mechanical relay. An electrical box extension was used to give him more room for mounting the IR receiver and housing his DIY circuit board.

Controlling Google TV From A Raspberry Pi (or Other Networked Devices)

Google TV is a network connected television. It does what you would think: plays television programs, streams media from the internet, and allows you to open URLs on your TV. But one nice feature is that it can also be controlled over the network rather than just via an IR remote. Google publishes apps which make this simple with a smartphone. But the communications protocols are open source, so [Leon Nicholls] wrote a Google TV remote control library in Java.

The video after the break shows him pairing a Raspberry Pi with his television. The image above is the pairing verification code you must enter on the remote hardware before control is authorized. Apparently this is a step that needs to happen every time if using Google’s Anymote library. [Leon] improved that, by saving the pairing data so that the first authorization is all that it takes.

He figures this could be used for home automation. We’re not sure what we’d use it for but we’d love to hear your ideas in the comments.