1 Chip USB AVR Development

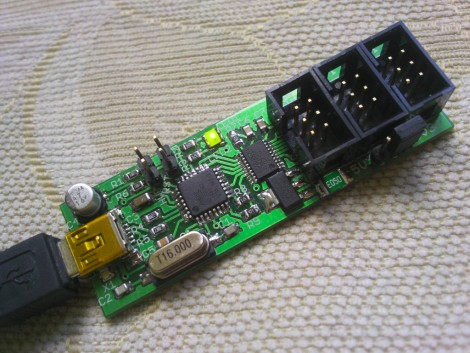
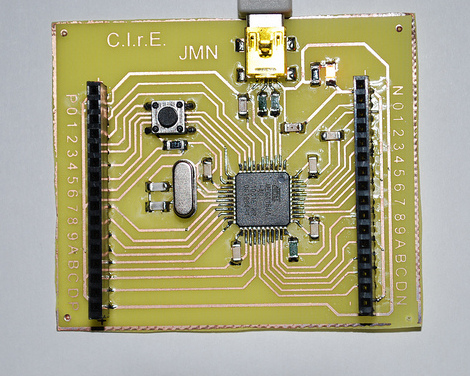
Wouldn’t it be nice if there was an AVR microcontroller with USB device support built in so you would not need a separate programmer or serial link? Well in fact there are quite a few of them, and this awesome tutorial (google translate) is a quick and easy crash course in using the ATMega 16/32U4 micro controllers.

These 8 bit AVR’s (16k and 32k) have the usual list of features you would expect in a Mega AVR. 26 GPIO pins and a pretty easy to solder 44 pin surface mount package, the micro controller also has a USB 2.0 Full-speed/Low Speed Device Module and allows programming though a standard bootloader.

Once you have a pretty standard board assembled you need Atmel’s FLIP RS232, USB, or CAN device programming software (Windows or Linux) and your favorite AVR IDE setup, you’re good to go!

Join us after the break for a quick video.

Continue reading “1 Chip USB AVR Development”

AVR Programmer Modelled After The MkII – Uses LUFA

Here’s a new option for building your own AVR programmer. It’s called the MkII Slim and the diminutive size makes it live up to its name. The design is rather spartan, using just three chips; a voltage regulator, a MAX3002 level converter, and an Atmel AT90USB162 as the main microcontroller. This chip has a built-in USB module, foregoing the need for a separate FTDI chip.

The firmware is built on the Lightweight USB Framework for AVRs (LUFA). This is a USB stack implementation originally called MyUSB that was developed by [Dean Camera]. Regular lurkers over at the AVRfreaks forums will recognize [Dean’s] name, or his handle [abcminiuser] as a source for many of the high quality AVR tutorials found there. But we digress.

The programmer offers all the features you’d want in an In-System Programmer. It can easily be reflashed with future updates thanks to the bootloader running on the chip. There’s jumper-selectable power options, and it can program targets running at 3.3V or 5v. The full development package including code and artwork is available for download at the site linked above. For your convenience we’ve embedded the schematic after the break.

Continue reading “AVR Programmer Modelled After The MkII – Uses LUFA”

A Study In AVR Power Saving Techniques

amtel_avr

[Scott] found the iCufflinks from Adafruit Industries pretty interesting, but he thought that the stated run time of 24 hours was a bit short. He figured he could improve the product’s power consumption at least a little bit, to improve the overall battery life.

From their schematics, he placed an order for parts and built two identical iCufflink mock-ups side by side – one running their code and one running his. He took baseline current draw measurements, then got busy slimming down the cufflinks’ software. It had been 20 years since he touched assembly, and he has never written it for an AVR, but judging by his work he’s not rusty in the least.

He slowed the ATtiny’s clock down and tweaked a few other settings for a savings of 53μA, but the real improvements came via a fairly simple fix. The original code called for the processor to institute a counting loop to sleep, which he found to be very wasteful. Instead, he chose to put the processor in an idle state, using the chip’s watchdog timer to wake it when it was time to pulse the LED. The power savings from this change alone was a whopping 261μA!

When he was said and done, the changes save about 315μA of current draw, and should allow the cufflinks to run for up to 38 hours without swapping batteries. In [Scott’s] opinion, a nearly 60% improvement in battery life is pretty good for a day’s work, and we’re inclined to agree.

Hardware XOR For Output Pins On AVR Microcontrollers

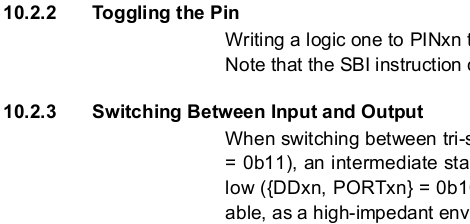
Did you know that most AVR chips have a type of hardware exclusive OR (XOR) option when it comes to the logic levels of the output pins? If you look in the datasheet (the image above is a screenshot from an ATtiny13 datasheet) you’ll find a section on Toggling the Pin. It turns out that if you set a PORT as an output, writing logic one to the corresponding PIN register will toggle the logic levels of that out. This is really easy to overlook if you’re writing in C, but I’ve been working on learning a bit of assembler language and found this to be very useful. Keep reading after the break and I’ll tell you how I happened upon this info and what it’s good for.

Continue reading “Hardware XOR For Output Pins On AVR Microcontrollers”

ChibiMo – An AVR-based USB Display

chibimo_usb_arduino_external_monitor

[Ko] wanted to add an extra monitor to his computer, but he wasn’t looking for something huge that would sit atop his desk – he desired something smaller, much smaller.

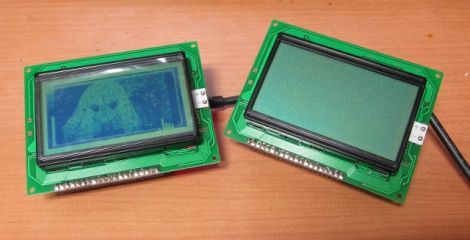
His ChibiMo mini USB monitor is a neat little creation that lets you extend or mirror your Windows desktop onto a tiny 128×64 pixel LCD panel. At first glance you might think that it is too small to be useful, but it is recognized in Windows in the same fashion as any standard monitor. This means that it would be quite easy to load system monitoring software solely on the LCD panel, keeping the clutter off of your main display.

The display is wired to an Arduino like any other standard shield, and is connected to his computer via a USB cable. Once the ChibiMo sketch is uploaded to the Arduino, the display driver needs to be loaded on the PC. This allows you to tweak the ChibiMo’s display settings in Windows’ display manager.

It’s a great concept, one we would love to see explored further. As of right now, the ChibiMo is only supported on x86 versions of Windows XP, and we weren’t able to find source links anywhere on his site. Perhaps there are some talented members of our community who would be interested in taking a whack at it…

Teensy AVRs Used In Penetration Testing

netragard_penetration_testing_mouse

While some people know that you should be wary of USB drives with unknown origins, the same care is rarely, if ever exercised with USB peripherals. The security firm Netragard recently used this to their advantage when performing a penetration test at a client’s facility. When the client ruled out the use of many common attack vectors including social networks, telephones, social engineering, and unauthorized physical access from the test, the team at Netragard knew they would have to get creative.

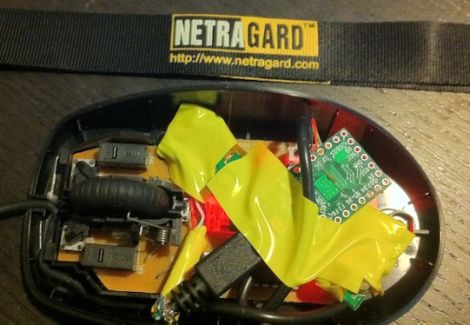
They purchased a Logitech USB mouse and disassembled it in order to add their clever payload. A Teensy uC was programmed to emulate keyboard input, entering commands via the mouse’s USB connection once it had been connected to a computer. Using an undocumented exploit in McAfee’s antivirus suite, they were able to evade detection while their system entered commands to install malware from the flash drive they hid along side the Teensy.

Once the mouse was reassembled, they repackaged it along with some marketing materials to make it look like part of a promotional event. They purchased a detailed list of employees and singled out an easy target, sending their malicious mouse on its way. Within three days, their malware was loaded onto the victim’s computer and their test was deemed a success.

[Thanks, Aaron]

AVRcam For Small Robot Machine Vision

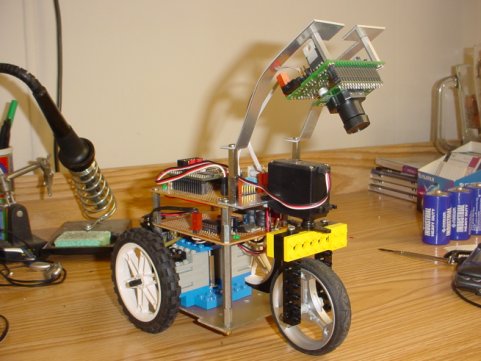
It’s neat how a project from 2004 can still be relevant if it’s done really well. This is the case with AVRcam.  It uses an Atmel AVR mega8 and can do some pretty impressive things, like track up to eight objects at 30fps. The hardware and software is also open source, so it should be possible to build one yourself. There are many projects like it on the internet, though often they require much beefier hardware. Although, these days you can fit a computer inside a match box, so we see more and more projects just throwing a full USB camera on a robot to do simple things like line following.  It’s debatable which solution is more elegant, but maybe not which one is more impressive.