AM ultrasonic transmitter and receiver

AM Ultrasonic Transmitter And Receiver

Most often ultrasonic transducers are used for distance measurements, and in the DIY world, usually as a way for robots to detect obstacles. But for a weekend project, [Vinod.S] took the ultrasonic transmitter and receiver from a distance-meter module and used amplitude modulation to send music ultrasonically from his laptop to a speaker, essentially transmitting and receiving silent, modulated sounds waves.

The transmitter and receiver

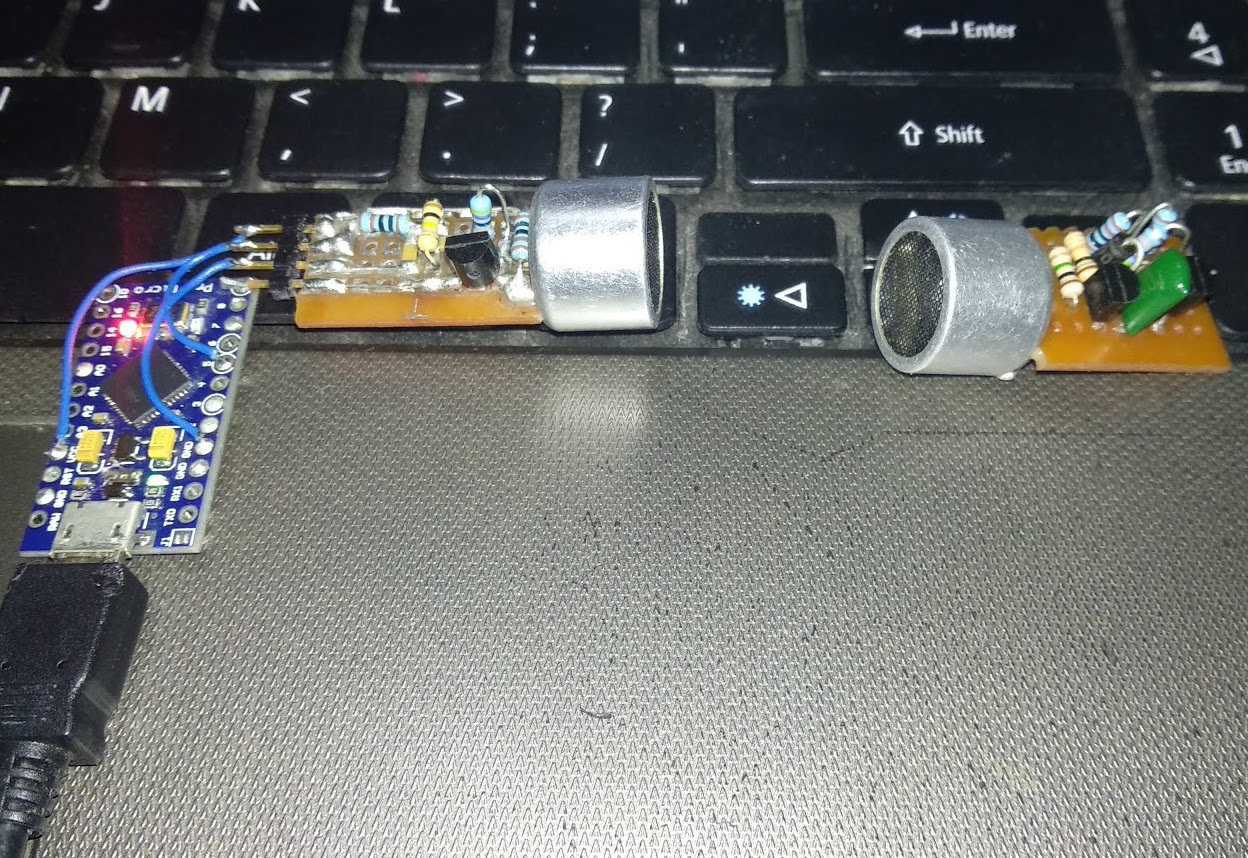
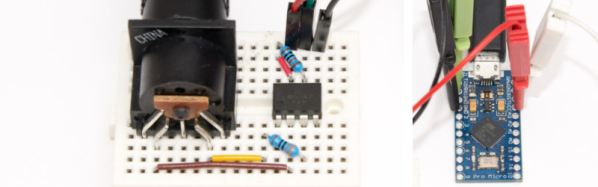
For the transmitter, he turned an Arduino Pro Micro into a USB sound card which he could plug into his laptop. That outputs both the audio signal and a 40 kHz carrier signal, implemented using the Arduino’s Timer1. Those go to a circuit board he designed which modulates the carrier with the audio signal using a single transistor and then sends the result out the ultrasonic transmitter.

He took care to transmit a clear signal by watching the modulated wave on an oscilloscope, looking for over-modulation and clipping while adjusting the values of resistors located between the transistor, a 5 V from the Arduino and the transmitter.

He designed the receiver side with equal care. Conceptually the circuit there is simple, consisting of the ultrasonic receiver, followed by a transistor amplifier for the modulated wave, then a diode for demodulation, another transistor amplifier, and lastly a class-D amplifier before going to a speaker.

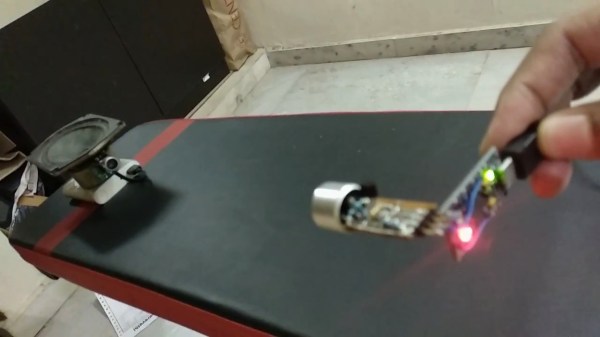
Due to the low 40 kHz carrier frequency, the sound lacks the higher audio frequencies. But as a result of the effort he put into tuning the circuits, the sound is loud and clear. Check out the video below for an overview and to listen to the sound for yourself. Warning: Before there’s a storm of comments, yes the video’s shaky, but we think the quality of the hack more than makes up for it.

Continue reading “AM Ultrasonic Transmitter And Receiver”

Cheap DIY MIDI To USB Adapter

[Joonas] became frustrated with cheap but crappy MIDI to USB converters, and the better commercial ones were beyond his budget. He used a Teensy LC to build one for himself and it did the job quite well. But he needed several converters, and using the Teensy LC was going to cost him a lot more than he was willing to spend. With some tinkering, he was able to build one using an Adafruit Pro Trinket which has onboard hardware UART (but no USB). This lack of USB support was a deal killer for him, so after hunting some more he settled on a clone of the Sparkfun Pro Micro. Based on the ATmega32U4, these clones were just right for his application, and the cheapest to boot. He reckons it cost him about $5 to build each of his cheap USB MIDI adapters which receive notes and pedal data from the keyboard’s MIDI OUT and transmit them to a computer

Besides the Pro Micro clone, the only other parts he used are a generic opto-coupler, a couple of resistors and a MIDI connector. After testing his simple circuit on a bread board, he managed to squeeze it all inside an old USB dongle housing, stuffing it in dead-bug style.

The heavy lifting is all done in the firmware, for which [Joonas] used LUFA — the Lightweight USB Framework for AVR’s. He wrote his own code to handle MIDI (UART) to USB MIDI messages conversion. The interesting part is his use of a 32.15 kbps baud rate even though the MIDI specification requires 31.25 kbps. He found that a slightly higher baud rate fixes a problem in the AVR USART implementation which tends to miss consecutive bytes due to the START edge not being detected. Besides this, his code is limited in functionality to only handle a few messages, mainly for playing a piano, and does not have full-fledged MIDI capabilities.

We’ve featured several of [Joonas]’s hacks here over the years, the most recent being the Beaglebone Pin-Toggling Torture Test and from earlier, How to Turn A PC On With a Knock And An ATTiny.

Measuring Magnetic Fields With A Robotic Arm

MagneticArm

Learning how magnets and magnetic fields work is one thing, but actually being able to measure and see a magnetic field is another thing entirely! [Stanley’s] latest project uses a magnetometer attached to a robotic arm with 3 degrees of freedom to measure magnetic fields.

Using servos and aluminium mounting hardware purchased from eBay, [Stanley] build a simple robot arm. He then hooked an HMC5883L magnetometer to the robotic arm. [Stanley] used an Atmega32u4 and the LUFA USB library to interface with this sensor since it has a high data rate. For those of you unfamiliar with LUFA, it is a Lightweight USB Framework for AVRs (formerly known as MyUSB). The results were plotted in MATLAB (Octave is free MATLAB alternative), a very powerful mathematical based scripting language. The plots almost perfectly match the field patterns learned in introductory classes on magnetism. Be sure to watching the robot arm take the measurements in the video after the break, it is very cool!

[Stanley] has graciously provided both the AVR code and the MATLAB script for his project at the end of his write-up. It would be very cool to see what other sensors could be used in this fashion! What other natural phenomena would be interesting to map in three dimensions?

Continue reading “Measuring Magnetic Fields With A Robotic Arm”

Building A Small Keypad For Strategy Games

A month ago [Andreas] started playing Starcraft 2 again. As he was not comfortable with the default hotkeys on a normal keyboard, [Andreas] decided to build his own.

He started by salvaging keys from an old keyboard he had lying around, then 3D printed the case you see in the picture above to fit them. The keyboard electrical design is a simple matrix and it appears that he etched the PCB himself. To provide the required USB connectivity, the Atmega8U2 was chosen. It comes with a pre-programmed USB bootloader that [Andreas] chose to activate when the left key is pressed at the system startup. The HID class was implemented using the LUFA-USB Framework and the final product is definitely good looking.

All the files required to duplicate his design can be found here. You can also checkout another starcraft keyboard and an ergonomic keyboard that we previously featured.

Microcontroller Enumerates As USB Printer — Can Be Programmed By Printing

avr-programming-by-printing

This is a fascinating concept. We’re not sure of its usefulness, but it definitely stands on its own just for the concept. [Dean Camera] just added a new HID class to the LUFA project that lets you flash AVR chips by printing to them. This means once you have a file like the one seen open in Notepad above, you can just click on File, then on Print, and the firmware will be uploaded to the chip.

[Dean] is the creator of the LUFA project and still likes to get his hands dirty hacking around with it. This idea came to him while he was exploring the concept of using the MIDI protocol to program a chip. That didn’t pan out because of the way Microsoft has handled MIDI in newer versions of Windows. But he did get the idea of making LUFA identify itself as a simple USB printer. He dug into the specification and figured out how to do that. Once Windows connects to the device it doesn’t really care what data gets sent to it. So [Dean] wrote a parser for the bootloader which could accept the incoming hex code and write it to the chip’s program memory.

LUFA Open Source USB Stack Now For NXP ARM Processors

Looks like the Lightweight USB Framework for AVRs (LUFA) has just been ported for ARM microcontrollers. NXP recently released a package for their LPC Cortex M3 family of ARM controllers. You won’t find a reference to LUFA on their nxpUSBlib description page (which we think is kind of sad), but if you grab a copy of the beta code the Version.h header file shows that it is indeed a port of the project. This is further backed up by the LUFA creator, [Dean Camera], who consulted with the NXP team doing the work.

The package provides an open-source USB stack that you can use in your projects as a USB host or USB device. We’re advocates of open source packages like this one as it makes it much easier for hobbyists to get help using the tools, and it allows the community to give back through bug fixes and feature additions.

We’ve highlighted a few LUFA projects, like this keyboard remapper and this AVR programmer. We’re looking to seeing the first set of NXP LUFA projects roll through!

[Thanks Johnny]

Hardware-based Keyboard Remapping

[Nav] wanted to change his keyboard mapping for one particular keyboard, rather than on each operating system. He used an AT90USBKey as a replacement PCB by soldering to all of the contacts on the key matrix. This allows him to remap the keys by following onscreen prompts.

The board enumerates as an HID device, and has a special mode which is accesses by plugging the keyboard in while holding down any key. If a text editor window is active you’ll see prompts from the microcontroller to press a series of keys. This is a routine used to learn how the key matrix is organized, and it’s your opportunity to change how each key is mapped. Since the mapping is saved to EEPROM, you can use any computer to map the keys, then plug the device into a systems that don’t offer software remapping. It could also be useful as a gaming keyboard, assuming there aren’t latency issues

As with the AVR-based arcade controller, this project uses the LUFA package to handle the USB stack.