Monoprice Releases Their Mini Delta Printer (On Indiegogo)

Around this time last year, Monoprice quietly unveiled a small, $200 3D printer. At the time, a fully functioning printer at this price point wasn’t unheard of. A good 3D printer at this price point was. It turned out this printer was actually fantastic and completely changed the value proposition of desktop 3D printers.

In the year since the release of the MP Select Mini printer, Monoprice has been hard at work bringing costs down, reworking designs, and creating an even less expensive printer. Now, it’s out. It’s available for pre-order on Indiegogo right now. Is this still a $150 printer? Not quite: the ‘early bird’ price is $159 with free shipping and August delivery, and a regular price of $169 plus $10 shipping with September or October delivery. There’s also a bundle for $279 that includes the printer, 2kg of filament, and a software package.

The first time we saw this tiny printer was way back in January at CES. It looked to be an extremely capable printer; the only question was if Monoprice could produce it and get it out the door. This would be a tall order; this printer comes with NEMA 17 stepper motors, a heated bed, a 32-bit controller board, and has WiFi enabled.

Here’s what we know about the capabilities of this printer. It’s a fairly standard delta printer with Bowden extruder and a heated bed. PLA and ABS is supported. The printer has auto bed leveling that measures the bed by ‘tapping’ the nozzle against the bed in about a dozen places before printing. From what we saw at CES, the hot end appears similar to the first revision of the $200 MP Select Mini — possibly opening up the door to E3D hot end installations.

Is this printer worth it? Every 3D printer released on a crowdfunding platform should come with the standard warnings, but Monoprice says this machine is in production right now. This raises the question: why release it on Indiegogo when Monoprice already has the whole ‘taking orders for products online’ thing in the bag? I suspect this crowdfunding campaign is just building a buffer; a year ago, the MP Select Mini was perpetually out of stock, and demand far outstripped supply. The same thing will happen with a 3D printer that’s even deeper into impulse buy territory.

In any event, the printer we’ve all been waiting for has been ‘released’, for varying values of ‘released’. The first units will start making their way onto desktops this summer, and we’re going to pick one up and put it through its paces. You can check out Monoprice’s video of this printer below.

Continue reading “Monoprice Releases Their Mini Delta Printer (On Indiegogo)”

Arduino (and Camera) Take Amazing Pictures

There’s an old joke where you ask someone what’s the most important thing about comedy. When they get to about the word “important,” you interrupt them and say, “Timing!” Perhaps the same thing can be said for photography. [Ted Kinsman’s] students at the Rochester Institute of Technology would probably agree. They built an Arduino-based rig to do inexpensive stop action photography.

As Arduino projects go, it isn’t very sophisticated. The circuit contains a  sound detection module and an optoisolator. The code would easily fit on a piece of notebook paper. When a loud sound occurs, the Arduino triggers the flash. Simple enough, but the resulting pictures are amazing. It also looks like a lot of fun to destroy perfectly good things in the name of art.

Continue reading “Arduino (and Camera) Take Amazing Pictures”

3D Printing Custom LED Bar Graphs

[BikerGlen] wanted to spice up his zombie containment unit (see video below) so he designed and 3D printed some very cool looking bar graphs. Apparently, you can get curved bar graph LEDs, but only if you buy a fairly large quantity. Hand soldering discrete LEDs at the perfect angle would be frustrating, but with a 3D printed jig, it was a piece of cake.

The devices use a MAX6954 LED driver, so it needs very few parts and takes commands via SPI. The chips were not cheap, but the small size and high integration sold [Glen] on it.

Continue reading “3D Printing Custom LED Bar Graphs”

Sudo Google Assistant

A Raspberry Pi kicking around one’s workbench is a project waiting to happen — if they remain unused long enough to be considered a ‘spare.’ If you find you’ve been pining after an Alexa or your own personal J.A.R.V.I.S., [Novaspirit Tech] might be able to help you out — provided you have a USB mic and speaker handy — with an accessible tutorial for setting up Google Assistant on your Pi.

A quick run-through on enabling a fresh API client on Google’s cloud platform, [Novaspirit] jumps over to the Raspbian console to start updating Python and a few other dependencies. Note: this is being conducted in the latest version of Raspbian, so be sure to update before you get underway with all of your sudos.

Once [Novaspirit] gets that sorted, he sets up an environment to run Google Assistant on the Pi, authenticates the process, and gets it running after offering a couple troubleshooting tips. [Novaspirit] has plans to expand on this further in the near future with some home automation implementation, but this is a great jumping-off point if you’ve been looking for a way to break into some high-tech home deliciousness — or something more stripped-down — for yourself.  Check out the video version of the tutorial after the break if you like watching videos of guys typing away at the command line.

Continue reading “Sudo Google Assistant”

A Very Large VU Meter Indeed

It used to be a must-have on any hi-fi, a pair of moving coil meters or LED bar graphs, the VU meter. Your 1980s boombox would have had them, for example. VU, for “Volume Units”, is a measure of audio level, and the fashion for its visual measure in consumer audio equipment seems now to have largely passed.

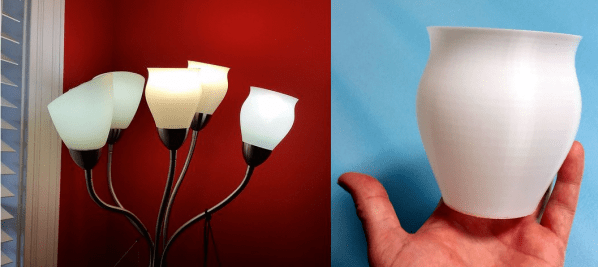
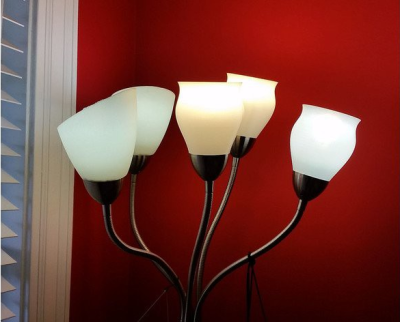
The LED bar graph VU meters were invariably driven by the LM3915, a chip that contains a resistor ladder and a stack of comparators which can drive LEDs directly. [Juvar] has taken an LM3915, and used it to drive a set of opto-isolated triacs which in turn drive a stack of appropriately coloured mains LED bulbs concealed within an Ikea Vidja lamp. The result is a huge and very bright VU meter that is as much a lighting effect as it is a measure of sound level.

He’s posted a video of the lights in action, and we’ve placed it below the break. There is a cameo appearance from his cat, and one can’t escape the feeling that it is wasted on a small room and would be at its best before a dance floor. Still, it’s a neat lighting effect and a new use for a classic integrated circuit.

Continue reading “A Very Large VU Meter Indeed”

Reverse Engineering An Ultrasonic Car Parking Sensor

It has become a common sight, a must-have feature on modern cars, a row of ultrasonic sensors embedded in the rear bumper. They are part of a parking sensor, an aid to drivers for whom depth perception is something of a lottery.

[Haris Andrianakis] replaced the sensor system on hs car, and was intrigued enough by the one he removed to reverse engineer it and probe its workings. He found a surprisingly straightforward set of components, an Atmel processor with a selection of CMOS logic chips and an op-amp. The piezoelectric sensors double as both speaker and microphone, with a CMOS analogue switch alternating between passing a burst of ultrasound and then receiving a response. There is a watchdog circuit that is sent a tone by the processor, and triggers a reset in the event that the processor crashes and the tone stops. Unfortunately he doesn’t delve into the receiver front-end circuitry, but we can see from the pictures that it involves an LC filter with a set of variable inductors.

If you have ever been intrigued by these systems, this write-up makes for an interesting read. If you’d like more ultrasonic radar goodness, have a look at this sweeping display project, or this ultrasonic virtual touch screen.

Hackaday Prize Entry: Collaborative Water Purification

Look over any description of a water treatment plant, and you’ll find a description that includes the words, ‘coagulation tanks’. What are these treatment plants coagulating? You don’t want to know. How are they doing it? With chemicals and minerals. Obviously, there’s something else that can be done.

For their Hackaday Prize entry, [Ryan], [designbybeck], [Clint], [Wanda] and [Maker Mark] are investigating electrocoagulation. It’s an alternative to a frothy brew of chemicals that uses electricity to pull pollutants out of the water.

Right now, the tests are much smaller in scale than the tens of thousands of gallons you’d find at a water treatment plant. In fact, the test rig is only a 16-ounce mason jar. While this isn’t large enough to precipitate pollutants out of a household water supply, it is big enough for a proof of concept.

The team is using two electrodes for this build, one aluminum, and one iron. These electrodes are connected via alligator leads to the electronics board they’ve built. This electronics board is basically just an H-Bridge (used so they can reverse the polarity of the field emitter and prevent a buildup of gunk on the electrodes) and a few connectors to a power supply. The results are encouraging; they have a few time-lapse videos of a mason jar of dirty water clearing up with the power of electricity. It’s a great project with some great documentation. The team already has a bunch of updates on their project and instructions on how to replicate their hardware. You can check out those videos below.

Continue reading “Hackaday Prize Entry: Collaborative Water Purification”