Raspberry Pi OS In-Place Upgrades, Not For The Faint Hearted

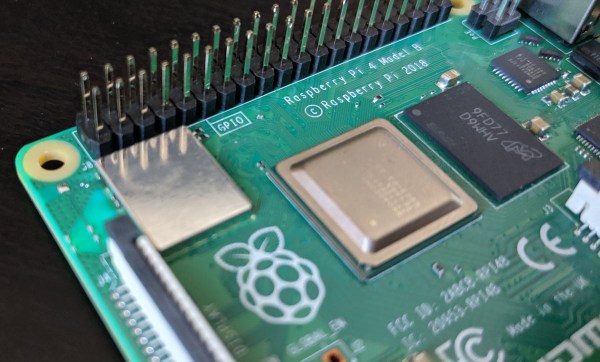
The Raspberry Pi series of boards are noted for their good software support, with a continuous flow of operating system upgrades such that an original Pi from 2012 will still boot the latest Pi OS. But these upgrades are best done by writing a fresh SD card, so oddly, the Pi remains surprisingly difficult in many cases to upgrade in place. [Iustin Pop] has taken a look at the problem, and finds that though it’s not always easy it remains possible with a bit or work.

An upgrade in place of a Raspberry Pi OS install that’s running on a headless device is probably the simplest of the lot, with a relatively small set of issues. Do it on a machine using the GUI though, and the switch from x.org to Wayland makes for a whole world of pain.

Perhaps most interesting for the insight it gives us into the way Raspberry Pi OS is derived from Debian, is the crossgrade process from the ARMhf build for earlier machines to the ARM64 one for the more recent ones. Here aside from a headache of differing paths and versions, he encounters the Pi-specific compilation tweaks put in place by the developers of Raspberry Pi OS, leading to the ARMhf version being a different branch from the original Debian than the ARM64 one.

Having read his examination of in-place upgrades we have to say that simply writing a new SD card remains the most attractive option. But sometimes along comes a remote system where that’s simply not possible, and this guide might just be very useful sometime.

A display with the magic mirror webpage shown running on it

Magic Mirror – On A Low CPU Budget

For quite a few hackers out there, it’s still hard to find a decently powerful Raspberry Pi for a non-eye-watering price. [Rupin Chheda] wanted to build a magic mirror with a web-based frontend, and a modern enough Raspberry Pi would’ve worked just fine. Sadly, all he could get was single-1 GHz-core 512MB-RAM Zero W boards, which he found unable to run Chromium well enough given the stock Raspbian Desktop install, let alone a webserver alongside it. Not to give up, [Rupin] gives us a step-by-step breakdown on creating a low-footprint Raspbian install showing a single webpage.

Starting with Raspbian Lite, a distribution that doesn’t ship with any desktop features by default, he shows how to equip it with a minimal GUI – no desktop environment needed, just an X server with the OpenBox window manager, as you don’t need more for a kiosk mode application. In place of Chromium, you can install Midori, which is a lean browser that works quite well in single-website mode, and [Rupin] shows you how to make it autostart, as well as the little quirks that make sure your display doesn’t go to sleep. The webserver runs in Heroku cloud, but we wager that, with such a minimal install, it could as well run on the device itself.

With these instructions, you can easily build a low-power single-page browser when all you have is a fairly basic Raspberry Pi board. Of course, magic mirrors are a well-researched topic by now, but you can always put a new spin on an old topic, like in this this retro-tv-based build. You don’t have to build a magic mirror to make use of this hack, either – build a recipe kiosk!

When Pi Supply Falls Short, Thin Clients Stand Tall For Home Automation And Low Power Computing

Do you need a cheap, small computer for a low power computing project? Historically, many of us would reach straight for a Raspberry Pi, even if we didn’t absolutely need the GPIO. But with prices elevated and supplies in the dumps, [Andreas Spiess] decided that it was time to look for alternatives to now-expensive Pi’s which you can see in the video below the break.

Setting up Debian for IOTstack

Many simply use the Pi for its software ecosystem, its lower power requirements, and diminutive size. [Andreas] has searched eBay, looking for thin PC clients that can be had for as little as $10-15. A few slightly more expensive units were also chosen, and in the video some comparisons are made. How do these thin clients compare to a Pi for power consumption, computing power, and cost? The results may surprise you!

Software is another issue, since many Pi projects rely on Raspbian, a Pi-specific ARM64 Linux distribution. Since Raspbian is based on Debian, [Andreas] chose it as a basis for experimentation. He thoughtfully included such powerful software as Proxmox for virtualization, IOTstack, and Home Assistant, walking the viewer through each step of running Home Assistant on x86-64 hardware and noting the differences between the Linux distributions.

All in all, if you’ve ever considered stepping out of the Pi ecosystem and into general Linux computing, this tutorial will be an excellent starting point. Of course [Andreas] isn’t the first to bark up this tree, and we featured another thin client running Klipper for your 3D printer earlier this month. Have you found your own perfect Pi replacement in these Pi-less times? Let us know in the comments below.

Continue reading “When Pi Supply Falls Short, Thin Clients Stand Tall For Home Automation And Low Power Computing”

A 64-Bit Raspberry Pi OS At Last

Long-term Raspberry Pi watchers will have seen a lot of OS upgrades in their time, from the first Debian Squeeze previews through the Raspbian years to the current Raspberry Pi OS. Their latest OS version is something different though, and could be one of the most important releases in the platform’s history so far, as finally there’s an official release of a 64-bit Raspberry Pi OS.

Would-be 64-bit Pi users have of course had the chance to run 64-bit GNU/Linux operating system builds from other distributions for nearly as long as there have been Pi models with 64-bit processors, but until now the official distribution has only been available as a 32-bit build. In their blog post they outline their reasons for this move in terms of compatibility and performance, and indeed we look forward to giving it a try.

Aside from being a more appropriate OS for a 64-bit Pi, this marks an interesting moment for the folks from Cambridge in that it is the first distribution that won’t run on all Pi models. Instead it requires a Pi 3 or better, which is to say the Pi 3, Zero 2 W, Pi 4, Pi 400, and the more powerful Compute Modules. All models with earlier processors including the original Pi, Pi Zero, and we think the dual-core Pi 2 require a 32-bit version, and while the Pi Zero, B+ and A+ featuring the original CPU are still in production this marks an inevitable move to 64-bit in a similar fashion to that experienced by the PC industry a decade or more ago.

As far as we know the Zero is still flying off the shelves, but this move towards an OS that will leave it behind is the expected signal that eventually there will be a Pi line-up without the original chip being present. We’re sure the 32-bit Pi will be supported for years to come, but it should be clear that the Pi’s future lies firmly in the 64-bit arena. They’ve retained their position as the board to watch oddly not by always making the most impressive hardware but by having the most well-supported operating system, and this will help them retain that advantage by ensuring that OS stays relevant.

On the subject of the future course of the Pi ship, our analysis that the Compute Module 4 is their most exciting piece of hardware still stands.

PCIe Multiplier Expands Raspberry Pi 4 Possibilities

It probably goes without saying that hardware hackers were excited when the Raspberry Pi 4 was announced, but it wasn’t just because there was a new entry into everyone’s favorite line of Linux SBCs. The new Pi offered a number of compelling hardware upgrades, including an onboard PCI-Express interface. The only problem was that the PCIe interface was dedicated to the USB 3.0 controller; but that’s nothing a hot-air rework station couldn’t fix.

We’ve previously seen steady-handed hackers remove the USB 3.0 controller on the Pi 4 to connect various PCIe devices with somewhat mixed results, but [Colin Riley] has raised the bar by successfully getting a PCIe multiplier board working with the diminutive Linux computer. While there are still some software kinks to work out, the results are very promising and he already has  a few devices working.

Getting that first PCIe port added to the Pi 4 is already fairly well understood, so [Colin] just had to follow the example set by hackers such as [Tomasz Mloduchowski]. Sure enough, when he plugged the port multiplier board in (after a bit of what he refers to as “professional wiggling”), the appropriate entry showed up in lspci.

But there was a problem. While the port multiplier board was recognized by the kernel, nothing he plugged into it showed up. Checking the kernel logs, he found messages relating to bus conflicts, and one that seemed especially important: “devices behind bridge are unusable because [bus 02] cannot be assigned for them“. To make a long story short, it turns out that the Raspbian kernel is specifically configured to only allow a single PCI bus.

Fortunately, it’s an easy fix once you know what the problem is. Using the “Device Tree Compiler” tool, [Colin] was able to edit the Raspbian Device Tree file and change the PCI “bus-range” variable from <0x0 0x1> to <0x0 0xff>. From there, it was just a matter of plugging in different devices and seeing what works. Simple things such as USB controllers were no problem, but getting ARM Linux support for the NVIDIA GTX 1060 he tried will have to be a topic for another day.

[Thanks to Paulie for the tip.]

Sudo Google Assistant

A Raspberry Pi kicking around one’s workbench is a project waiting to happen — if they remain unused long enough to be considered a ‘spare.’ If you find you’ve been pining after an Alexa or your own personal J.A.R.V.I.S., [Novaspirit Tech] might be able to help you out — provided you have a USB mic and speaker handy — with an accessible tutorial for setting up Google Assistant on your Pi.

A quick run-through on enabling a fresh API client on Google’s cloud platform, [Novaspirit] jumps over to the Raspbian console to start updating Python and a few other dependencies. Note: this is being conducted in the latest version of Raspbian, so be sure to update before you get underway with all of your sudos.

Once [Novaspirit] gets that sorted, he sets up an environment to run Google Assistant on the Pi, authenticates the process, and gets it running after offering a couple troubleshooting tips. [Novaspirit] has plans to expand on this further in the near future with some home automation implementation, but this is a great jumping-off point if you’ve been looking for a way to break into some high-tech home deliciousness — or something more stripped-down — for yourself.  Check out the video version of the tutorial after the break if you like watching videos of guys typing away at the command line.

Continue reading “Sudo Google Assistant”

Raspberry Pi Zero Becomes Mighty Miniature Minecraft Machine

In a clever bit of  miniaturization, [JediJeremy] has nearly completed a gyro-mouse controller for a Raspberry Pi Zero! Ultimately this will be a wearable Linux-watch but along the way he had some fun with the interface.

Using the MPU6040 gyroscope/accelerometer card from a quadcopter, [JediJeremy] spent a week writing the driver to allow it to function as a mouse. Strapping an Adafruit 1.5″ PAL/NTSC LCD screen and its driver board to the Zero with rubber bands makes this one of the smallest functional computer and screen combos we’ve seen. Simply tilt the whole thing about to direct the cursor.

It presently lacks any keyboard input, and [JediJeremy] has only added a single button for clicking, but look at this thing! It’s so tiny! In his own words: “I think this is the first computer that I can accidentally spill into my coffee, rather than vice versa.”

Continue reading “Raspberry Pi Zero Becomes Mighty Miniature Minecraft Machine”