Over the past five days we’ve been challenging the Hackaday community to build a clock and show it off. This is to raise awareness for electronics design in everyday life and hopefully you found a non-hacker to join you on the project. The point is that our society — which has pretty much universally accepted everyday carry of complex electronics — has no idea what goes into electronic design. How are we supposed to get kids excited about engineering if they are never able to pull back that curtain and see it in action?
Build something simple that can be understood by everyone, and show it off in a way that invites the uninitiated to get excited. What’s simpler than a clock? I think of it as the impetus behind technology. Marking the passage of time goes back to our roots as primitive humans following migratory herds, and betting on the changing seasons for crop growth. Our modern lives are governed by time more than ever. These Clocks for Social Good prove that anyone can understand how this technology works. And everyone who wants to learn to build their own electronic gadget can discover how to do so at low-cost and with reasonable effort. This is how we grow the next generation of engineers, so let’s take a look at what we all came up with over the weekend.

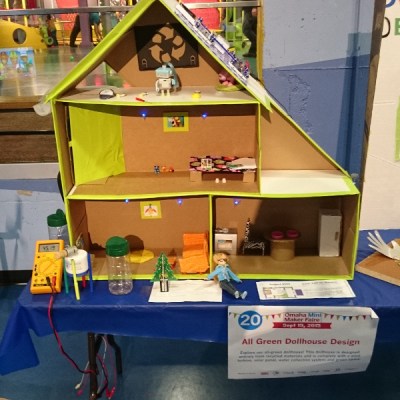 The cardboard structure features a kitchen, living room, bedroom, bathroom, and attic. Every piece of furniture and all the decorations are made from salvaged materials and packaging. One side of the roof holds a Snap Circuits board with a solar panel that powers some blue LEDs on the bedroom wall. [Allie] poured water down the other side of the roof to demonstrate the rain water collection system. The house’s rain barrel was made from a grated parmesan cheese container, which is perfectly designed for the airline tubing running into it from the recycled plastic guttering.
 One of [Allie]’s other projects is a disagreeable owl fashioned from cardboard and a salvaged canister. Hidden away beneath the owl’s platform lies a simple gear system attached to a key on the front. Turning the key causes the owl’s head to swivel back and forth. We tried to make it spin all the way around, but the full range of motion is about 270 degrees. She also brought Mountain Dew, a hummingbird model made from a spark plug and other metal bits and bobs, including a pair of soda can wings.
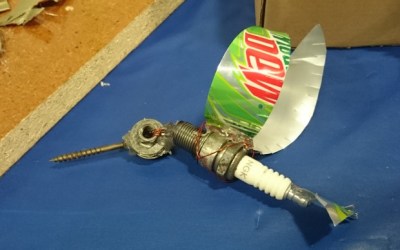 In addition to her crafty skills, [Allie] is one well-spoken tween. She was more than happy to discuss her creations in detail to anyone who would listen, which included at least two local journalists and this impressed reporter. We learned through a bit of light research that a robot [Allie] built a few years ago inspired a British toy company to produce a new doll, the