Minicut2d And Omniwheel Robot

You’d think we would be done with the World Maker Faire posts by now, but no! We keep looking at our memory cards and finding more awesome projects to write about.

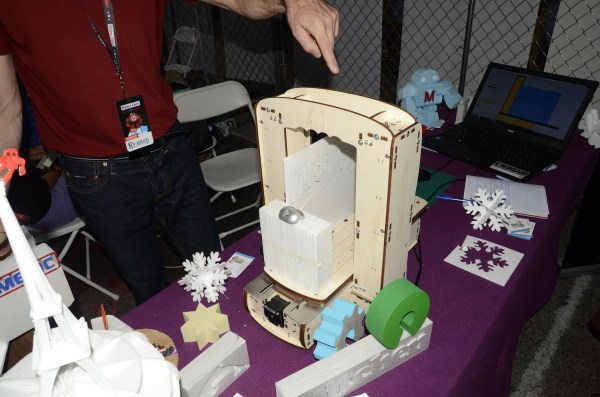
[Renaud Iltis] flew over from France to show off MiniCut2D, his CNC hot wire foam cutter. MiniCut2D uses X and Y, and Z stMINICUT2epper motors much like a 3D printer. Rather than print though, it pulls a heated nichrome wire through styrofoam. Foam cutting is great for crafts, but it really takes off when used for R/C aircraft. [Renaud] was cutting some models out of Depron foam in his booth. [Renaud] has set up FrenchFoam.com as a central location for users to upload and share designs in DXF format.

One of the neater features of MiniCut2D is that it can be loaded with a stack of foam boards to make several cuts at once. Not only is this a time saver when cutting repeating designs like wing ribs, but it also ensures the cut pieces are identical. Hey, even CNCs make mistakes once in a while.

 Omniwheel Robot
vic

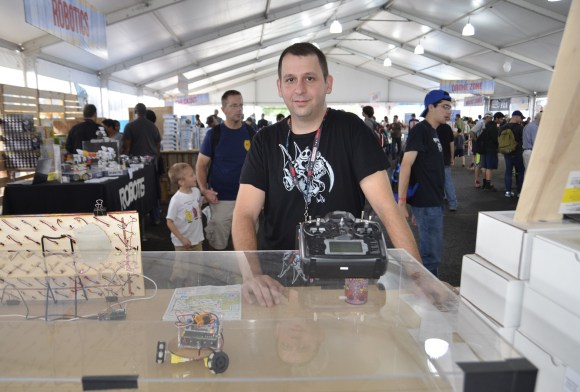
In the MakerShed booth, we found [Victor Aprea] showing off Wicked Device’s new product, the Omniwheel Robot. Omniwheel utilizes a holonomic drive with omnidirectional wheels. The kit comes with a Nanode Zero, Wicked Devices’ own Arduino Uno clone, a motor control board, 3 motors, 3 omnidirectional wheels, and a whole list of hardware. The only thing needed to complete the kit is a radio control unit and receiver. Omniwheel may be simple, but we found driving it around to be mesmerizing – and a bit challenging. It’s a good thing [Victor] brought that plexiglass cover, as we bumped it a few times.

We’d love to see one of these little bots with a couple of sensors and autonomous control. If you build one, make sure to post it to Hackaday.io!

Triggering Remote Fireworks With An Arduino And An Android

LIGHTING ROCKET

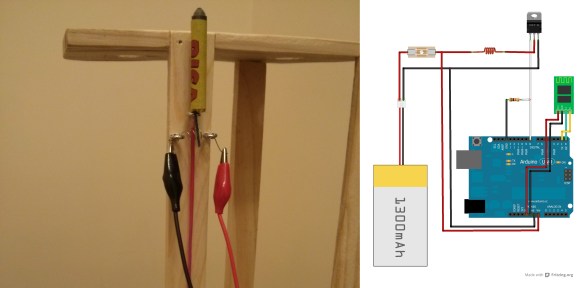
With Canada day and Independence day fast approaching, some makers are looking towards setting up their own fireworks to shoot off in celebration – sure you could use a match or lighter… or you could crack out your trusty Arduino and a cellphone! (translated)

To ignite the fuse, [Oscar] is using a short length of Nichrome wire which is controlled via a Mosfet by the Arduino. To control the Arduino he’s using ArduDroid with a Bluetooth module. The app lets you trigger the various digital and analog outputs, and send and receive data.

Stick around to see a few different demonstration videos of the circuit, testing, and launching some little bottle rockets!

Continue reading “Triggering Remote Fireworks With An Arduino And An Android”

Heating Up A Printrbot’s Bed

A heated bed for the Printrbot 3D printer

Heated beds for 3D printers help reduce the amount of curling and warping of parts. The warping happens when the part cools and contracts. The heated bed keeps the part warm for the entire print and reduces the warping.

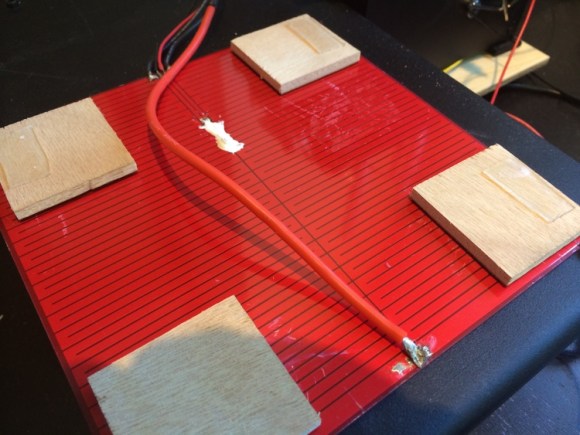
As an upgrade to her Printrbot, [Erin] added a heated bed. The first plan was to DIY one using Nichrome wire, but heated beds are available at low cost. They’re basically just a PCB with a long trace that acts as a resistor. She added a thermistor to monitor temperature and allow for accurate control.

The Printrbot heated bed worked, but didn’t heat up quite quick enough. [Erin] was quick to scratch off the solder mask and solder new leads onto the board. This converted the board into two parallel resistors, halving the resistance and doubling the power.

This version heated up very quickly, but didn’t have a steady heat. The simple control that was being used was insufficient, and a PID controller was needed. This type of control loop helps deal with problems such as oscillations.

The Printrbot’s firmware is based on Marlin, which has PID support disabled by default. After rebuilding the code and flashing, the PID gains could be adjusted using g-codes. With the values tuned, [Erin]’s printer was holding steady heat, and can now print ABS and PLA with minimal warping.

Make A Plastic Bender Using Stuff You Already Have

bendingStation

The team over at [2PrintBeta] found they needed some unique plastic profiles for their 3D printer the Printupy. Unable to find a supplier with what they needed, they decided to try building their own inexpensive bending station, using stuff they already had.

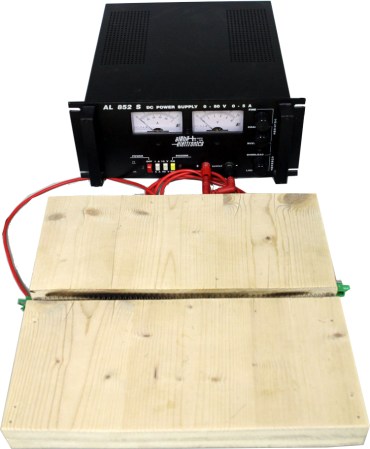
Not too concerned with the longevity of the system (or perhaps the flammability?) they’ve taken a wooden board and routed a straight groove through the center of it. Using a power supply and some Nichrome wire — it’s done.

They admit it’s really not the most durable and that it requires constant supervision in case of flames — but it cost next to nothing to make, and actually works quite well! What we like about the following video is they also show us the design process, the laser cutting, and bending to create the final product.

Continue reading “Make A Plastic Bender Using Stuff You Already Have”

DIY Curved Display Makes Use Of Cool Thermochromic Properties

flexible screen

[Marin Davide] was on a mission. A mission to build his own curved display screen, using an Arduino, nichrome wire, and thermochromic liquid crystal ink.

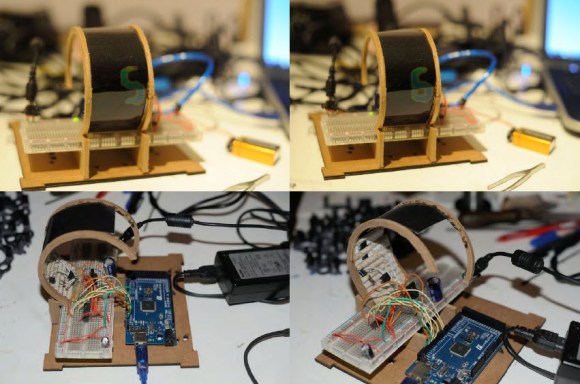
The prototype he’s designed uses a sheet of plastic coated in thermochromic ink, curved on an MDF frame. This particular thermochromic ink turns bright blue when heated to around 27°C.

To display digits, he’s created tiny segments of the 7-segment display by wrapping the nichrome wire around pieces of cardboard, which then have been glued to the back of the display. Each of these is controlled separately from his Arduino Mega. He muses that you could also make a rudimentary dot matrix display with this — it would be interesting to see what kind of resolution you could obtain!

To see more photos check out the original DesignNews post linked above. We’re not sure why the bulk of the details are only available in this PDF. If we’re just missing a direct link to the original project page let us know in the comments and we’ll update the post.

Interested in more thermochromic black magic? How about these awesome temperature sensitive photos? Or what about a digital clock face, illuminated by heating resistors?

DRM Chair Only Works 8 Times

chair

Download a song from iTunes, and you can only add that song to the music library of five other computers. Grab a copy of the latest Microsoft Office, and you’d better hope you won’t be upgrading your computer any time soon. Obviously DRM is a great tool for companies to make sure we only use software and data as intended, but outside planned obsolescence, there isn’t much in the way of DRM for physical objects.

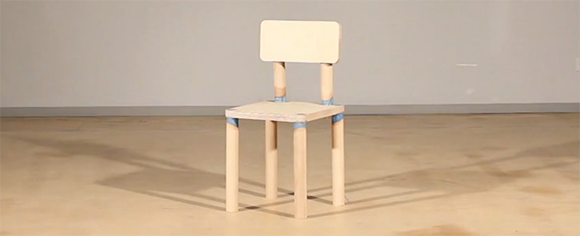
This is where a team from the University of Art and Design in Lausanne, Switzerland comes in. They designed a chair that can only be sat upon eight times. After that, the chair falls apart necessitating the purchase of a new chair. Somewhere in the flat-pack furniture industry, someone is kicking themselves for not thinking of this sooner while another is wondering how they made a chair last so long.

The design of the chair is fairly simple; all the joints of the chair are cast in wax with a piece of nichrome wire embedded in the wax. An Arduino with a small switch keeps track of how many times the chair has been used, while a solenoid taps out how many uses are left in the chair every time the user gets up. When the internal counter reaches zero, a relay sends power through the nichrome wire, melting the wax, and returning the chair to its native dowel rod and wooden board form.

Melting wax wasn’t the team’s first choice to rapidly disassemble a chair; their first experiments used gunpowder. This idea nearly worked, but it was soon realized no one on the team wanted to sit on a primed and loaded chair. You can see the videos of the wax model failing after the break.

Continue reading “DRM Chair Only Works 8 Times”

Custom Heaters For A DIY BBQ Smoker

Spring is in the air, and with that comes savory meals cooked over the course of dozens of hours. While preparing for your yearly allotment of pork and beef, check out [Brett Beauregard]’s custom heater elements he built for a DIY wood smoker.

This build follows the very successful smoker [Brett] built last year. This year, he’s using the same toaster oven heating elements, only cut down to make the heater smaller and more efficient. Basically, [Brett] is making a small cartridge heater out of the equipment he already has.

After cutting the toaster oven heating elements to length, [Brett] reamed out the ends to expose the nichrome wire. A short hit with a TIG welder bonded the lead to the heating element. Insulated with furnace cement, [Brett] had a custom heater perfect for charring chunks of mesquite or hickory.

Meat smokers aren’t very complicated – they can be built with a flowerpot and a hotplate, and will still cook up a delicious dinner. We might have to borrow [Brett]’s technique when we build this year’s smoker.