A General-Purpose PID Controller

For those new to fields like robotics or aerospace, it can seem at first glance that a problem like moving a robot arm or flying an RC airplane might be simple problems to solve. It turns out, however, that control of systems like these can get complicated quickly; so much so that these types of problems have spawned their own dedicated branch of engineering. As controls engineers delve into this field, one of their initial encounters with a control system is often with the PID controller, and this open source project delivers two of these general-purpose controllers in one box.

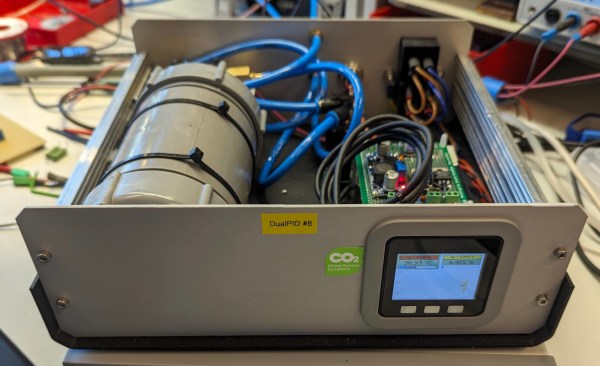
The dual-channel PID controller was originally meant as a humidity and temperature controller and was based on existing software for an ATmega328. But after years of tinkering, adding new features, and moving the controller to an ESP32 platform, [knifter] has essentially a brand new piece of software for this controller. Configuring the controller itself is done before the software is compiled, and it includes a GUI since one of the design goals of the project was ease-of-use. He’s used it to control humidity, temperature and CO2 levels in his own work at the University of Amsterdam, but imagines that it could see further use outside of his use cases in things like reflow ovens which need simple on/off control or for motors which can be controlled through an H-bridge.

The PID controller itself seems fairly robust, and includes a number of features that seasoned controls engineers would look for in their PID controllers. There are additionally some other open-source PID controllers to take a look at like this one built for an Arduino, and if you’re still looking for interesting use cases for these types of controllers one of our favorites is this PID controller built into a charcoal grill.

A ’70s TV With ’20s Parts

Keeping older technology working becomes exponentially difficult with age. Most of us have experienced capacitor plague, disintegrating wire insulation, planned obsolescence, or even the original company failing and not offering parts or service anymore. To keep an antique running often requires plenty of spare parts, or in the case of [Aaron]’s vintage ’70s Sony television set, plenty of modern technology made to look like it belongs in a machine from half a century ago.

The original flyback transformer on this TV was the original cause for the failure of this machine, and getting a new one would require essentially destroying a working set, so this was a perfect candidate for a resto-mod without upsetting any purists. To start, [Aaron] ordered a LCD with controls (and a remote) that would nearly fit the existing bezel, and then set about integrating the modern controls with the old analog dials on the TV. This meant using plenty of rotary encoders and programming a microcontroller to do the translating.

There are plenty of other fine details in this build, including audio integration, adding modern video and audio inputs like HDMI, and adding LEDs to backlight the original (and now working) UHF and VHF channel indicators. In his ’70s-themed display wall, this TV set looks perfectly natural. If your own display wall spotlights an even older era, take a look at some restorations of old radios instead.

Continue reading “A ’70s TV With ’20s Parts”

Autonomous Multi-Task Performing Robot

[Ruchir] has been pretty into robotics for a while now and has always been amused by the ever-popular obstacle avoiding robot, but wanted something that could do more. So, like any good hacker, he decided to build something himself.

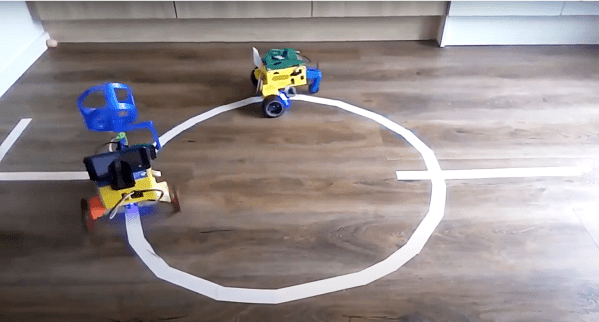
He wanted to incorporate all the popular beginner robot capabilities into a single invention. His robot can follow a line, detect an obstacle, and retrieve an object without switching between modes. It can even follow another robot, which is pretty neat.

His robot has a lot of the hardware you would expect. It uses a Raspberry Pi for all the heavy image processing, has optical sensors for line following and obstacle avoidance, and includes a speaker for audio feedback. What’s especially cool is the impressive interface, called the Regbot GUI, that [Ruchir] is using with his robot. According to the Wiki page, the Regbot GUI appears to accompany an educational robotics platform developed by Professor Jens Christian Andersen of the Technical University of Denmark for teaching controls to engineering students. [Ruchir] was able to adapt the GUI to his particular bot no problem.

Using the Regbot GUI, [Ruchir] can monitor all the robot’s sensor data in real-time (accelerometer, gyroscope, distance sensor, servo, encoder, etc.), dynamically adjust its calibration settings if needed, or even provide a universal killswitch in case the unthinkable happens. We’d say it’s definitely worth a look before you embark on your next robotics project.

Continue reading “Autonomous Multi-Task Performing Robot”

Inverted Pendulum For The Control Enthusiast

Once you step into the world of controls, you quickly realize that controlling even simple systems isn’t as easy as applying voltage to a servo. Before you start working on your own bipedal robot or scratch-built drone, though, you might want to get some practice with this intricate field of engineering. A classic problem in this area is the inverted pendulum, and [Philip] has created a great model of this which helps illustrate the basics of controls, with some AI mixed in.

Called the ZIPY, the project is a “Cart Pole” design that uses a movable cart on a trolley to balance a pendulum above. The pendulum is attached at one point to the cart. By moving the cart back and forth, the pendulum can be kept in a vertical position. The control uses the OpenAI Gym toolkit which is a way to easily use reinforcement learning algorithms in your own projects. With some Python, some 3D printed parts, and the toolkit, [Philip] was able to get his project to successfully balance the pendulum on the cart.

Of course, the OpenAI Gym toolkit is useful for many more projects where you might want some sort of machine learning to help out. If you want to play around with machine learning without having to build anything, though, you can also explore it in your browser.

Continue reading “Inverted Pendulum For The Control Enthusiast”

Easy Power Supply Mod Takes Control

Inexpensive bench top power supplies are great for the home hobbyist, featuring wide voltage range and current limiting for a low price. What’s not to love? The controls; most have a single-turn pot that is typically very fidgety, especially at low voltage.

The solution is to replace the factory pots with nice wire-wound 10 turn units in order to gain 10x the precision. Of course nothing is ever drop in, the new pots didn’t fit the old holes, but that is nothing a few moments with a drill can’t fix. Also the original knobs no longer fit, but that’s just an opportunity for a knob upgrade.

The end result is still a power supply with fidgety controls, but instead of holding your breath, tippy tapping knobs to get within 100mV of your target, you can dial right in to within 10mV of your target. That makes life much easier, especially on low voltage projects that may not have power regulation quite yet.

Join us after the break for a video with all the info.

Continue reading “Easy Power Supply Mod Takes Control”

Heating Up A Printrbot’s Bed

A heated bed for the Printrbot 3D printer

Heated beds for 3D printers help reduce the amount of curling and warping of parts. The warping happens when the part cools and contracts. The heated bed keeps the part warm for the entire print and reduces the warping.

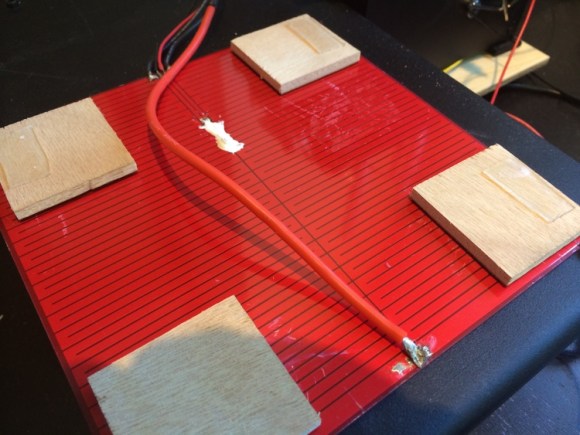
As an upgrade to her Printrbot, [Erin] added a heated bed. The first plan was to DIY one using Nichrome wire, but heated beds are available at low cost. They’re basically just a PCB with a long trace that acts as a resistor. She added a thermistor to monitor temperature and allow for accurate control.

The Printrbot heated bed worked, but didn’t heat up quite quick enough. [Erin] was quick to scratch off the solder mask and solder new leads onto the board. This converted the board into two parallel resistors, halving the resistance and doubling the power.

This version heated up very quickly, but didn’t have a steady heat. The simple control that was being used was insufficient, and a PID controller was needed. This type of control loop helps deal with problems such as oscillations.

The Printrbot’s firmware is based on Marlin, which has PID support disabled by default. After rebuilding the code and flashing, the PID gains could be adjusted using g-codes. With the values tuned, [Erin]’s printer was holding steady heat, and can now print ABS and PLA with minimal warping.

Toddler Computer Remote

[youtube=http://www.youtube.com/watch?v=ACbLjz-c4LE]

[Killerdark] has built a simple remote for his toddler to control videos on a PC. He gutted a USB number pad, built a new enclosure with the necessary buttons clearly labeled, and mapped the buttons in software.  He could have possibly done better with larger color coded buttons, but really, it seems to work well as is. This reminds us of the giant iPod remote from back in 2006. Good job [Killerdark]