A few weekends ago, [Chris] was in the mood for some retrogaming. That meant digging out the old Apple IIgs equipped with a monstrous RAM card with a whole three megabytes of RAM. This particular Apple IIgs had intermittent issues for a long time, and [Chris] was beginning to suspect the RAM was the culprit. Testing this required testing a few dozen individual RAM chips, so why not build something with an Arduino to make [Chris]’ life easier?
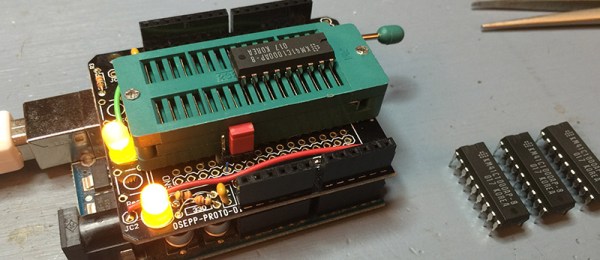
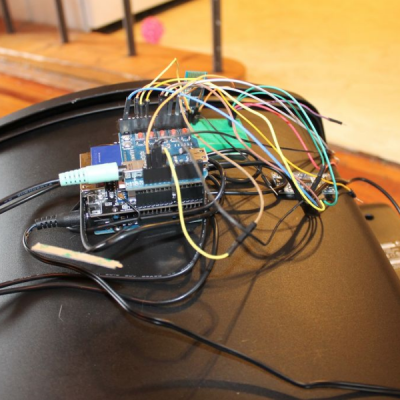
The chips found in [Chris]’ Apple are standard 1 M x 1 DRAM chips, the standard for late-80s computers. To test these chips on an Arduino, he picked up a beautiful ZIF socket, wired up the chip to an Arduino shield, and began the joyous process of figuring out how to interface DRAM to an Arduino.
Unlike static memories, DRAM needs to be refreshed periodically to recharge the capacitors. While this refresh cycle was the bane of designers and engineers throughout time, [Chris] actually doesn’t need to care about refreshing the DRAM. He’s just writing 1024 rows to the memory and reading it straight out – no need to refresh the memory. The trick comes from the multiplexed address bus. For his project, [Chris] needs to write 10 bits of the address, latch it, then write the other half of the address bits.
The DRAM tester was a success, and [Chris] put all the code and schematics up on GitHub. Solving the mystery of the broken Apple IIgs wasn’t as simple, as [Chris] thinks the problem might be in one of the support chips on the gigantic RAM card or the IIgs motherboard. Still, it’s a neat, quick build to test out a few DRAM chips.
 The build itself is uncomplicated and can be replicated with ease. A servo motor helps flip the lid open and close. This is triggered by an ultrasonic ping sensor, which responds when someone waves a hand in front of the trash can. A second ping sensor helps inform the user when it is full and needs to be emptied. A Leonardo with the