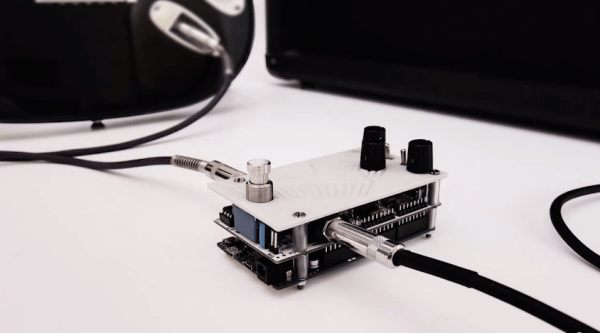
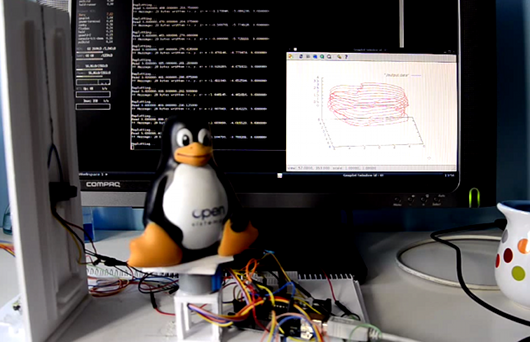
Freeside’s Infinity Portal

sidebyside

If infinity mirrors aren’t cool enough, the 10-foot-tall infinity portal should blow you away. Strictly speaking, the mirror itself is only 7’x4′, but you’ll still find yourself engulfed in the archway. The portal began as a simple prototype that we covered earlier this summer, which was just a frame of 2×4’s, some acrylic and LED strips. It works by putting lights between a two-way mirror and another mirror, reflecting most light internally and creating the illusion of depth.

The giant archway also began as a small-scale prototype, its shape and engravings carved out by a laser cutter. Once they were satisfied with its design, it was time to scale things up. The full-sized portal needed a a tremendous amount of stability, so the guys at Freeside built the base from wooden palettes. They needed the portal to travel to a few different venues, so the rest of the frame breaks down into components, including a removable wooden frame from which the acrylic hangs. A Teensy 3.0 runs all the WS2812 LED strips, which were chosen because each of their LEDs is individually addressable.

Check out the video below for an extremely detailed build log, which should give you a better idea of how massive and impressive this portal really is!

Continue reading “Freeside’s Infinity Portal”

Plotterbot Hangs On Your Wall To Work

illuminatedposter

Looking for a fun and easy to do project to begin your foray into the fun-filled world of Arduinos? How about your very own drawing robot, aptly named, the Plotterbot!

We first heard word of this project when [Jay] submitted a giant plotted version of the Hack A Day logo for our Trinket contest, and we liked the Plotterbot so much we had to give it a featured article!

It’s a very simple design that uses an Arduino, 2 stepper motors, a servo motor (for pen lifting), some fishing line and various odds and ends you can probably find around the house. Realistically it will cost around $100 to build, but if you can salvage some parts from an old printer or scanner, even less!

[Jay] is currently releasing a series of detailed posts on his blog explaining the process of building one, but if you’re excited to start right away, you can always check out his FAQ for more juicy details.

RFID Reader Snoops Cards From 3 Feet Away

Security researcher [Fran Brown] sent us this tip about his Tastic RFID Thief, which can stealthily snag the information off an RFID card at long range. If you’ve worked with passive RFID before, you know that most readers only work within inches of the card. In [Fran’s] DEFCON talk this summer he calls it the “ass-grabbing method” of trying to get a hidden antenna close enough to a target’s wallet.

His solution takes an off-the-shelf high-powered reader, (such as the HID MaxiProx 5375), and makes it amazingly portable by embedding 12 AA batteries and a custom PCB using an Arduino Nano to interpret the reader’s output. When the reader sees a nearby card, the information is parsed through the Nano and the data is both sent to an LCD screen and stored to a .txt file on a removable microSD card for later retrieval.

There are two short videos after the break: a demonstration of the Tastic RFID Thief and a quick look at its guts. If you’re considering reproducing this tool and you’re picking your jaw off the floor over the price of the reader, you can always try building your own…

Continue reading “RFID Reader Snoops Cards From 3 Feet Away”

Arduino Keypad Door Automation

arduino door pad

[Andrea] just sent us this great student hack he made for his room. He’s constructed an Arduino keypad door lock — without using any proper fastening hardware!

The entire build is made out of scrap parts he had lying around: some DVD’s, a bit of wood, an allen key, a motor and belt from a broken printer, an old hard drive enclosure, and a few power supplies. As you can see the entire setup is held up rather artistically using good old duct tape.

The system auto-locks after 5 seconds, and just in case, [Andrea] has hard-coded in a few safety codes into the firmware to allow him to forcefully open the door — you know, if it malfunctions or something. Not overly confident in his code, he also has it reset every 5 minutes of idling to safeguard against potential memory leaks — probably a good idea! All in all it’s a very cool build, and we have to give him props for not damaging the door to mount it! Down the road he’s also planning on adding a knock sensor using the small speaker that is already part of the circuit, because, why not?

Stick around after the break to see this magnificent contraption that would make Red Green proud.

Continue reading “Arduino Keypad Door Automation”

LED Magic Staff Just In Time For Halloween!

[Dave]’s been working pretty hard on his Arduino driven, LED-lit, magical staff for the past few months, and now it’s finally coming together.

He’s using 6 LED strips that contain 55 LEDs each — at full brightness the staff can suck up an impressive 20A @ 5V! To power it, he’s equipped the staff with 8 NiMH C size batteries (5000mAh @ 1.5V). This works out to about 15-20 minutes of runtime at full power (255, 255, 255, LED values) — to counter this he usually runs a sparkly LED algorithm that lasts much longer. Besides, at full power it’s really quite blinding.

The staff is controlled by an Arduino Uno and currently only has two different modes: random and full brightness. Not to worry though, he’s planning on adding a sound sensor to turn it into an equalizer, a shock sensor to give it a cool ripple effect while walking, and maybe a few other interesting patterns!

Stick around after the break to see the first test video!

Continue reading “LED Magic Staff Just In Time For Halloween!”

1Sheeld Uses Your SmartPhone As An Arduino Accessory

1sheeld

The Arduino can be a bit of a gateway board. You start with an Uno, then a shield, then another. Before you know it, you have an entire collection of shields. This is the problem 1Sheeld wants to solve. 1Sheeld allows a you to use your cell phone as a sensor and I/O suite for your Arduino, replacing many existing shields. We think this will be a great idea, especially with all the older phones coming off contract these days. The sensor capabilities of the average smartphone, as well as the LCD and touchscreen I/O capabilities could make for an interesting pairing.

Currently the 1Sheeld page is just a sign up for an upcoming kickstarter, which leaves many details to the imagination. It appears that the 1Sheeld will be a bluetooth based board. A few questions do remain to be answered though – will the 1Sheeld use the Android ADK? The software is what we’re waiting to see. The software running in the 1Sheeld module bluetooth chip will be important, but the software running phone side will be the real make or break of this module. We would love to see more smartphones being used for hardware hacking rather than collecting dust once they’ve been replaced.

[Via TechCrunch]

The Nickelphone

nickelphone

[Tyler Bletsch] sent us a tip about his new build: a keyboard that redefines “coin-operated.” The Nickelphone can emit square wave tones via a piezo buzzer, but [Tyler] made this 25-key piano as a MIDI keyboard capable of driving a full synthesizer.

He chose an ATMega644 as the brain because it’s Arduino-friendly but has more data pins—32—than the usual ATMega328 chip, which allows him to provide each key with its own pin. Each coin was soldered to its own wire and connects up to a 1MΩ resistor array. Coin-presses are recognized by the simple capacitive sensing technique outlined here, but [Tyler] needed to take advantage of a workaround to accurately detect multiple presses.

Check out [Tyler’s] detailed project guide for more information as well as the source code. Check out the video of the Nickelphone after the break, then browse through some other capacitive touch hacks, like the Capacitive Touch Business Card or the Capacitive Touch Game Controller.

Continue reading “The Nickelphone”