Nose Cone Parachute Deployment From A Soda Bottle, Rubber Band, And Servo

nose-cone-parachte

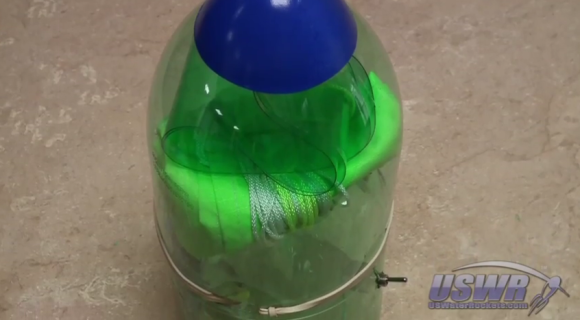
This piece of engineering is so simple and elegant, you’ll want to build a pretty serious water rocket just so you can try it out. It’s an automatic parachute deployment system that you build into the nose-cone of your rocket. The main portion of the build is made out of plastic soda bottles (2 liter size) to end up with a chamber to store the chute, as well as a friction joint that holds the thing together.

The video after the break shows a complete tutorial on how to build one of these. It starts by tracing out a sine-wave-like pattern on the wall of the bottle. The staggered tongues that are left after cutting along this line make up the friction joint. After gluing a cone (the blue thing) to the bottom of the bottle, it receives the parachute and is then slipped over another bottle that makes up the body of the rocket. The rubber band wraps around the outside of the chassis, holding those plastic tongues in place. The loose end of the rubber band is hooked around the horn of a servo motor, which can then be triggered remotely, or by using a sensor of your choosing. There is even a spring made out of a loop of plastic bottle — you can see it just on top of the chute in the image above.

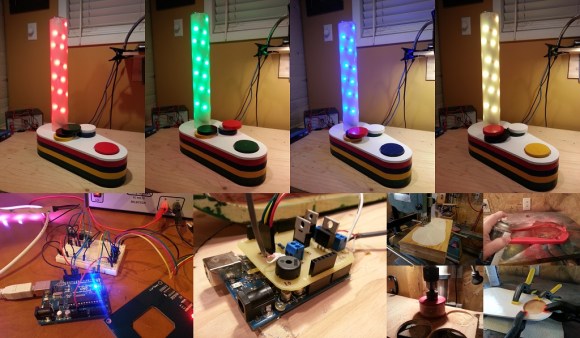
Need a launching system that is as fancy as the parachute system? Here you go.

Continue reading “Nose Cone Parachute Deployment From A Soda Bottle, Rubber Band, And Servo”

Improving A Cheap Guitar Pedal

pedul

If something doesn’t suit your needs, just change it. That’s a motto we live by, and it looks like [Doug] took up the same creed when he modified a cheap effects pedal.

The victim of [Doug]’s soldering iron is a Danelectro BLT Slap Echo – a tiny, cheap pedal in Danelectro’s mini ‘food named’ pedal series. Stock, this pedal’s slap back echo is set to a fixed amount of time. [Doug]’s mod changes that.

The mod consists of desoldering a single SMD resistor and replacing that with a 50k pot [Doug] had lying around. After mounting the pot between the two stock knobs, the new and improved pedal had a variable length echo. There are a few more mods possible with this pedal – changing some of the resistors on the filter for a better sound, or even connecting the rate pot to a wah-style rocker pedal for some wobbly Echoplex or Space Echo action.

You can check out [Doug]’s gallery of pics here.

Sterling Engine Kludged Together From Whatever

Watching [Jam BD] build this working Sterling Engine from nothing is awe-inspiring. He literally did with what he had on hand. Even his build log forgoes phrases like “I ordered a…” in exchange for “I didn’t have any so…”.

The cylinder heated by a candle is a pipe stuffed with aluminum foil which was hammered flat to get the best seal possible. The CDs prominently featured on the final product act as the fly-wheel. To ensure that there is enough mass [Jam] ganged three of them together. There is also a counter-weight affixed just off-center to help keep the wheel turning. The gears shown above were actually used more like mounting plates to build a cam. Looking at the body and frame of the device makes us wonder how in the heck this thing actually came together?

We can’t get enough of these kinds of hacks, which is why we had to go back and watch the tuna can Sterling Engine one more time.

Continue reading “Sterling Engine Kludged Together From Whatever”

Bypassing Seagate ATA Security Lock

Here’s a common story when it comes to password retrieval: guy sets up a PC, and being very security-conscious, puts a password on his Seagate hard drive. Fast forward a few months, and the password is, of course, forgotten. Hard drive gets shuffled around between a few ‘computer experts’ in an attempt to solve the problem, and eventually winds up on [blacklotus89]’s workbench. Here’s how he solved this problem.

What followed is a walk down Hackaday posts from years ago. [blacklotus] originally found one of our posts regarding the ATA password lock on a hard drive. After downloading the required tool, he found it only worked on WD hard drives, and not the Seagate sitting lifeless on his desk. Another Hackaday post proved to be more promising. By accessing the hard drive controller’s serial port, [blacklotus] was able to see the first few lines of the memory and the buffer.

Two hours and two Python scripts later, [blacklotus] was able to dump the contents of his drive. He then took another Seagate drive, locked it, dumped it, and analyzed the data coming from this new locked drive. He found his old password and used the same method to look for the password on the old, previously impenetrable drive. It turns out the password for the old drive was set to ‘0000’, an apparently highly secure password.

In going through a few forums, [blacklotus] found a lot of people asking for help with the same problem, and a lot of replies saying. ‘we don’t know if this hard drive is yours so we can’t help you.’ It appears those code junkies didn’t know how to unlock a hard drive ether, so [blacklotus] put all his tools up on GitHub. Great work, and something that didn’t end up as a Hackaday Fail of the Week as [blacklotus] originally expected.

WiFi & Bluetooth Bot Control

MasterFeatureGraphic1024x500New

Looking for an easy way to control that Arduino powered robot you built? We just caught wind of a pair of apps for Android that look pretty handy! WiFi Bot Control and Bluetooth Bot Control.

So, what are they?  They’re configurable apps that are capable of taking in an IPCam video signal, and sending various commands via a URL string (or a bluetooth signal) for an Arduino to interpret. It comes standard with a joystick control protocol and 8 customizable command buttons. On the robot end of things you’re looking at a fairly basic setup consisting of an Arduino, a WiFi module, a motor shield and motors, and an IP Camera. The rest is up to you!

It looks pretty easy to set up, and the lite version is free! That’s good enough reason for us to try it out. The full version is $1.99 which isn’t a bad price to pay for a nice GUI for your project. See it in action after the break with a robot called Eddie.

Continue reading “WiFi & Bluetooth Bot Control”

Build And Control Your Own Robot Army

deltas

[Sarah Petkus] has a simple dream. She wants to build and command her own delta robot army. It all began with an illustration she drew of a woman hovering over a field of flowers. The flowers in this case had incandescent light bulbs as blooms. [Sarah] decided to create her image in the real world as an interactive art installation. Her first attempts at moving light flowers were based on a pulley system, which was unreliable and not exactly the graceful movement she imagined. Eventually [Sarah] discovered inverted delta robots. She changed her flower design to a delta, and began building her own delta robots out of parts she had around the house.

A chance meeting with the folks at SYN Shop hackerspace in Las Vegas, NV kicked the project into high gear. [Sarah] switched from using R/C ball links as joints to a simple ball bearing joint. She created her entire design in CAD software and printed it on the hackerspace’s 3d printer. She now has six working prototypes. The robots are all controlled via I2C by an Arduino compatible Nymph board. Six robots doesn’t exactly constitute an army, so [Sarah] had to find a new way to fund her project. She’s currently setting up a project for Kickstarter. [Sarah] will be selling kits for her robots, with the proceeds going toward the realization of her dream of a field of robotic light bulb flowers – Assuming the deltas don’t become sentient and try to take over the world first. [Sarah] posts progress updates to her blog, and has a dedicated site (which we featured on Sunday as part of a Links post) for information about her upcoming Kickstarter campaign.

Continue reading “Build And Control Your Own Robot Army”

RFID RGB Lamp Goes The Distance

rfid-RGB-lamp

[Philippe Chrétien’s] project makes it to our front page just based on its completeness. When you hear about a multicolored lamp which changes based on an RFID tag you might not get too excited. When you look at the refined electronics and the quality of the wooden enclosure it’s another story entirely.

As we’ve said many times before, coming up with the idea for a project is the hardest part… especially when you just want to start hacking. With his kids in mind [Philippe] figured this would be something fun for them to play around with, opening the door to discussing the electronics concepts behind it.

He prototyped on a breadboard using three N-type MOSFETs to drive the colors of an RGB LED strip. The proven circuit was laid out and etched at home to arrive at the clean-looking Arduino shield shown off above. The entire thing gets a custom enclosure cut using layered plywood, a paper template, and a bandsaw.

Need a use for this once the novelty has worn off? Why not mod it to use as a motion activated night light? Alas the actual project link for that one is dead, but you get the idea.