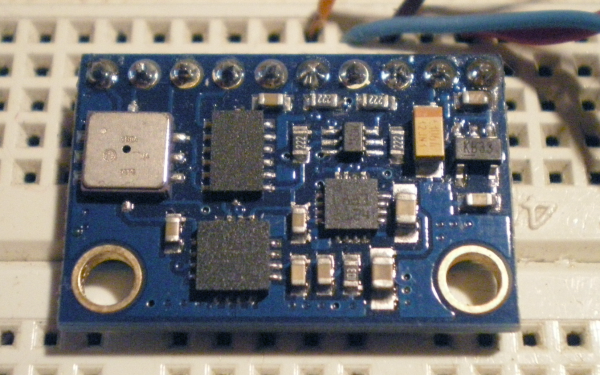
Remote Uploading To An Arduino With Codebender

[youtube=http://www.youtube.com/watch?v=KCHqhV6xPMg&w=470]

A few weeks ago, we saw codebender, an online replacement for the Arduino IDE that allowed you to upload a sketch to your board from a web browser. Over on the codebender blog [Vasilis] and his team are rolling out a way to remotely upload code to an Arduino over Ethernet. Now you don’t even need a serial connection to program an Arduino; it can be done over the Internet to a board in the next room, or on another continent.

The star of this hack is the Ariadne bootloader, an implementation of TFTP that allows any Ethernet-enabled Arduino to receive updates over the Internet. There is still one small problem with the Ariadne bootloader: uploading code over Ethernet requires someone to press the reset button on the Arduino, completely negating the benefits of programming an Arduino over Ethernet.

This problem has been solved before for earlier Arduino boards, so we’re sure [Vasilis] and his team will be able to fix the reset issue in very short order. If you’d like to check out the remote TFTP bootloader and play around with codebender, you can grab Ariadne over on GitHub.

Reading Sega Carts Off A Breadboard

Golden Axe is great, and the Sonic 3/Sonic and Knuckles combo is one of the highest works of art from the 16-bit era, but for those of us without a working Genesis or Megadrive, we’ve had to make due with the ROMs others provide. [Lee] figured out an easy way to read the data off these old Sega cartridges using easily scavenged parts and an Arduino Mega, paving the way for an Arduino-based ROM dumper.

The connector on the bottom of a Sega Genesis cartridge has a 2×32 pinout, normally requiring 64 connections to actually read the card. These connectors aren’t readily available, but [Lee] did manage to find a few 2×31 pin connectors lying around in the form of old ISA sockets. The outer pins of a Genesis cart are used for grounds and a ‘cartridge insert’ slot, and after filing away the end of an old ISA connector, [Lee] found he could actually read the data on these old game cartridges.

There are 49 data and address pins on these old Sega carts, so an Arduino Mega needed to be brought into the mix to actually read some of the data on the ROM chip. As of now, [Lee] can read data from the cart but has only gotten so far as to read the licensing data stored at 0x80. Still, very cool and the first step towards an Arduinofied Sega cart dumper.

Motorized Camera Rig Makes Panoramic Shooting Simple

diy-panorama-rig

Where some people might see a pile of junk, Hackaday reader and budget-conscious photo nut [FantomFotographer] sees inspiration. He was in search of a rig that would help him take better panoramic photos and found all that he needed to build one right around him.

He had an old tripod kicking around, which serves as the base for rig. At the top sits a pair of servos [FantomFotographer] attached to the tripod with some scrap wood, screws, and glue. The servos are driven by an Arduino Nano, which sits comfortably in a plastic enclosure he scavenged from trash heap. He uses an IR receiver to control the whole thing, which allows him to not only change shooting angles, but camera settings as well.

While it might sound like all is well with his upcycled camera rig, [FantomFotographer] says that like every project, there is some room for improvement. He’s keeping the source code under wraps at the moment, but once he gets everything working to his liking, he says that he’ll release it.

In the meantime, be sure to check out the cool panoramas he has put together.

The Proper Way To Put An Arduino In A Raspberry Pi

For all their hoopla, the GPIO pins on the Raspberry Pi aren’t terribly useful on their own. Sure, you can output digital data, but our world is analog and there just isn’t any ADCs or DACs on these magical Raspi pins.

The AlaMode, a project designed by [Kevin], [Anool], and [Justin] over at the Wyolum OSHW collaborative aims to fix this. They developed a stackable Arduino-compatable board for the Raspberry Pi.

Right off the bat, the AlaMode plugs directly into the GPIO pins of the Raspberry Pi. From there, communication with the ATMega of the Arduino is enabled, allowing you to send and receive data just as you would with an Arduino. There’s a real-time clock, servo headers, plenty of ways to power the board, and even a breakout for this GPS module.

A lot of unnecessary cruft is done away with in the AlaMode; There’s no USB port, but it can be programmed directly over the GPIO pins of the Raspberry Pi. Pretty neat, and we can’t wait to grab one for our Raspi.

Using An IR Remote With Your Arduino

If you’ve ever needed a short-range remote control for a project, [firestorm] is here to help you out. He put up a great tutorial on using an IR remote to do just about anything with everyone’s favorite microcontroller platform.

[firestorm] used the Arduino IRremote library to decode the button presses on his remote. After uploading the IR receive demo included in the library, the Arduino spit out hex codes of what the IR receiver was seeing. [firestorm] wrote these down, and was able to program his Arduino to respond to each individual button press.

After figuring out the IR codes for his remote, [firestorm] threw a shift register into his bread board and attached a seven-segment LED. Since [firestorm] knows the codes for the number buttons on his remote, it’s very easy to have the LED display flash a number when the corresponding button on the remote is pressed.

A single seven-segment display might not be extremely useful, but with [firestorm]’s tutorial, it’s easy to give your Arduino some remote control capabilities with a simple IR receiver. Not bad for a few dollars in parts.

Task Scheduler For Arduino

For their recent high altitude balloon project LVL1 member [Brad] programmed a pretty complicated brain based on an Arduino. It was responsible for collecting data from all of the sensors, and reporting back in a few different ways. One of the things he did to simplify the project was develop a task scheduler for the Arduino board. It lets you add functions to a queue of jobs, along with data about when they should be run.

The task scheduler does make coding a bit easier, but where it really shines is in situations like this where you don’t have access to the hardware if there’s a problem. In his description of the scheduler [Brad] mentions the possibility that one of the sensors could fail as the cold of the upper atmosphere takes its toll. This could leave the whole system stuck in a subroutine, and therefore it will stop sending reports back to the team on the ground. Since he was using the task scheduler it was a snap to add watchdog timer servicing to the mix. Now if program execution gets stuck the watchdog will reset the chip and all is not lost.

[Thanks  JAC_101]

Kegerator Tallies Your Pints On Untappd While You Sit Back With A Cold One

untappd-auto-checkin

[Jeff] admits that he’s pretty well addicted to Untappd, a site he describes as a Foursquare for beer. Like his fellow beer nerds, he enjoys reporting the pints he’s had, even if they happen to be from his own stash of homebrew kegs. Untappd certainly supports this level of dedication, but it seemed silly to [Jeff] that he needed to grab his phone each time he poured himself a cold one in the comfort of his own home.

He took a look around the room and spied an Arduino doing a whole lot of nothing, so he set off to build a system that would allow him to automatically record his drinking habits without the use of his smartphone. The system is not overly complex, and measures pours using flow sensors, uploading the results to Untappd using their “check-in” API. [Jeff] was sure to include several other useful features into his build, including a lockout timer that prevents multiple check-ins when simply topping off a pint, as well as “neighbor mode” which lets you pour a round for friends without recording the pour.

Be sure to check out the build in its entirety on [Jeff’s] site, and let us know if you’re doing something equally cool with your keg setup at home.