Red Bull Creation Hardware (Bullduino) Arrives

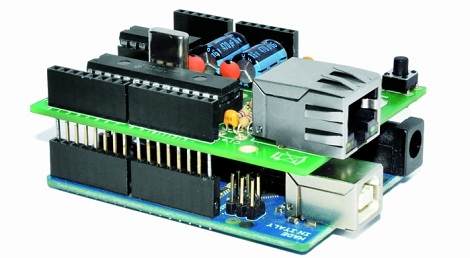
The Bullduino’s are starting to arrive. When [Arclight] received his in the mail the first thing he did was to share the hardware details. Of course this is the hardware that participants in the Red Bull Creation contest will be receiving ahead of this year’s contest.

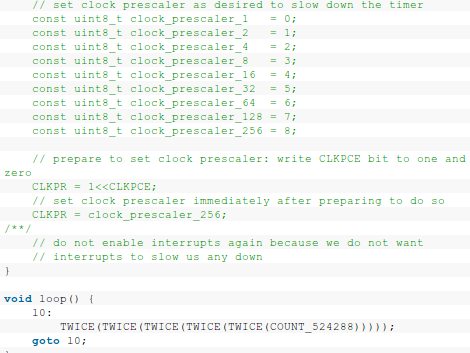
The board is an ATmega328 Arduino clone. Instead of an FTDI chip for USB this one is sporting an ATmega8u2. That’s not too much of a surprise as it should translate to a cost savings. [Arclight] reports that the stock firmware flashes a message in Morse code. It seems the Harford HackerSpace got their Bullduino several days ago and already decoded the message. It reads:

“Wouldn’t lou prefer a good game of chess?”

The guys that did the decoding speculate that this could be a type as ‘l’ and ‘y’ are inversions of each other in Morse code; or it could be some kind of clue. At any rate, if you want to do some disassembly and see if there’s anything lurking in the firmware, [Arclight] posted FLASH and EEPROM dumps from both ATmega chips along with his article.

Driving A Nokia QVGA Screen With Arduino (or Any UC)

This is a Nokia 6300 screen. It’s a 320×240 display that has about 2″ of diagonal viewing area and boasts 24-bit QVGA TFT technology. It’s going to look fantastic in your next project and it won’t be hard to get up and running thanks to the hardware and software guide which [Andy Brown] put together. He chose this display because of its features, but also because it’s really easy to source and can be had for $5-7 delivered. The guide is aimed at working with the Arduino MEGA, but we’re sure you can port it for just about any microcontroller you’d like.

Much like the FPGA PSP display we just looked at, [Andy] chose to design his own PCB to host the LCD. This makes it a snap to attach the LCD — literally, since he managed to source the correct snap-in connector. The board also hosts a constant-current LED driver which takes care of the backlight, and allowed him to build in a level converter (since the screen communicates at 3.3V but Arduino uses 5V logic).

The software tutorial is lengthy but impressive. We’re surprised at the performance he gets out of the AVR chip. See the screen cycle through a set of demos after the break.

Continue reading “Driving A Nokia QVGA Screen With Arduino (or Any UC)”

Putting Scores Of Arduinos On The Internet With One Router

Like many hackers of late, [Rick] has been experimenting with connecting Arduinos to the Internet with a disused WiFi router and an installation of OpenWRT. Unlike his fellow makers, [Rick] thought it would be wasteful to dedicate a single router to one Arduino project, so he used a small, low power wireless module to connect up to 30 Arduinos to the Internet.

Just as in a few recent builds (1, 2), [Rick] found an old Fonera router sitting in a box at his local hackerspace. After installing OpenWRT, [Rick] connected a very small wireless module to the router’s GPIO pins and patched the firmware to put an SPI bus on the router.

Now, whenever [Rick] wants to connect an Arduino project to the Internet, all he needs is a $4 radio module. This radio module connects to the router, and the router handles the networking requirements of up to 30 DIY projects.

If you’re looking to build an Internet-enable sensor network, we honestly can’t think of a better or cheaper way of going about it. Nice job, [Rick].

ArduSat Puts Arduino Experiments In Space

CubeSats are nothing new – hundreds have been launched into Earth orbit by schools and universities over the past decade. Like anything cool, an Arduino eventually gets thrown into the mix. That’s what the folks behind ArduSat are doing: they’re launching an Arduino-laden satellite into orbit with a bunch of sensors to enable anyone to become a citizen space scientist.

On board the ArduSat is a suite of sensors including a spectrometer, Geiger counter, IR light sensor, electromagnetic wave sensor, a temperature sensor, gyroscope, accelerometer, magnetometer, GPS unit, CO2 sensor, and of course a few cameras. The rewards for this Kickstarter are fairly interesting: backers who pledge $500 are able to buy a week’s worth of time using the ArduSat sensors for your own personal experiment.

As for how this Arduino-powered satellite is getting a ride up to Low Earth Orbit, the team plans to send an application into NASA for the CubeSat Launch Initiative ride-along program. If NASA selects the ArduSat, it’ll get a ride into space along with other CubeSats on a larger commercial launch. If the ArduSat isn’t selected by NASA, the team behind this satellite has secured funding to piggyback on a commercial launch.

Tip ‘o the hat to [HackTheGibson] for sending this in.

Using Printf-style Output To Debug Arduino

First off, if you’re looking at that title and thinking it’s flame-bait, please hold off. What [Ihsan Kehribar] is working with is another way to get some feedback for what’s going on with your Arduino project. Or really any AVR project that uses an ISP connection. He’s added text output for AVR programs similar to the printf function used for a lot of non-embedded C development.

So, we’d bet you’re asking yourself why he’s not just using outright debugging? The AVR line supports many different types of it. But that can be complicated, and usually requires a proper programmer. If you just want to watch to see what values are changing, and when functions are being executed, this isn’t a bad solution. He uses the computer to continually poll the chip. Whenever the sketch calls the his print library it answers back with the payload to be displayed in the terminal. The overhead shouldn’t be too high, and if you’re smart about it this can be flagged as a debug option at the top of the program file.

Traffic Signal Controller Pulls Data Over WiFi

[Travis Brown] just published a post about the traffic light controller he built. His number one goal was to make the device wireless (except for AC power) and he achieved this by using a WiFi shield for his Arduino. But there is also a separate board that provides a way for the chip to switch the AC lights.

He works for a web hosting company, and the boss wanted a fun way to display the status of the servers among other things. He chose to use the WiServer library which controls the CoperHead WiFi Shield and gives him the ability to serve simple web pages from the Arduino. When power is applied the sketch automatically connects to the AP and starts polling the company’s API for status data. If you’re not within eyesight of the traffic lights you can log into the web server and check that way.

We think [Travis] did a great job of explaining his code, and we applaud him for making proper use of the watchdog timer (something we don’t see in very many projects). This joins the pile of traffic-light display devices we’ve seen around here. We still don’t know where people are getting their hands on the things.

Continue reading “Traffic Signal Controller Pulls Data Over WiFi”

Nah, You Don’t Need An Ethernet Module For Your Arduino

[Andy] needed a cheap Internet connection between a data-gathering Arduino and his home server. An Ethernet shield would suffice, but he couldn’t run CAT5 to the Arduino’s location. Wireless shields are hideously expensive, and after looking over the popular Zigbee modules, [Andy] had a few concerns about range and build complexity.

The obvious solution to this problem was getting a cheap WiFi router, flashing OpenWRT firmware on the device, and piping sensor data through the Arduino’s USB port, through the router, and over a WiFi connection to the server.

[Andy] used a TP-Link TL-WR703N wireless ‘travel router’ available on eBay £15 (~$30 USD when we checked). After flashing the router with OpenWRT, [Andy] had a wireless connection from a remote data-collecting Arduino directly to his server.

Attentive Hack a Day readers will note this is the third ‘wireless router + OpenWRT as a dev board’ build this week (first one, second one) . No, we don’t know what’s going on, or why the collective unconscious of makers around the globe decided to latch onto this type of build so suddenly. OpenWRT is available for hundreds of different routers, and anything that keeps disused routers out of the landfill (with the bonus of doing something useful) is alright in our book, so if you have another similar build, send it in and we’ll get around to it sometime.