HIDUINO: Your Arduino Is Now A MIDI Interface

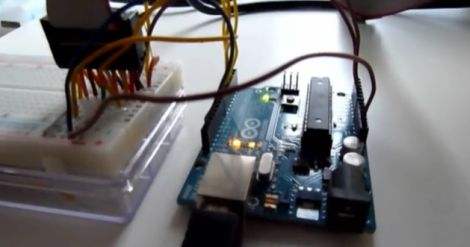
[Dimitri Diakopoulos] dropped into our tip line to let us know his HIDUINO project. The HIDUINO is a set of firmware for the ATmega8u2 used in the new revisions of the Arduino  (Uno, and Mega2560 for example).  Once the HIDUINO is loaded your Arduino can show up as any HID compliant device you wish, no extra drivers necessary. This means that using this firmware, music software such as Max, Ableton, Reaktor etc can read and write MIDI directly to/from the Arduino. Currently the project is for direct USB-MIDI communication but could be altered to act as a variety of HID devices.

Flashing the ATmega8u2 with your own device type or name requires a bit of work on the developers part like owning an ISP programmer, soldering header pins to the board, and re-flashing the ATmega8u2 every time you want to load new code into the Arduino. Users without an ISP can still flash HIDUINO using Atmel’s FLIP software (Windows) or the DFU programmer (Mac OS X and Linux) and a precompiled HIDUINO firmware. They still have to solder a jumper on the underside of the board to use the DFU bootloader.

This firmware could certainly benefit anyone building an Arduinome , Joystick, or any variety of devices that users simply want to interface to a PC without additional software.

A guide for ISP flashing can be found at [Dimitri]’s site.

Wireless Animatronic Hand Control

animatronic_hand

[Easton] was looking to enter his local science fair and needed a project that would wow the judges. After considering it for a bit, he decided that an animatronic hand would be a sure winner. Many animatronic projects we have seen are connected to a computer for control purposes, but his is a bit different.

[Easton] wanted to be able to control the hand in real time with his own movements, so he sewed some flex sensors onto a glove and wired them up to a custom Arduino shield he built. The Arduino is also connected to an XBee radio, allowing it to interface with his animatronic hand wirelessly.

He built the hand after studying anatomical drawings to better understand where finger joints were located and how they moved. He cut up pieces of flexible wire tubing to build the fingers, reinforcing them with Lego bricks. He ran fishing wire from the finger tips to five independent servos to provide the hand’s motion. Another Arduino with an XBee shield was used to control the hand and receive wireless signals from the glove.

Check out the video below to see why this project won [Easton] first place in the science fair.

Continue reading “Wireless Animatronic Hand Control”

Arduino And Open Sound Control Without An Ethernet Shield

Open Sound Control (OSC) is a communications protocol that can be seen as a modern alternative to MIDI. It’s specifically designed to play nicely with network communication systems. The problem with using it along with Arduino-based gadgets is that you then need to use something like an Ethernet shield to provide the network connection. [Liam Lacey] decided to use Processing as a go-between for OSC and the Arduino in lieu of the Ethernet Shield. One of the major benefits of this method is that it gives you some flexibility when it comes to how the Arduino communicates. Since a USB connected Arduino can be addressed by the Processing sketch in the same way as an AVR chip connected via an RS232 serial port, [Liam’s] method will allow you to prototype on an Arduino board, but transition to your own non-USB hardware for the finished project. The one big drawback to this method is the need to have a computer connected to your controller, but we’d bet you’d need one to run MAXmsp anyway.

Interactive Dice Game Pits Man Against Machine

dice_game

While most dice games are based on luck and chance more than anything else, [Mike] decided he wanted to create a dice game that took a little more skill to play. He built a replica of a game found in Ian Stewart’s “The Cow Maze”, a book of mathematical stories and puzzles.

The theory behind the game is as follows:

A number is randomly drawn and is considered the “heap”. Players take turns reducing the heap, using the die to represent the number they would like to remove. The only restrictions placed on moves are that you cannot re-use the same number chosen by your opponent in the preceding move, nor can you use the number on the die face opposite that number. The winner of the game is the individual reducing the heap to exactly zero, though you can also lose the game automatically if you reduce the heap to a negative number.

The game operates using a magnet-loaded wooden die and hall sensors built into the playing surface. The sensors relay the value of the die’s face to the ATmega chip he used to run the game. His code provides the logic for your computer opponent as well as for keeping score.

The whole project is wrapped up in a nice-looking wooden box that gives it a bit of old time-y charm, micro controller and LCD aside.

Be sure to check out the video below to see a few rounds of the game being played, and swing by his site for more details.

[via SparkFun]

Continue reading “Interactive Dice Game Pits Man Against Machine”

Lower Cost Arduino Cell Shield

People love putting their Arduinos in interesting and remote places. while it may be possible, it may not be practical to run out and collect data from the devices. That is where this GSM / GPRS shield comes in handy.

Based around the SIMCom SIM900 that puts this device on the lower end of the price scale, (49 Euro for the module, ~60 Euro for the module mounted on a breakout board, or around 85 greenbacks) makes this module an interesting target for anyone wanting to add cell phone connectivity to a project.

To take this a step further [Boris] whipped up a nice shield PCB for the Arduino and Arduino like footprint users to make connections between the 900’s breakout board and the Arduino layout a snap. Electrically its just wires, and a LM317.

Laptop Touchpad-based LED Lighting Control

touchpad_lighting

[Dave] needed some extra light above his desk/workbench area and decided to wire up some RGB LED light strips to brighten the place up a bit. He wasn’t content with using a standard switch to toggle them on and off, and after some brainstorming, he decided to build a capacitive touch circuit using a pair of copper tubes mounted in a project box. Just as he was putting the finishing touches on his switch, he saw a project online where a Synaptics touchpad was used in conjunction with an Arduino for lighting control. The copper tube switch was pitched, and he got busy working with his Arduino.

When connected to an Arduino, the touchpads can be used in two modes – relative and absolute. Relative mode is familiar to most people because it is used to guide the mouse cursor around on a laptop’s screen. Absolute mode however, relays coordinate information back to the Arduino, allowing the user to map specific areas of the pad to specific functions. [Dave] enabled his touchpad to use absolute mode, and mapped a handful of different functions on the Arduino. He can now fade his lights on and off or light the room on a timer, as well as use a sliding function to tweak the LEDs’ brightness.

It’s a neat, yet simple hack and a great way to repurpose old laptop touchpads.

Continue reading for a quick demo video he put together, and swing by his site if you want to take a look at the source code he used to get this working.

Continue reading “Laptop Touchpad-based LED Lighting Control”

Video Experimenter Shield

People always want to do more with less and the Video Experimenter Shield is no exception. Consisting of an LM1881 video sync separator, a handful of passive components, and a stylish PCB in the standard Arduino shield footprint.

The board features simple but useful controls and features, a removable jumper allows you to select a sync source, either from incoming video or the Arduino, a potentiometer to adjust the analog threshold, and there is a convenient signal breakout header.

Software is an enhanced version of the popular TV out library and allows you to start off with video graphics overlay, closed caption decoding, a simple gun game, and basic, but still effective frame capture, and computer vision. Of course, there are all sorts of other fun and amusing experiments that start to pop in mind once you check out a quick demo video after the break.

Continue reading “Video Experimenter Shield”