Commodore 1530 Datasette Gets A Digital Counter

Ah, the humble Commodore 1530 Datasette drive. It never enjoyed much popularity in the USA, but it was the standard for quite some time in Europe. [DerSchatten13] still uses and loves his 1530. When a co-worker showed him some 7-segment bubble LEDs, he knew what he had to do. Thus the 1530 digital counter (translated) was born.

[DerSchatten13] started out by building his design on a breadboard. He used every I/O pin on an ATtiny2313 to implement his circuit. Tape motion is detected by a home-made rotary encoder connected to the original mechanical counter’s belt drive. To keep the pin count down, [DerSchatten13] multiplexed the LEDs on the display.

Now came the hard part, tearing into the 1530 and removing the mechanical counter. [DerSchatten13] glued in some standoffs to hold the new PCB. After rebuilding the circuit on a piece of perfboard, he installed the new parts. The final result looks great on the inside. From the outside, one would be hard pressed to tell the digital counter wasn’t original equipment.

Operation of the digital counter is identical to the analog unit – with one exception. The clear button now serves double duty. Pressing and holding it saves the current count. Save mode is indicated by turning on the decimal point. If the user rewinds the tape, the counter will stop the motor when the saved count is reached. Cueing up that saved program just got a heck of a lot easier!

Continue reading “Commodore 1530 Datasette Gets A Digital Counter”

Fixing A BASIC Calculator

HPThe early days of modern computing were downright weird, and the HP 9830B is a strange one indeed: it’s a gigantic calculator, running BASIC, on a CPU implemented over a dozen cards using discrete logic. In 2014 dollars, this calculator cost somewhere in the neighborhood of $50,000. [Mattis] runs a retrocomputer museum and recently acquired one of these ancient machines, and the walkthrough of what it took to get this old machine running is a great read.

There were several things wrong with this old computer when it arrived: the keyboard had both missing key caps and broken switches. The switches were made by Cherry, but no one at Cherry – or any of the mechanical keyboard forums around the Internet – have ever seen these switches. Luckily, the key cap connector isn’t that complex, and a little bit of bent wire brings the switches back up to spec. The key caps were replaced from a few collectors around the globe.

Getting as far as booting the machine, [Mattis] found some weirdness when using this old calculator: the result of 2+2 was 8.4444444, and 3+1 was 6.4444444. Simply pressing the number 0 and pressing execute resulted in 2 being displayed. With a little bit of guesswork, [Mattis] figured this was a problem with the ALU, and inspecting the ROM on that board proved to be correct: the first 128 nibbles of the ROM were what they were supposed to be, and the last 128 nibbles were the OR of the last half. A strange error, but something that could be fixed with a new replacement ROM.

After hunting down errors with the printer and the disk drive, [Mattis] eventually got this old calculator working again. For such an astonishingly complex piece of equipment, the errors were relatively easy to hunt down, once [Mattis] had the schematics for everything. You can’t say that about many machines only 10 years younger than this old calculator, but then again, they didn’t cost as much as a house.

Hackaday Retro Edition: The Compaq

It’s been a while since we’ve had any submissions to the Hackaday retro challenge, but [Philip]’s latest project more than makes up for it. He rescued the original 28 pound Compaq luggable and turned it into a work of art. He also managed to get it up on the Internet and pointed it at the Hackaday retro edition, making this one of the best retro submissions in recent memory.

[Philip] rescued this old luggable from the trash, and upon plugging it in and turning it on, heard a loud bang and cloud of smoke from the exploded tantalum caps. We’re guessing [Phil] doesn’t have a variac. After replacing all the broken components, fixing the mechanics of the hard drive, and replacing the two old 5 1/4″ floppy drives with a half-height 5 1/4 and 3 1/2 drives, [Phil] had this machine working again.

After a quick shuffle through his ‘obsolete technology box’, [Phil] found an old 3Com Ethernet card. This was a 16-bit card, but with a new driver and a TCP/IP stack for IBM compatibles it was actually pretty easy to get this old box on the Internet. Since [Phil] removed one of the 5 1/4 drives, he slightly modified a Linksys WRT54G router, wired in new front panel lights for the router, and cut a smoked gray acrylic panel. You can see it next to the drives in the picture above; the colored lights make this old luggable look even more retro, despite it being manufactured about 15 years before blue LEDs became commonplace.

You can check out all the repairs and modifications to this Compaq over on [Phil]’s site, and as always, we’re looking for people to load up the Hackaday retro edition on their old hardware.

ZX Spectrum Turned Into A USB Keyboard

ZX

They’re a little hard to find in the US, but the ZX Spectrum is right up there with the Commodore 64 and the Atari 8-bit computers in England. [Alistair] wanted to recreate the feeling of sitting right in front of the TV with his Speccy, leading him to create the ZX Keyboard, a Spectrum repurposed into a USB keyboard.

While most projects that take an old key matrix and turn it into a USB keyboard use the TMK firmware, [Alistair] wanted to flex his programming muscles and wrote the firmware from scratch. It runs on an Arduino Pro Mini, scanning the matrix of five columns and eight half rows to turn combinations of keypresses into an astonishing number of commands, given the limited number of keys on the ZX.

The firmware is available on [Alistair]’s repo, available to anyone who doesn’t want to pay the £50 a new ZX Spectrum keyboard will cost. As far as the usability of a Spectrum keyboard goes, at least [Alistair] didn’t have an Atari 400 sitting in the attic.

Aerodynamics? Super Honey Badger Don’t Give A @#*^@!

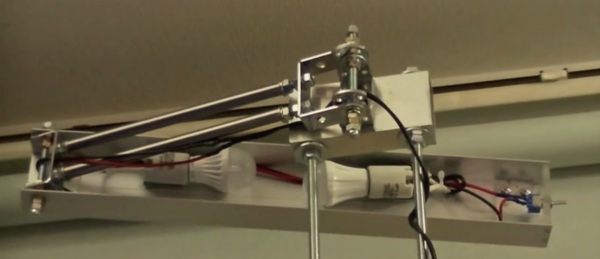
honeybadger-rcplane

[Arron Bates] is a pro R/C Pilot from Australia. He’s spent the last few years chasing the dream of a fixed wing plane which could perform unlimited spins. After some promising starts with independently controlled wing spoilers, [Arron] went all in and created The Super Honey Badger. Super Honey Badger is a giant scale R/C plane with the tail of a helicopter and a soul of pure awesome.

Starting with a standard 87″ wingspan Extra 300 designed for 3D flight, [Arron] began hacking. The entire rear fuselage was removed and replaced with carbon fiber tubes. The standard Extra 300 tail assembly fit perfectly on the tubes. Between the abbreviated fuselage and the tail, [Arron] installed a tail rotor from an 800 size helicopter. A 1.25 kW brushless motor drives the tail rotor while a high-speed servo controls the pitch.

[Arron] debuted the plane at HuckFest 2013, and pulled off some amazing aerobatics. The tail rotor made 540 stall turn an easy trick to do – even with an airplane. Flat spins were a snap to enter, even from fast forward flight! Most of [Arron’s] maneuvers defy any attempt at naming them – just watch the videos after the break.

Sadly, Super Honey Badger was destroyed in May of 2014 due to a structural failure in the carbon tubes. [Arron] walked away without injury and isn’t giving up., He’s already dropping major hints about a new plane (facebook link).

Continue reading “Aerodynamics? Super Honey Badger Don’t Give A @#*^@!”

Bil Herd: Computing With Analog

When I was young the first “computer” I ever owned was an analog computer built from a kit. It had a sloped plastic case which had three knobs with large numerical scales around them and a small center-null meter. To operate it I would dial in two numbers as indicated by the scales and then adjust the “answer” by rotating the third dial until the little meter centered. Underneath there was a small handful of components wired on a terminal strip including two or three transistors.

In thinking back about that relic from the early 1970’s there was a moment when I assumed they may have been using the transistors as logarithmic amplifiers meaning that it was able to multiply electronically. After a few minutes of thought I came to the conclusion that it was probably much simpler and was most likely a Wheatstone Bridge. That doesn’t mean it couldn’t multiply, it was probably the printed scales that were logarithmic, much like a slide rule.

Did someone just ask what a slide rule was? Let me explain further for anyone under 50. If you watch the video footage or movies about the Apollo Space Program you won’t see any anyone carrying a hand calculator, they didn’t exist yet. Yet the navigation guys in the first row of Mission Control known aptly as “the trench”, could quickly calculate a position or vector to within a couple of decimal places, and they did it using sliding piece of bamboo or aluminum with numbers printed on them.

Continue reading “Bil Herd: Computing With Analog”

The Entire Commodore 64 Library In Your Pocket

[sweetlilmre] is just beginning his adventures in retrocomputing, and after realizing there were places besides eBay to buy old computers, quickly snagged a few of the Amigas he lusted after in his youth. One of the machines that didn’t make it into his collection until recently was a Commodore 64 with Datasette and 1541 drive. With no tapes and a 1541 disk drive that required significant restoration, he looked at other devices to load programs onto his C64.

These devices, clever cartridge implementations of SD cards and Flash memory, cost more than anyone should spend on a C64. Realizing there’s still a cassette port on the C64, [sweetlilmre] created Tapuino, the $20 Commodore tape emulator

The hardware used to load games through the Datasette connector included an Arduino Nano, a microSD breakout board, a 16×2 LCD, some resistors, buttons, and a little bit of wire. The firmware part of the build – available here on the Git – reads the .TAP files off the SD card and loads them into the C64.

[sweetlilmre] posted a very complete build post of the entire device constructed on a piece of protoboard, Pop that thing in a 3D printed case, and he can have the entire C64 library in his pocket.