Re-manufacturing Inkjet Cartridges For 3d Printing


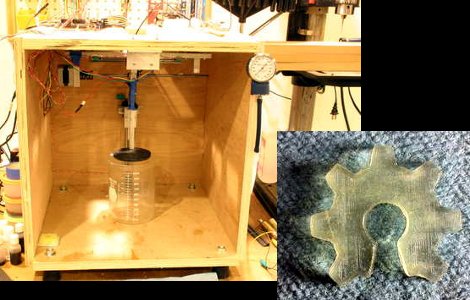
[Nullset] uses inkjet printer technology for his 3D printing needs. We usually think of hot-plastic printing like the RepRap or Makerbot when we hear about rapid prototyping, but this setup uses a liquid bonding agent to turn powder into a solid structure. Standard inkjet cartridges can be used to precisely place the bonding agent, but it’s hard on the heads and you have to replace them often. [Nullset] is getting pretty good at it, and decided to write a tutorial on the modifications necessary to print with bonding liquid.

At its core, the method injects binder into the cartridge through one port while using a second for drainage. [Nullset] found that the needle fittings used to inflate a basketball work great for this. He drills a couple of holes that the threaded end of the needles fit into. That connection is sealed with some epoxy, and the tubing that delivers the binder is zip-tied to the needles. A bit of purging is necessary to get rid of any old ink, but after the initial flush you’ll be up and running pretty quickly. He figures the whole process can be one in around 10 minutes once you get the hang of it.

Building A Stepper Driver

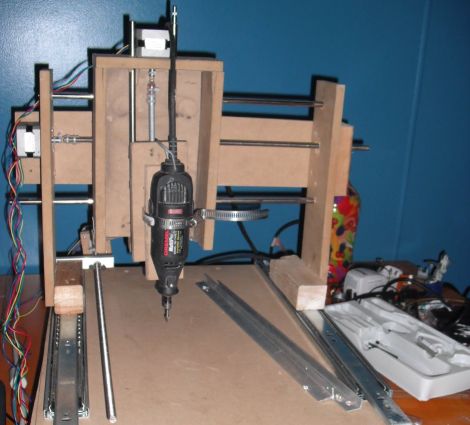
[TBJ] is building what he calls a junkbox 3D printer. You can probably guess that he’s trying to salvage most of the parts for the device, and after pulling a stepper motor from an old printer he was in need of a way to control it. What he came up with is a stepper driver that uses discrete components that are easy to acquire and inexpensive. The design calls for two inputs, one that toggles the direction in which the motor will spin, and the other that triggers one step of the motor. A CD4013 dual flip-flop takes care of both of these inputs in one chip package.

The motor is driven by a pair of H-bridges that he built using six transistors each. The trick with a stepper motor is that you need to drive the four poles of the motor to a specific logic level at a specific time. For this [TBJ] uses a CD4017 decade counter. A network of diodes grounds half of the output lines based on the flip-flop that controls direction. Our friend the 555 timer provides a clock for the circuit, keeping everything moving at a predefined rate. Check out the video after the break for an explanation and demonstration.

Continue reading “Building A Stepper Driver”

Minecraft Is Now A 3d Design Tool

[Cody Sumter] and [Jason Boggess] are students at the MIT Media Lab, and they just came up with Minecraft.Print(), an attempt to create a bridge between Minecraft and the real world via 3D Printers.

The print is first prepared by placing obsidian, diamond, gold, and iron blocks on opposite corners of the model in Minecraft. From there, a Python script takes over and parses the world map to generate an .STL file for a RepRap or MakerBot.

So far, [Cody] and [Jason] have printed a few Companion Cubes and the model of the Enterprise D. We’re pretty impressed with the resolution of the prints, especially considering the original model is voxelated. The prints look very nice, and right now we really want to print out all the cool stuff we’ve seen, like Isengardgigantic CPU, or maybe a Minecraft 3D printer.

Minecraft.Print() sure is a nice program [Cody] and [Jason] have there. It would be a shame if anything happened to it. Check out a video demo after the break.

Continue reading “Minecraft Is Now A 3d Design Tool”

A Plotter Made From Lego Parts

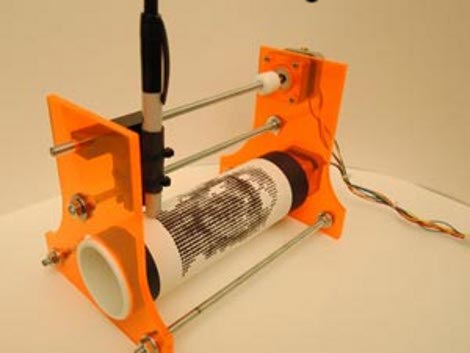
We’re always amazed at what people can come up with using Lego parts, but this hack certainly pushes the limits. Originally conceived as a 3D printer, this plotter is still an impressive proof-of-concept. Ironically, this “3D printer” was build with the hope of winning a Makerbot 3D printer, so be sure to vote for it if you’re impressed.

it’s pretty impressive seeing what [graphmastur] has done using only Lego parts. It’s especially entertaining to see a sheet of Lego “grass” used as the Y-axis table. The build was designed in Lego Digital designer, and the parts are available in “LDD” format or HTML.

This project is explained further in the video after the break. If you’d like to simply see it do a plotting operation, fast forward to around 4:30. The device is not perfect, but as the video says “it worked, pretty well” when drawing a square with an ordinary marker. Continue reading “A Plotter Made From Lego Parts”

CNC-PBDU (pancake Batter Dispenser Unit)

Flapjacks taste infinitely better when they’re machine-made. Well, that’s true for [Mexican Viking] who built an automatic pancake maker to the delight of his family.

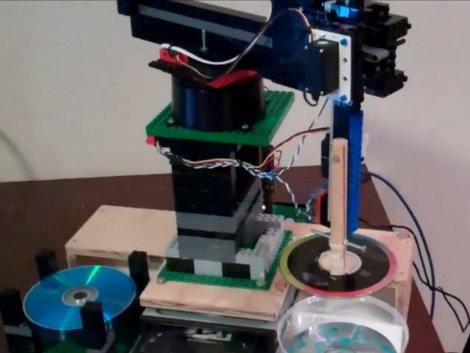
Obviously, the building material of choice is Lego. The machine consists of a base with two linear gears on either side. A gantry is held high above this base, travelling upon geared towers to either side. The writing nozzle, fashioned out of ketchup bottles, can move back and forth along this gantry for a full range of motion along the X and Y axes. Lego pneumatic pumps supply pressurized air which forces the batter out of the bottle reservoir. This dispensing system is extremely clever and worth reading a bit more about. But if you just want us to make with the good stuff, you can see it grilling up pancakes in the video after the break.

The only thing missing is automatic flipping.

Continue reading “CNC-PBDU (pancake Batter Dispenser Unit)”

Gigantic 555 Footstool

The team at Evil Mad Scientist Laboratories needed a footstool. Obviously not content with buying one, they came across the idea of building a 555 footstool.

After finding some dimension drawings of the 555 timer IC, the team scaled everything up 30 times. While a normal DIP-8 555 is around 0.4 inches long, the footstool is over a foot long and eight inches high. The stool was cut on a CNC mill out of 1/2″ plywood, glued together, and finally panted with the correct date code and the logo of Evil Mad Scientist Labs. The finished product is amazing. We’ve been looking for a nice table, and the idea of an 8 foot long wooden 64-pin Motorola 68000 is pretty appealing.

While there’s no electronics in the footstool, it’s not hard to imagine fabricating some aluminum pins and a hollow body so a huge, functional 555 could be built. It would be possible to use discreet components following the block diagram of the 555 to build a huge Atari Punk Console; the gigantic capacitors are fairly easy to build in any event.

Selective Solar Sintering With Sand

[Markus Kayser] built an amazing solar powered SLS printer, but instead of using lasers and powdered plastics his machine uses the power of the sun to heat sand into complex shapes.

[Markus]’ printer uses the same concept as his earlier solar cutter – burning things with a magnifying glass. Interestingly, the printer isn’t controlled with stepper motors and reprap electronics – it’s completely cam driven. The solar panels only power the motor attached to the frame moving on bearings made from skateboard wheels.

We’d guess that [Markus] is using a little more than 2 square meters of Fresnel lenses in his project. Since solar irradiance is about 120 W/m² (PDF warning), [Markus] is concentrating a lot of energy onto a point the size of a quarter, which would be necessary to heat up sand to its 1500° C melting point. The resolution isn’t what you could get with a laser, but [Markus] was able to print an amazing bowl along with other complex 3d shapes.

Check out [Markus]’ video of the solar sinter printer after the break. There’s also a video of his previous experiment with the solar cutter.

Continue reading “Selective Solar Sintering With Sand”