Underwater GoPro Hero 2 Sees Clearly Again

go pro hack

GoPros are great action cameras for snagging photos and videos places where you can’t normally bring real camera gear. The problem is, even with the waterproof GoPro case for the Hero 2 — the underwater videos tend to be blurry and out of focus. Unsatisfied with his videos, [Mitchell] decided to make his own lens for the case!

The waterproof case has a removable concave lens, but for whatever reason it’s not very good underwater. Lucky for [Mitchell], it’s quite easily removed with 6 screws, revealing a nice thick gasket and the lens. Instead of trying to go fancy with some glass element from a broken camera, he’s just taken some 1/4″ plexiglass and cut out a piece to fit the case. It was a bit too thick for the original configuration, so he’s actually flipped the retaining ring upside down to space the lens away from the actual camera. A bunch of silicone later and the case is waterproof again with a new lens!

The resulting footage with the new lens looks awesome underwater — take a peek after the break.

Continue reading “Underwater GoPro Hero 2 Sees Clearly Again”

Using The Raspberry Pi To See Like A Bee

Bee

The Raspberry Pi board camera has a twin brother known as the NoIR camera, a camera without an infrared blocking filter that allows anyone to take some shots of scenes illuminated with ‘invisible’ IR light, investigate the health of plants, and some other cool stuff. The sensor in this camera isn’t just sensitive to IR light – it goes the other way as well, allowing some investigations into the UV spectrum, and showing us what bees and other insects see.

The only problem with examining the UV spectrum with a small camera is that relatively, the camera is much more sensitive to visible and IR than it is to UV. To peer into this strange world, [Oliver] needed a UV pass filter, a filter that only allows UV light through.

By placing the filter between the still life and the camera, [Oliver] was able to shine a deep UV light source and capture the image of a flower in UV. The image above and to the right isn’t what the camera picked up, though – bees cannot see red, so the green channel was shifted to the red, the blue channel to the green, and the UV image was placed where the blue channel once was.

Continue reading “Using The Raspberry Pi To See Like A Bee”

Eye Tracking With The Oculus Rift

ocu

There’s a lot you can do with eye and gaze tracking, when it comes to interface design, so when [Diako] got his hands on an Oculus Rift, there was really only one thing to do.

Like a few other solutions for eye tracking we’ve seen, [Diako] is using a small camera with the IR filter removed to read the shape and location of an eye’s pupil to determine where the user is looking. This did require cutting a small hole near one of the Oculus’ eye cups, but the internal camera works great.

To get a window to the world, if it were, [Diako] slapped another camera onto the front of the Oculus. These two cameras are fed into the same computer, the gaze tracking is overlaid with the image from the front of the headset, and right away the user has a visual indication of where they’re looking.

Yes, using a computer to know where you’re looking may seem like a rather useless build, but stuff like this is used in research and extraordinarily high tech heads up displays. Although he’s not using the motion tracking on the Oculus, if [Diako] were to do so, he’d have the makings of one of the most powerful heads up displays possible.

Continue reading “Eye Tracking With The Oculus Rift”

This Is Not-A-Camera

not a camera

What’s this? A 2-Dimensional wooden camera cut-out? Nope. We lied — it’s actually a digital camera squeezed into 1/2″ sheet of walnut!

[Olivia Barr the Third] originally made this for her 101-year-old grandmother [Olivia Barr the First], who recently got into photography in her late 90’s! [Olivia]  wanted to make her a digital camera that was light and easy to use. She succeeded and has started an art project over at notacamera.tumblr.com — Spy photography? Kind of?

The small 3″ x 3.5″ camera packs an HD video camera with 16-bit mono audio, and is able to take 1280 x 960 stills. It uses a microSD card, a 3.6v 250mAh battery and has a power button, status LEDs and even a USB port.  It was laser cut out of 3 sheets of walnut board and glued together, sandwiching the components in place.

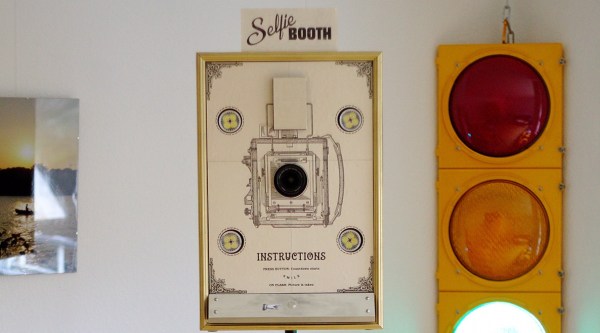
Just for fun, she’s also made a “selfie” version which is laser etched onto a piece of mirror for easy framing of your face.

A Light Painting Infrared Ray Gun

gun

[Noe] over at Adafruit has a really great build that combines the Internet’s love of blinkey LEDs and rayguns with the awesome technology behind extraordinarily expensive thermal imaging cameras. It’s a light painting infrared heat gun, used for taking long exposure photographs and ‘painting’ a scene red or blue, depending on the temperature of an object.

While this isn’t a proper FLIR camera, with a DSLR and a wide open shutter, it is possible to take pseudo-thermal images by simply ‘painting’ a scene with the light gun. This is an absurdly clever technique we’ve seen before and has the potential to be a useful tool if you’re looking for leaks around your windows, or just want to have a useful cosplay prop.

The circuit inside this raygun is based on a contactless infrared sensor connected to an Adafruit Gemma, with the LEDs provided by a NeoPixel ring. There are two 3D printable cases – your traditional raygun/blaster, and a more pragmatic wand enclosure. With either enclosure, it’s possible to take some pretty heat map pictures, as seen in the video below.

Continue reading “A Light Painting Infrared Ray Gun”

Taking Pictures With A DRAM Chip


DRAM Image

This picture was taken by using a DRAM chip as an image sensor (translated). A decapped 64k DRAM chip was combined with optics that could focus an image onto the die. By reading data out of the DRAM, the image could be constructed.

DRAM is the type of RAM you find on the RAM cards inserted into your motherboard. It consists of a massive array of capacitors and transistors. Each bit requires one transistor and one capacitor, which is quite efficient. The downside is that the memory needs to be refreshed periodically to prevent the capacitors from discharging.

Exposing the capacitor to light causes it to discharge faster. Once it has discharged past a certain threshold, the bit will flip from one to zero. To take a picture, ones are written to every bit in the DRAM array. By timing how long it takes a bit to flip from one to zero, the amount of light exposure can be determined. Since the DRAM is laid out in an array, each bit can be treated as a pixel to reconstruct the image.

Sure, modern CCDs are better, cheaper, and faster, but this hack is a neat way to totally re-purpose a chip. There’s even Turbo Pascal source if you’d like to recreate the project.

Thanks to [svofski] for the tip.

RiotNAS: Mobile Storage For Street Photography

riotnas1

You’re likely aware of the protests and demonstrations happening throughout Venezuela over the past few months, and as it has with similar public outcries in recent memory, technology can provide unique affordances to those out on the streets. [Alfredo] sent us this tip to let us know about riotNAS: a portable storage device for photos and videos taken by protesters (translated).

The premise is straightforward: social media is an ally for protesters on the ground in these situations, but phones and cameras are easily recognized and confiscated. riotNAS serves up portable backup storage via a router running OpenWRT and Samba. [Alfredo] then connected some USB memory for external storage and a battery that gives around 4 hours of operating time.

For now he’s put the equipment inside a soft, makeup-looking bag, which keeps it inconspicuous and doesn’t affect the signal.  Check out his website for future design plans—including stashing the device inside a hollowed out book—and some sample photos stored on the riotNAS system. If you’re curious what’s going on in Venezuela, hit up the Wikipedia page or visit some of the resources at the bottom of [Alfredo’s] site.