Motorized Camera Mount Was Once A 3D Printer

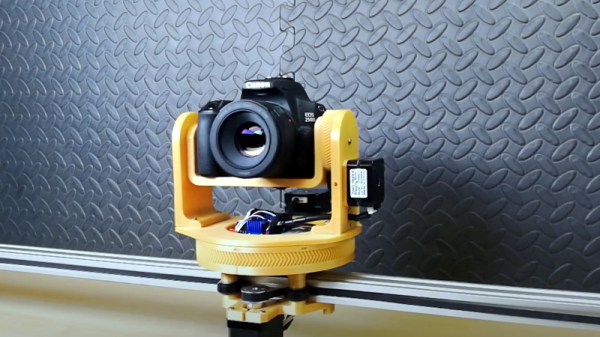
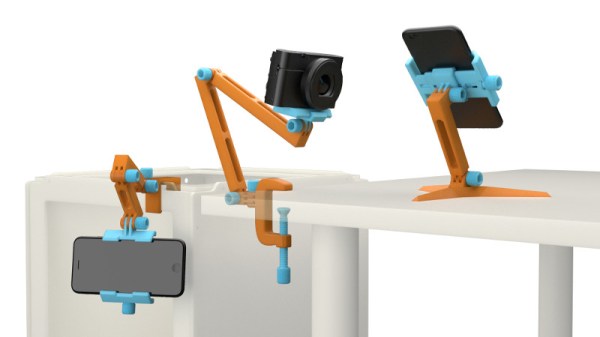
If you plan on building your own motorized camera mount, a 3D printer can definitely be of help. But in this case, [dslrdiy] didn’t use it for printing out parts — finding himself with little use for an old printer built from scrap back in the day, he decided to repurpose it and turn it into a remote controlled DSLR camera mount that’s capable of panning, tilting, and sliding.

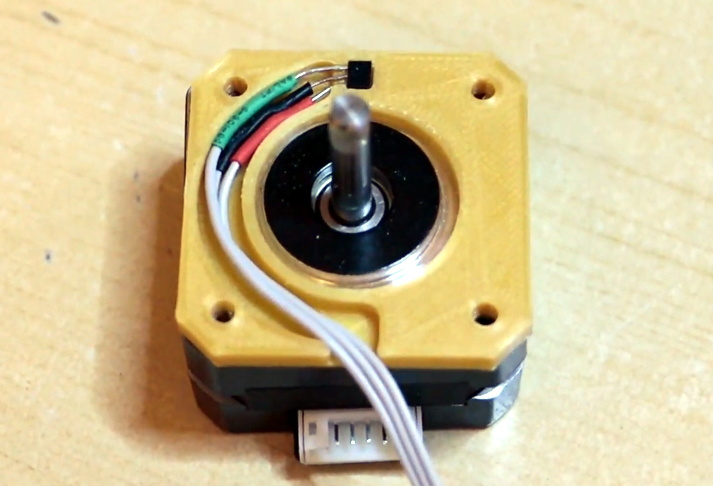
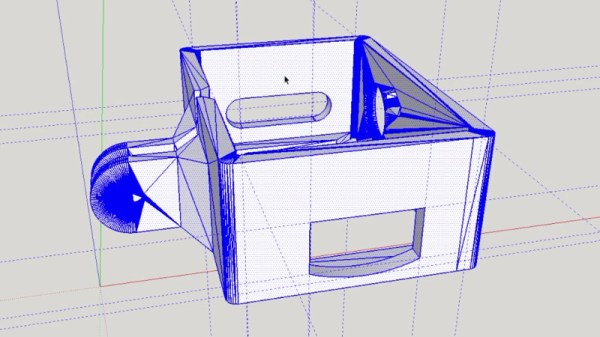
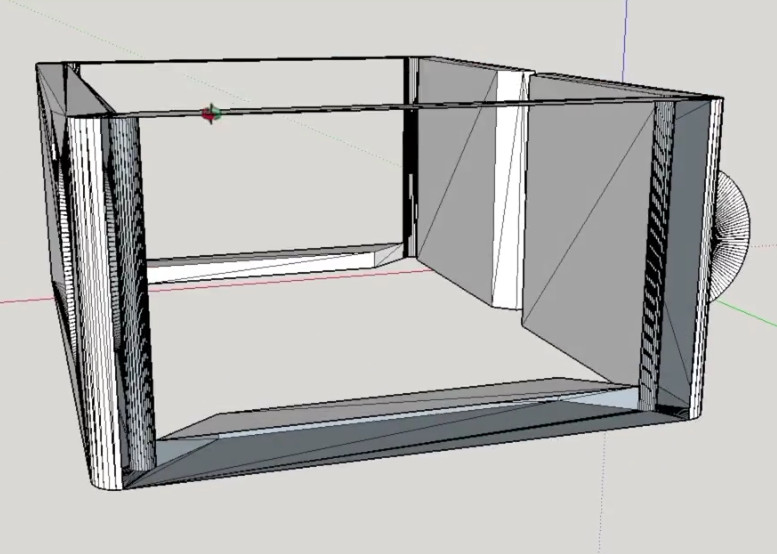
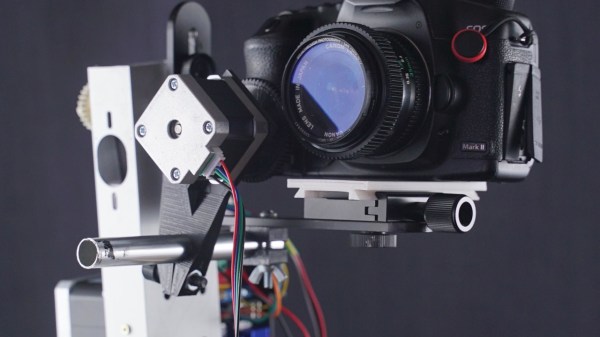
The main goal was to not only salvage the stepper motors and controller board, in this case an Arduino Mega 2560 with RAMPS board, but also to keep the original firmware itself in use. For this to work, [dslrdiy] redesigned the mechanical parts that would allow him to perform the different camera movements using regular G-Code instructions operating the X, Y, and Z axes to pan, tilt, and slide respectively.

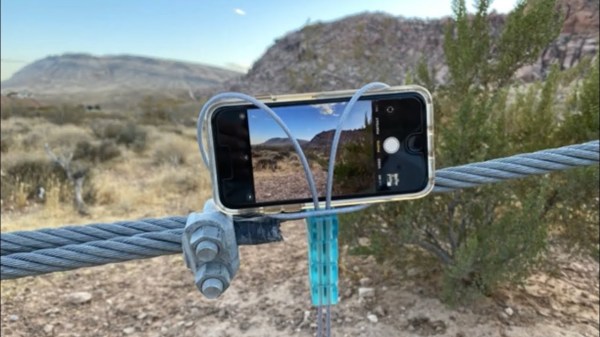
The G-Code instructions themselves are sent via UART by an accompanying control box housing an ESP32. This allows the camera mount to operated by either via joystick and buttons, or via serial Bluetooth connection, for example from a phone. The ESP32 system also allows to set predefined positions to move to, along with speed and other motor tweaks. You can see it all demonstrated in the video after the break.

While there’s simpler solutions for camera mounts out there, this is certainly an interesting approach. It also shows just how far desktop 3D printers have come if we already find the older generations repurposed like this. For more of [dslrdiy]’s work with 3D printers and cameras, check out his customizable lens caps.

Continue reading “Motorized Camera Mount Was Once A 3D Printer”

Build Yourself A Nifty Cable Smartphone Mount

Smartphones have supplanted cameras in day to day use for the vast majority of purposes. However, unlike cameras, they don’t come with tripod mounts or any real good way of holding them in a set position. [Mrballeng] has built an excellent mount, however, that uses cable to hold a smartphone in all manner of positions, for photography or other purposes.

The mount relies on vinyl-coated steel cable. Upon this cable are slotted four blocks that are 3D printed out of resin. The blocks are also fitted with strong magnets. This allows them to be positioned along the vinyl cable while sticking themselves in place thanks to the magnetic attraction to the steel core. The blocks can also be used to attach the cable to magnetic objects like drywall screws or light fittings.

Using the mount is simple. The cable is wrapped around the phone and the blocks cinched up to hold it in place. Then, the magnets in the blocks can be used to hold the phone to walls or other surfaces.

It’s a tidy build, and one we can imagine using regularly if we had one. Of course, there’s no reason you couldn’t produce the parts on a more common filament-based printer, either. We’ve seen some other great smartphone photography hacks too, like this mod that lets you use your phone as a microscope for under $10. Video after the break.

Continue reading “Build Yourself A Nifty Cable Smartphone Mount”

Making A 3D Printed DSLR Camera Mount Even Better

We’d love to say that all of our projects worked perfectly on the first try, but the average Hackaday reader is a bit too experienced to buy a fib like that. The reality is, DIY projects rarely get everything right out of the gate. It takes some time to identify issues and work out all the kinks. But of course, that’s half the fun.

For a perfect example of this process, check out the latest update on the 3D printed DSLR camera mount that [isaac879] has been working on. When we last checked in with this project over the summer the mount was already impressive, but with the latest improvements and the addition of a whole new axis of movement, this homebrew camera motion system is an extremely compelling project for anyone who wants to take their project videos to the next level.

The new Hall effect sensor mounts are a very nice touch.

Back in June, the mount [isaac879] showed off was only capable of pan and tilt. But as you can see in the video after the break, he’s since mounted that to a track made of 20×40 aluminum extrusion and added another stepper motor. This allows the pan/tilt mount to move itself back and forth on the track to get those slick panning shots that all the cool kids use in their videos nowadays.

But even if you’re not interested in the slider aspect, the core pan/tilt mount has also received a number of refinements over the last few months. Perhaps the most obvious is the switch over to thinner and lighter stepper motors. Reducing mass is always an improvement with a moving system like this, and in the case of the pan motor, the shorter can prevents a potential collision with the camera itself. Obviously the smaller motors are weaker, but [isaac879] considers that a feature; the mini motors will just start skipping steps if things get bound up instead of potentially damaging your expensive camera.

He’s switched to flange bearings to help hold the frame together, improved wire routing, added a mounting point for the electronics, reprinted the pinion gears in a flexible filament to help absorb some vibrations, and switched over to TMC2208 stepper drivers. The new drivers may actually be one of the biggest usability upgrades, as they allow the entire mount to move faster and more accurately. Critically, [isaac879] also reports the new drivers have solved a troublesome vibration issue he was seeing when the camera was moving slowly.

Obviously you can throw together a simple pan and tilt mount with a couple of servos and some zip ties if you only need to use it once or twice, but a project of this caliber would rightfully become a permanent fixture in your workspace. Perfect if you’re looking to up your project photography game.

Continue reading “Making A 3D Printed DSLR Camera Mount Even Better”

Giant Bearing Is At The Heart Of A Camera Mount

We bet you have all some cool part in your bin that is just gnawing at you to build something cool. That doodad, possibly from a garage sale, surplus store, or clearance rack deserves a project fitting of its near-infinite potential. [isaac879] finally marries a giant ball bearing with his passion for photography in the form of a pan-tilt camera mount for his Canon DSLR. The problem with tossing your golden-ticket part into a project is that not everyone has a MacGuffin, or a brand new one might be bank-breakingly expensive, so he does us a favor and makes a drop-in replacement that you can print and fill with 6mm brass bbs. This sort of thing is why we love hackers.

The camera mount has the features we expect to see in a robust stepper mount, such as infinite spinning, time delay, and an Xbox controller interface. Inside the base is the industrial bearing or its plastic replica, and that wide base won’t be tipping over anytime soon. Gearing all around is of the herringbone style, of the type you find in classroom pencil sharpeners because they transfer power smoothly. Speaking of things going smoothly, we enjoyed his assembly montage where every part fits together perfectly and there is not a naughty word to be uttered. Just like real life.

If you like homemade bearings, check out this slew bearing that looks like it was made with Perler beads, and we have a self-aligning camera tripod mount for the photography buffs.

Continue reading “Giant Bearing Is At The Heart Of A Camera Mount”

A Modular Mounting System Via 3D Printing

When working with cameras or other tools, it can often be useful to have some manner of stand or tripod to hold things in position, freeing up one’s hands for other tasks. Unfortunately, when it comes to smaller cameras and devices like smartphones and tablets, there are few standardized solutions. [yyh1002] has skirted the problem by creating a customizable modular mounting system, and it’s taken the 3D-printing world by storm.

The system was inspired by GoPro mounts, which are a system of plastic arms and screws that can effectively position the small devices in all manner of orientations. [yyh1002]’s system is GoPro-compatible, using the same fasteners and similar geometry, and tons of other modelers have added on.

The parts are 3D printed and consist of a series of arms, clamps and joints that can be configured to suit the task at hand. Source files are available, which allows custom version to be made. This is useful for modifying parts like phone holders to suit different models, to avoid fouling buttons or interfering with camera placement. Thus far, the community has contributed parts as diverse as G-clamps, camera mounts, and parts to mate to Playstation controllers. (Editor’s note: I’m actually printing out a Pi Zero case from this series as I edit this post. Coincidence!)

It’s a useful system, and we look forward to seeing more parts uploaded in future. Meanwhile, don’t forget – it’s remarkably easy to tripod mount just about anything.

Customizing STLs For Off-Brand Devices

[Rob Clarke] needed a mount for his off-brand action camera, but it’s not exactly the kind of thing with a bustling accessory market. To make matters worse, it turns out the camera is so low-key that he couldn’t find a 3D printable mount for it either. Luckily, a check with his calipers confirmed his camera is just about the same size as an old GoPro Hero 3, so all he had to do was modify an existing design to fit his needs.

As anyone who’s worked with STL files will tell you, they are a pain to modify. An STL is essentially a completed solid model, and not really meant to be fiddled around with. It’s a bit like trying to take an edited image and get back to the layers that were used to create it in Photoshop or GIMP. The final output has been “flattened”, so that granular control is lost.

That being said, [Rob] got rather lucky in this case. He found a GoPro mount that was about 90% there, he just needed to adjust the depth and change the positioning of the holes on the side. He loaded the STL into SketchUp, deleted the two sides, and replaced them with new surfaces. This gave him a clean slate to add the appropriate openings for his camera’s USB port and microSD card. To adjust the depth of the mount, he simply stretched the model out on the Z axis.

[Rob] event went ahead and released his modified STLs as a remix of the original case he found on Thingiverse for anyone else that has the same camera. That’s what we love to see.

If you’re interested in learning more about using SketchUp for designing 3D printed parts, check out this excellent guide by our very own [Brian Benchoff].

Continue reading “Customizing STLs For Off-Brand Devices”

Featured Image

Giving A Camera Mount A Little (Magnetic) Attractiveness

It’s probably safe to say that most hackers and makers don’t really want to fuss around with the details of making video documentation of their work. They would rather spend their time and energy on the actual project at hand…you know — the fun stuff.

[Daniel Reetz] has been wanting more mounting options for his camera mount to make it easier and quicker to set up.  One end of his existing camera mount is a clamp. This has been working for [Daniel] so far, but he wanted more options. Realizing that he has plenty of ferrous metal surfaces around his shop, he had an idea — make a magnetic base add-on for his camera mount.

In the video, [Daniel] walks us through the process of creating this magnetic camera mount add-on, starting with the actual base. It is called a switchable magnetic base (or mag-base as he calls it) and looks like a handy little device. This was surely the most expensive part of the build, but looks like it should last a very long time. Basically, it’s a metal box with magnets on the inside and a rotating switch on the outside. When the switch is in one position, the box’s bottom is magnetic. Rotate the switch to the other position, and the bottom is no longer magnetic. These switchable magnetic bases come with a stud on top for attaching other things to it, which it looks like [Daniel] has already done. From there on out though, he explains and shows the rest of the build.

Some mild steel rod was cut and modified to slip into the pipe. The rod is held in place by a set screw which allows for easy adjustment of the mount’s height. Then he welds the rod to a washer which is, in turn, welded to a tube. After the welding, he takes the whole thing to a deburring wheel to clean it up. After that, the final touches are made with some spray paint and a custom 3D printed cap.

Sprinkled throughout the video are some useful tips, one of them being how he strips the zinc off of the washer with acid prior to welding. The reason for this is that you don’t want to weld over zinc because it produces neurotoxins.

Now [Daniel] can attach his camera mount quickly just about anywhere in his shop with the help of his new magnetic base.

There’s no shortage of camera mount hacks that we’ve covered. Here’s another one involving a magnet, but also has an automatic panning feature. Do you need a sliding camera mount? How about a motorized sliding camera mount — enjoy.

Continue reading “Giving A Camera Mount A Little (Magnetic) Attractiveness”