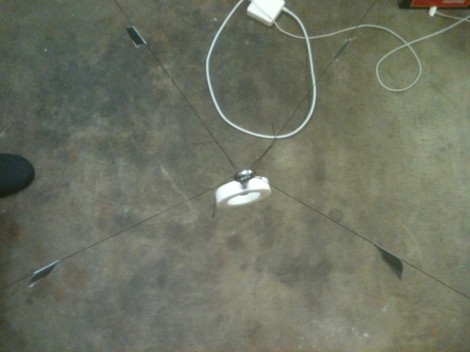
Laser-triggered Camera Rig Update: 2011 Version

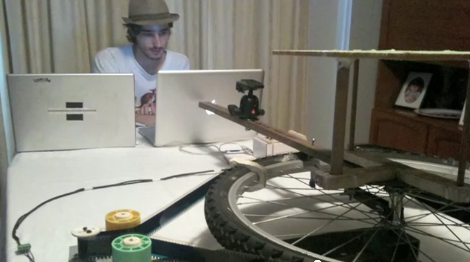
[Fotoopa] keeps churning out new iterations of his laser-triggered camera rig. This is his latest, which he calls the 2011 setup. Regular readers will remember that we just covered a different version back in November; that one was the 2010 rendition. It had two DSLR cameras offset by 90 degrees with mirrors to face forward. This time around he has gone back to the single camera setup which was what he used on the first and second versions seen way back in 2008.

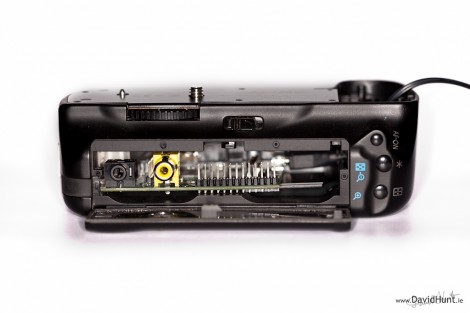
Whew, that’s a lot of links to specialty DSLR hardware. Let’s bring it back to this newest model (the link at the top). The biggest improvement is the shutter delay between when the laser beam is tripped and the image is take. [Fotoopa] reports that he’s managed to reduce that time down to 3.3 milliseconds. This is thanks to an external shutter replacement which improves on the stock shutter’s 52 millisecond delay.

For those that are seeing this for the first time. [Fotoopa] uses this rig to photograph insects in motion. A laser trip wire is responsible for triggering the shutter, and it does so with stunning results!

Build An Intervalometer With These Simple Fabrication Techniques

[L] just finished building this intervalometer and his verbose documentation of the project has a little bit of everything. The fabrication uses common prototyping materials, and simple skills that are easy to master even for the beginner.

The hardware is based around an ATmega8 microcontroller. After snooping around the Internet [L] wanted to see if the voltage divider based focus and shutter commands that are present in some camera remote shutter controls would work for his model. Investigation with a commercial shutter release showed him how it was done, so he incorporated that into his design. When it comes to firmware for the device we really like his explanation of the menu system. There’s a lot of settings and he did a great job of planning the user interface to make them all work on the finished product.

The schematic and board layout were done with Eagle. During the layout process he made choices for easy assembly using strip board, and even walks us through the steps when cutting the traces and adding jumper wires. It’s nicely finished in this clear plastic case and demonstrated in the video after the break.

Continue reading “Build An Intervalometer With These Simple Fabrication Techniques”

Rainbow Machine Livens Up Any Photograph

rainbow-machine

[Shameel Arafin, Sean McIntyre, and Reid Bingham] really dig rainbows. Going by the moniker the “RainBroz”, the trio built a portable display that can be used to add cool light painting effects to pictures.

The group brings their Rainbow Machine all over the place, including parties, gatherings, and random spots on the street. Anyone is welcome to have their picture taken with the Rainbow machine, and each subject is given a card with a URL on it, so that they can check out their picture whenever they please.

The display consists of addressable RGB LED strips and an Arduino from Adafruit, along with the associated support mechanisms for moving the LEDs. The real magic is carried out by the LPD8806 light painting library, also from Adafruit, which enables the RainBroz to create all sorts of images with little fuss.

As you can see in the video below, the Rainbow Machine seems to get a pretty warm reception from just about everyone, even people grabbed right off the street. It looks simple enough to build, so why not put one together for your next gathering?

Continue reading “Rainbow Machine Livens Up Any Photograph”

Focus Fix For Non-reflex 35mm Camera

For camera fanatics the acquisition of an old camera is a thrilling event. But if you’re going to collect them, you’d better have some repair skills so that you can also use them. [Fernando’s] latest find was this Minox 35mm camera. The aperture needed cleaning, and after reassembling the unit he realized the he had not marked the focus ring when taking it apart. This is not a reflex camera, so you can’t look in the view finder to adjust focus. He came up with his own method to get the focus ring calibrated.

The focal point needs to focus on the film. He simulated this plane using some magic tape, which removes easily without leaving a residue. When the shutter is open, you can see the image projected on this translucent surface. He then set up the camera with the lens 90 cm from a bright light bulb. By adjusting the focus to create a sharp image on the temporary screen, he knows the focus is calibrated, and can reset the focus ring to the 0.9m mark.

Need some help developing that exposed film? You could always give the coffee and vitamin C hack a try.

Knockoff Game Controller Makes A Fine Remote Shutter Release

remote-shutter-release

[Duncan Murdock] received a Canon DSLR camera for Christmas and wanted a remote shutter release to go along with it. Since nary a store was open on Christmas, he was pretty much out of luck. Scrounging around in his parts drawer, he found all sorts of goodies waiting to be reused, including a knockoff Wii nunchuck.

He pulled the original cable from the nunchuck and replaced it with an old telephone wire, attaching a 2.5mm plug to the end. The plug goes directly into his camera’s control port, allowing him to trigger the auto focus and shutter mechanisms with the push of a button.

We like the idea of a junk controller being recycled for use in a camera, though we think it has far more potential than being used as a simple wired trigger. If both the nunchuck and camera were fitted with some sort of wireless interface (Bluetooth, IR, etc), we think it would make a great addition to any hobby photographer’s kit.

Motorized Camera Mount Unexpectedly Popular For CNC-aimed Hardware

Here’s a camera mount that moves smoothly along a motorized sled. [Bart Dring] created the system and was surprised by it’s popularity, having received several sales requests from photographers. He originally designed the linear bearing system, called the MakerSlide as an inexpensive alternative to other CNC machine solutions. Allowing a computer to map out timed movements for video shots wasn’t on his radar then, but as you can see in the clip after the break, the MakerSlide does an amazing job at it.

The modular track system makes it easy to attach to a base. In this case, a couple of pieces of acrylic let him support both ends of the track on standard camera tripods. [Bart] mentions the knowledge gap between people who work with CNC milling hardware and photographers as an issue in deciding how to control the system. Since photographers aren’t likely to be proficient in EMC2, he designed a control application with an Arduino. It uses a stepper motor controller shield, and does some fancy math to make sure there is smooth acceleration, etc.

Continue reading “Motorized Camera Mount Unexpectedly Popular For CNC-aimed Hardware”

IR Remote For DSLR Cameras

Since most DSLR cameras now have an IR communication port, [Julius] thought it would be a good idea to build an  IR shutter release remote. He has released the plans for two versions; a single sided hand etched one, and a double sided one to have made professionally. He notes that it should have a range of at least 10 meters thanks to the 100mAh Li-Po battery and a reasonably high power IR LED.  You can download the source code as well as the etching mask and eagle files from the wiki page.  He does note that you may have to change the pattern sent to match your camera.