Easy Workout Logging With Ethernet-enabled Exercise Bike

It will be easy to keep your exercise routine on track if you don’t have to do anything at all to log your workouts. [Reefab] developed this add-on hardware for his exercise bike that automatically logs his workout on the Internet.

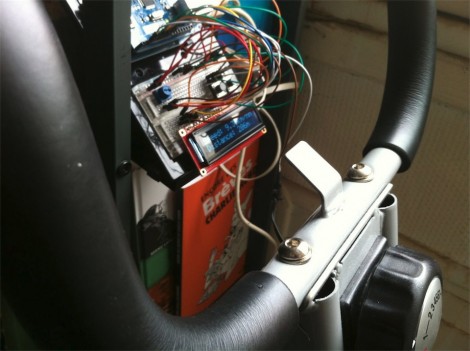
He’s using RunKeeper to store and display the workout data. They offer a token-based API which [Reefab] implemented in his Arduino sketch. The hardware to grab data from the exercise bike is quite simple to set up. A rare-earth magnet was added to the fly-wheel with a reed switch positioned next it in order to measure the number and speed of rotations. This is exactly how a consumer bicycle computer works, needing just one accurate measurement corresponding to how far the bike travels with each revolution of that wheel.

In addition to the networked-logging feature [Reefab] included a character display so you can follow your speed and distance data during the workout.


DyIO Is A Huge Robotics Development Board

[Kevin] wrote in to tell us about the robotics development platform he’s been working on for the last few years. He calls his device the DyIO, and looks like an extremely easy way to get a robot up and running quickly.

Because the DyIO stands for Dynamic Input & Output, [Kevin] thought it was important to put 24 separate IO pins in his build. These pins can serve as 24 digital inputs or outputs, a few analog inputs and PWM outs, or even DC motor controls.

What’s really interesting is the SDK that [Kevin] and his team chose to build. With this SDK, you can program the DyIO in Java or just about any other language you would want. Already, [Kevin] and his team have built a few interesting projects around the DyIO, like a hexapod robot and animatronic pokemon. While we’re sure something awesome beyond imagination is waiting to be built with the DyIO platform, you can check out these already-completed builds after the break.

Continue reading “DyIO Is A Huge Robotics Development Board”

Weekly Roundup 3/3/11

In case you missed them the first time, here are our most popular posts from the past week:

In first place is a post about a video by [Rear Admiral Grace Hopper] where she talks about how to visualize a nanosecond using a piece of copper wire.

Coming in at second is one that we are pretty excited about here at HAD. The Raspberry Pi has finally launched! For those of you who haven’t been following its progress, this is a small (roughly the size of a credit card) Linux computer that costs only $35 for the better model! We can think of all sorts of things that we would like to use them for but alas, even we can’t get our grubby hands on them quite yet since they are already completely sold out.

Next we have a weather station for the virtual weather within Minecraft. This project uses a small LCD and an Arduino to tell you if you need to be wearing your virtual raincoat.

If you have been looking for a way to anodize titanium at home instead of sending out your parts to a service, here is a post for you.

Finally, we finish up with a post that we like a lot. It is about three remote controlled ‘airplanes’ that were flown near the Brooklyn Bridge that look a lot like people when seen from a distance.

Very Easy 3D Scanning Software With ReconstructMe

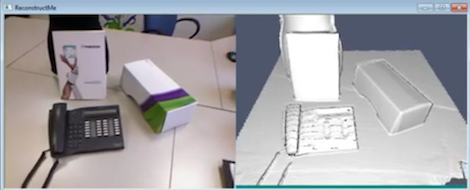
[Maxzillian] sent in a pretty amazing project he’s been beta testing called ReconstructMe. Even though this project is just the result of software developers getting bored at their job, there’s a lot of potential in the 3D scanning abilities of ReconstructMe.

ReconstructMe is a software interface that allows anyone with a Kinect (or other 3D depth camera) in front of a scene and generate a 3D object on a computer in an .STL or .OBJ file. There are countless applications of this technology, such as scanning objects to duplicate with a 3D printer, or importing yourself into a video game.

There are a few downsides to ReconstructMe: The only 3D sensors supported are the xBox 360 Kinect and the ASUS Xtion. The Kinect for Windows isn’t supported yet. Right now, ReconstructMe is limited to scanning objects that fit into a one-meter cube and can only operate from the command line, but it looks like the ReconstructMe team is working on supporting larger scans.

While it’s not quite ready for prime time, ReconstructMe could serve as the basis for a few amazing 3D scanner builds. Check out the video demos after the break.

Continue reading “Very Easy 3D Scanning Software With ReconstructMe”

Building Your Own Portable 3D Camera

diy-3d-camera

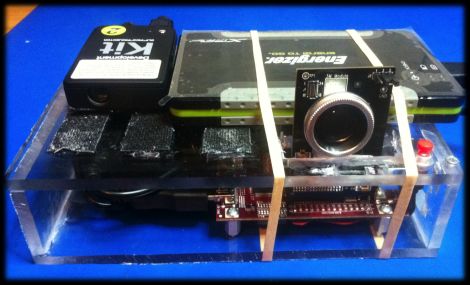
[Steven] needed to come up with a project for the Computer Vision course he was taking, so he decided to try building a portable 3D camera. His goal was to build a Kinect-like 3D scanner, though his solution is better suited for very detailed still scenes, while the Kinect performs shallow, less detailed scans of dynamic scenes.

The device uses a TI DLP Pico projector for displaying the structured light patterns, while a cheap VGA camera is tasked with taking snapshots of the scene he is capturing. The data is fed into a Beagleboard, where OpenCV is used to create point clouds of the objects he is scanning. That data is then handed off to Meshlab, where the point clouds can be combined and tweaked to create the final 3D image.

As [Steven] points out, the resultant images are pretty impressive considering his rig is completely portable and that it only uses an HVGA projector with a VGA camera. He says that someone using higher resolution equipment would certainly be able to generate fantastically detailed 3D images with ease.

Be sure to check out his page for more details on the project, as well as links to the code he uses to put these images together.

mot-salvaging

Tutorial Series Shows You Everything You Need To Salvage Transformers From Microwaves

Transformers certainly have a tendency to increase the cost of any project, especially if you need a large transformer to get the job done. Microwave ovens are great sources of free transformers, though they are not always in the shape required for your next build.

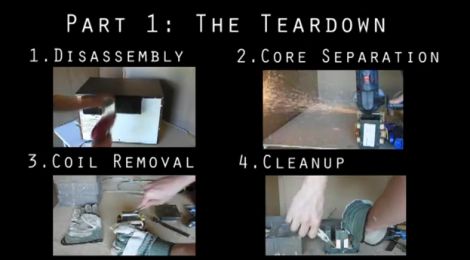
[Matt] put together three great tutorial videos covering the basics of salvaging Microwave Oven Transformers (MOTs), that anyone new to the process should watch before giving it a go. The first video covers MOT removal and disassembly, which is a time consuming yet easy process providing you follow [Matt’s] pointers.

The second video delves into transformer theory, and discusses how to achieve optimal performance when rebuilding an MOT or hand wrapping coils to fit your project specs. The third video in the series follows [Matt] as he rebuilds one of the salvaged transformers, documenting his pitfalls and successes along the way.

If you haven’t given much thought to salvaging MOTs, we definitely recommend taking a bit of time to watch the video series in full – it’s definitely worth it.

You can see the first video in the series after the jump – the rest can be found via the YouTube link above.

Continue reading “Tutorial Series Shows You Everything You Need To Salvage Transformers From Microwaves”