Four Seasons In One Photo

What an interesting way to show a year: Norwegian hacker [Erikso] created a condensed timelapse that shows a year in a single photo. He had taken a timelapse of the view from his living room window in the frozen north every day during 2010, using a camera that was locked in place taking an image every 30 minutes. Then, with the help of some hacker friends, he came up with a script that slices these images up and combines them so that each day is represented by a vertical slice. The result is a gorgeous image that gives a wonderful sense of the seasons, and how that affects the trees. You can see the leaves grow and fall, and the snow on the ground come, go and come again.

Continue reading “Four Seasons In One Photo”

Nikon Resurrection: Repairing A Broken Lens

Modern DSLR cameras are amazing devices. Mechanics, electronics, and optics, all rolled up in a single package. All that technology is great, but it can make for a frustrating experience when attempting any sort of repair. Lenses can be especially difficult to work on. One misalignment of a lens group or element can lead to a fuzzy image.

[Kratz] knew all this, but it didn’t stop him from looking for a cheap lens deal over on eBay. He found a broken Nikon DSLR 55-200mm 1:4-5.6 AF-S VR camera lens for $30. This particular lens is relatively cheap – you can pick up a new one for around $150 online. Spending $30 to save $120 is a bit of a gamble, but [Kratz] went for it.

The lens he bought mostly worked – the auto-focus and vibration reduction system seemed to be fine. The aperture blades however, were stuck closed. Aperture blades form the iris of a lens. With the blades closed down, the lens was severely limited to brightly lit situations. All was not lost though, as the aperture is a relatively simple mechanical system, which hopefully would be easy to repair.

pinNikonKeeping screws and various parts in order is key when taking apart a lens. [Kratz] used a tip he learned right here on Hackaday: He drew a diagram of the screw positions on a thick piece of paper. He then stuck each screw right into the paper in its proper position.

Carefully removing each part, [Kratz] found a pin had slipped out of the rod that connects the lens’ internal parts with the external aperture control arm. Fixing the pin was simple. Getting the lens back together was quite a bit harder. Several parts have to be aligned blindly. [Kratz] persevered and eventually everything slipped into alignment. The finished lens works fine, albeit for a slightly noisy auto-focus.

It’s worth noting that there are service and repair manuals for many cameras and lenses out there in the dark corners of the internet, including [Kratz]’s 55-200 lens. Reading the repair procedures Nikon techs use shows just how many tools, fixtures, and custom bits of software go into making one of these lenses work.

Build Your Own Thermal Camera

We have featured thermal camera projects by [Max Ritter] before, but [Max] has just taken the next step: he is offering the latest version as a build-it-yourself kit. The DIY Thermocam improves on his previous designs by capturing 60 by 80 pixel thermal images, which can be combined with visible light images from an accompanying  640 by 480 pixel camera to produce the final image. It is built around the FLIR Lepton module that has been used in many of the recent commercial thermal cameras that we have seen. Max has also added a battery and display, making the whole thing a standalone camera.

The firmware that runs all this is open-source and written in C++ for easy modification, so users can build their own thermal camera.”The approach is to offer people the self-assembly kit so that they can use it as a development platform to do whatever they want to achieve with thermal imaging”[Max] told us. The kit runs €429 (about $468), with free shipping worldwide.

Continue reading “Build Your Own Thermal Camera”

Seeing Around Corners With Frickin’ Lasers

Researchers at the University of Edinburgh and Heriot-Watt University have created a sensor that can see around corners using lasers, high speed cameras, and some intense data processing. They can essentially turn a laser light source into a virtual mirror to look through.

Led by [Genevieve Gariepy], the team has been able to prove their research in a lab setting, and are now trying to refine it to work in the real world. While the animated image above makes the system seem rather simple, the tech behind it makes our heads hurt.

The timing measurement alone for the laser light to bounce off the hidden object and be reflected to where the camera can see it needs to be accurate down to the 500 billionth of a second (500 nanoseconds). Five hundred billionths.

Continue reading “Seeing Around Corners With Frickin’ Lasers”

Keeping The LiPo Smoke Where It Belongs

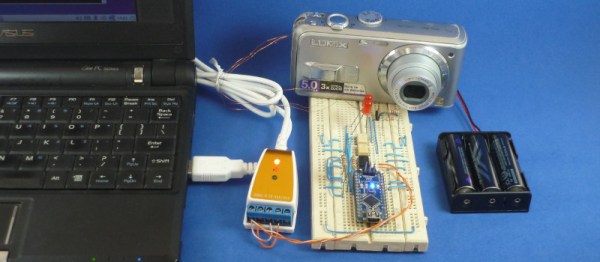
Nothing brings joy to a hacker’s heart like taking a cheap gizmo and making it useful. Over at Hackaday.io [AndyHull] popped open some cheap LiPo battery power packs to see if he could power a Canon Powershot camera. The entire shebang would be left in the wilderness for photography so keeping it inexpensive was a big goal since it might be destroyed or lost.

The power packs [Andy] looked at have a TP4221 controlling the charge cycle for up to four 18650 LiPo cells connected in parallel. The controller also boosts the voltage to 5 volts for one or two USB ports while providing automatic shutdown if the LiPo cell voltage drops below 3.2v. Below that voltage the cells can be damaged and might possibly cause a fire.

The packs [Andy] used also had a torch output to drive an LED almost directly from the cells. That output is a nominally 3.8 V at 100 mA which is just what he needed to power the Canon Powershot. It could be used to power small micros or other low power devices.

The LED was removed and replaced by a connection to outside the pack. The torch output is triggered by two quick presses on a switch that was also replaced with a connector to allow remote control.

If you’re looking for powerful battery options, give LiPo a try and have a look at [Andy]’s LiPo battery safety issues post, also on Hackaday.io. For a broader LiPo overview, see this obsessive rundown of various batteries.


Hacklet 86 – Time-lapse Projects

“If I could save time in a bottle…” it’s not just an old song, it’s a passion for many photography hackers. Time-lapse photography is a way to show the movement of time through still images. These images are animated into what essentially is a video recorded at a super low frame rate. We’re talking one frame per minute or slower in some cases! The camera doesn’t have to be still for all this, but any motion must be carefully controlled. This has led hackers, makers, and engineers to create a myriad of time-lapse rigs. This week’s Hacklet is all about some of the best time lapse projects on Hackaday.io!

rig-1We start with [Swisswilson] and the simply named Timelapse rig. To say this rig is beefy would be an understatement. All the aluminum parts, with the exception of the gears, were machined by [Swisswilson]. Two Nema-23 Nema-17 motors are controlled by Sparkfun Easy Stepper Drive boards, while an Arduino Micro serves as the controller. The electronics are all housed in a sturdy box which also serves as a remote control. A joystick allows pan and tilt to be manually controlled. The bombproof construction is definitely a help here, as [Swisswilson] is using this rig with DSLR cameras. Combined with a lens, these setups can reach a pound or two.


pilapseNext up is [minWi], who put their script-foo to work with raspilapse. Raspilapse automates the entire process of taking photos, assembling them into a movie, and uploading to YouTube. The hardware is a Raspberry Pi Model B, with a RasPi Camera. The Pi shoots images then uploads them to a Virtual Private Server (VPS). [minWi] used an external server to save wear and tear on the Pi’s SD storage card. At the end of the day, the VPS uses ffmpeg to assemble the images into a video, then uploads the whole thing to YouTube. We’re betting that with a few script mods, this entire process could be run on a Raspberry Pi 2. If you’re really worried about the SD card, a USB flash drive could be used.


SunriseSunsetRig[Andyhull] takes us down to one frame per day with Sunset and Sunrise camera controller. [Andy] wanted to get shots of the sunrise every day. Once converted to a video, these shots are great for documenting the passing of the seasons. He used a Canon point and shoot camera along with the Canon Hack Devleoper’s Kit (CHDK) for his camera. The camera has its own real-time clock, and with CHDK, it can be programmed to shoot images at sunrise. The problem is power. Leaving the camera on all the time would quickly drain the batteries. Arduino to the rescue! [Andy] programmed an Arduino Pro Mini to turn the camera on just before sunrise, then shut it back down. The standby power of a sleeping ATmega328 is much lower than the camera’s, leading to battery life measured in weeks.


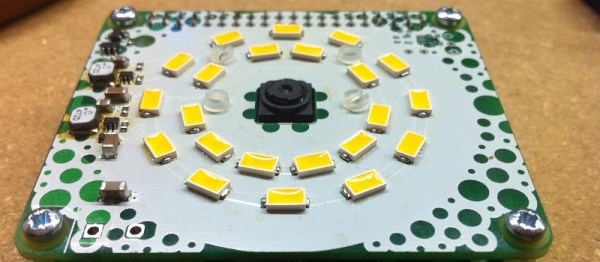
podFinally, we have [caramellcube] who added data to their time-lapse photos with Portable Observation Device (POD). POD was conceived as a device to aid paranormal investigators. The idea was to have a device that could take images and record data at a set interval from within a locked room. Sounds like a job for a Raspberry Pi! [caramellcube] started with Adafruit’s Raspberry Pi-based touchscreen camera kit. From there they added a second board controlled by an Arduino Nano. The Nano reads just about every sensor [caramellcube] could fit, including humidity, air pressure, magnetic field strength, acceleration, light (4 bands), sound, and static charge. The Nano allows [caramellcube] to connect all those sensors with a single USB port on the Pi. We’re not sure if [caramellcube] has found any ghosts, but we’re sure our readers can think of plenty of uses for a device like this!

If you want to see more time-lapse projects, check out our new time-lapse projects list! If I missed your project, don’t be shy, just drop me a message on Hackaday.io. That’s it for this week’s Hacklet. As always, see you next week. Same hack time, same hack channel, bringing you the best of Hackaday.io!

3D Printed Lens Gears For Pro-grade Focus Pulling

Key Grip, Gaffer, Best Boy – any of us who’ve sat through every last minute of a Marvel movie to get to the post-credits scene – mmm, schawarma! – have seen the obscure titles of folks involved in movie making. But “Focus Puller”? How hard can it be to focus a camera?

Turns out there’s a lot to the job, and in a many cases it makes sense to mechanize the task. Pro cinematic cameras have geared rings for just that reason, and now your DSLR lens can have them too with customized, 3D printed follow-focus gears.

Gear_Selection_01_full_render_preview_featuredUnwilling to permanently modify his DSLR camera lens and dissatisfied with after-market lens gearing solutions, [Jaymis Loveday] learned enough OpenSCAD to generate gears from 50mm to 100mm in diameter in 0.5mm increments for a snug friction fit. Teamed up with commercially available focus pulling equipment, these lens gears should really help [Jaymis] get professional results from consumer lenses. 

Unfortunately, [Jaymis] doesn’t include any video of the gears in action, but the demo footage shown below presumably has some shots that were enabled by his custom gears. And even if it doesn’t, there are some really cool shots in it worth watching.

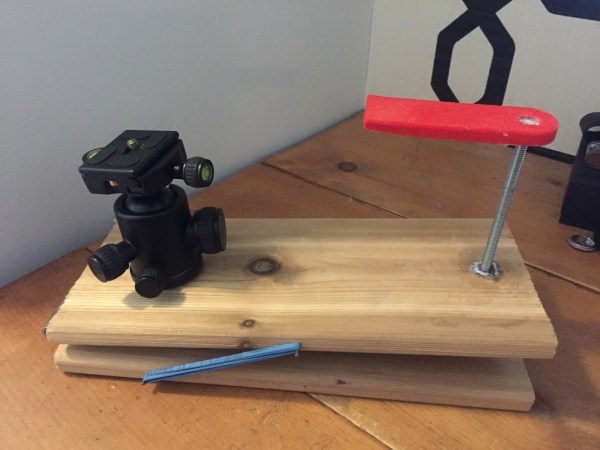
And for the budding cinematographers out there without access to a 3D printer, there’s always this hardware store solution to focus pulling.

Continue reading “3D Printed Lens Gears For Pro-grade Focus Pulling”