Getting A Textured 3D Scan From Just A Webcam

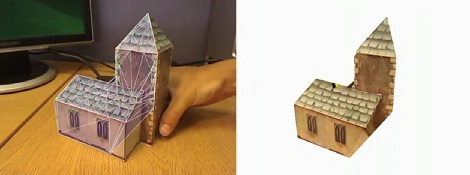
Here’s an oldie but a goodie that passed us up the first time it went around the Internet. [Qi Pan], (former) PhD student at Cambridge, made a 3D modeling program using only a simple webcam. Not only does this make very fast work of building 3D models, the real texture is also rendered on the virtual object.

The project is called ProFORMA, and to get some idea of exactly how fast it is, the model of a church seen above was captured and rendered in a little over a minute. To get the incredible speed of ProFORMA, [Qi] had his webcam take a series of keyframes. When the model is rotated about 10°, another keyframe is taken and the corners are triangulated with some very fancy math.

Even though [Qi]’s project is from 2009, it seems like it would be better than the ReconstructMe, the Kinect-able 3D scanning we saw a while ago. There’s a great video of [Qi] modeling a papercraft church after the break, but check out the actual paper for a better idea of how ProFORMA works.

Continue reading “Getting A Textured 3D Scan From Just A Webcam”

Gigantic Liquid Crystal Display Is Like A Giant Calculator

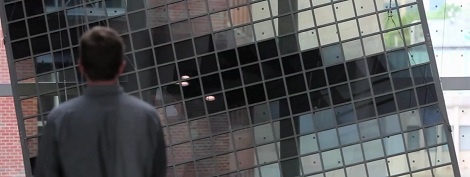
Some say he turns on his soldering iron by saying, “Flame on!.” He deadbug solders – QFP packages. All we know is he’s called [stig] and he sent in an awesome an awesome video of a new display at the Nature Research Center in Raleigh, North Carolina. It’s a 10 foot by 90 foot LCD display that uses 6 inch square glass panels containing the same liquid crystals you’d find in a calculator.

The display/installation is called Patterned by Nature and is built using 3600 pieces of LCD privacy glass. When a voltage is applied to the glass it changes from clear to opaque. While this technology has been around for decades (just look at your calculator), only in the last few years has LCD privacy glass come down in price to make a project like this economical.

The gigantic display was created in part by Sosolimited, an art studio who has made a similar project before. The display hanging in the atrium of the Raleigh Nature Research Center is amazingly efficient for its size  drawing only 75 watts.

If you’d like to try your hand at a similar build, we wish you luck; this LCD glass is still somewhat expensive but perhaps in a few years the price will come down enough that we can play Tetris on the side of a building.

Continue reading “Gigantic Liquid Crystal Display Is Like A Giant Calculator”

3 Axis Accelerometer With LED Bar Displays

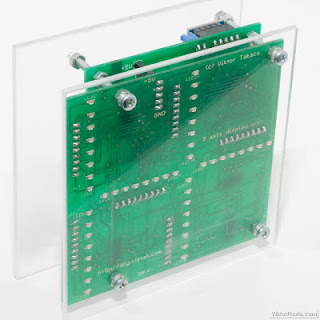
[Viktor] doesn’t remember why he started this project. He doesn’t know what he had in mind in the beginning, nor what the intended use was.He knows he wanted something interactive with blue LEDs.  What he ended up with, was a 3 axis Accelerometer with a pretty cool display that sits on his desk to amuse visitors.

Constructed using a PIC16F887 for the brains and a Freescale MM7361 3 axis  accelerometer, you can pull the schematics from his site. The code is available on demand as well.

[via HackedGadgets]

Continue reading “3 Axis Accelerometer With LED Bar Displays”

A Flight Simulator Made Out Of A Real 737 Cockpit

[Trent] sent in an awesome story about a single man who bought the nose of a 737, put it in his garage, and built a flight simulator inside the cockpit. His name is [James Price], and right now the only thing we’re wondering is when we can have a visit.

The cockpit came from an aircraft boneyard in Oklahoma. After [James] plunked down $1500 for the shell of a cockpit, he moved his new toy to a Livermore, California aircraft hangar and eventually into his garage. While the plane is meant to be a simulator, [James] is a tinkerer at heart: he says the best part of building his 737 is building the systems, programming the computers, and making everything work together. We’ve got to admire that.

Of course this isn’t the first cockpit-in-a-garage build we’ve seen. Years ago we featured an Avro Lancaster, and just a few months ago we saw a strikingly similar replica 737 flight deck (it’s made out of wood, and not a real 737). [James]’ build is one of the very few home-built simulators made out of a real airplane. Someone get this guy an F15 cockpit stat.

Measuring The Capacities Of Different Battery Brands

Being the smart consumer he is, [Denis] usually looks at the price per pound when comparing similar products at the grocery store. When it came time to buy a few AA batteries, he didn’t have any data to go on. To solve his little conundrum, [Denis] decided he would test several brands of batteries and see which one gives him the most bang for the buck.

After bringing home a haul of a dozen different brands of AA cells, [Denis] broke out the Arduino and starting designing a circuit. To test how much energy each brand provides, the Arduino measures the voltage across a load every second until the battery reaches 0.2V. The elapsed time, as well as the voltage, Watt hours, Joules, and ambient temperature are logged on an attached LCD screen and sent over a USB serial link to automate the data collection process.

What’s the verdict? Unsurprisingly, words like ‘super,’ ‘max,’ and ‘ultra’ didn’t connotate a better battery. The best bang for the buck came from an off-brand called RS Power Ultra. The worst battery was the Panasonic Evolta cells that came in at about $1.50 USD per watt-hour.

If you’d like to verify [Denis]’ work, all the code is up on Github along with the schematic.

Projecting Video Directly Onto The Retina

With the head-mountable, augmented reality Google Glass capturing tons of attention in the press, it was only a matter of time before we saw a DIY retina projector. This isn’t a new build; [Nirav] has been working on it for a few months, but it might just be time for this information to be useful to someone.

A retina projector focuses laser light though beam splitters and concave mirrors to create a raster display on the back of your eye. There’s an incredible amount of research into this field, but not many DIY projects. To make this project a reality, [Nirav] picked up a SHOWWX laser video projector and mounted it in a 3D printed frame along with a few pieces of optical equipment.

[Nirav]’s build isn’t without its drawbacks, though. The exit pupil, or the apparent size of the image, is only about 1.5 mm wide and much too small to be of any real use. Also, commercial retina projectors have an output of a puny 2 microwatts, where [Nirav]’s laser projector puts out 200 millwatts. This is more than enough to permanently damage your eye.

Build An Induction Heater And Become A Metalsmith

If you’ve ever wanted to forge, cast, or smelt metal, this project is right up your alley. It’s a 30 kVA induction heater built by [bwang] over on Instructables. It gets hot enough to melt and forge steel, iron, and aluminum.

An induction heater operates by surrounding the object to be heated with a coil carrying high frequency AC current. Basically, the entire setup acts like a huge transformer with a shorted secondary. To get these currents into a workpiece, [bwang] used a TL494 PWM controller as an oscillator. The output of the TL494 is filtered and amplified a few times to generate a huge amount of AC current.

Larger versions of [bwang]’s induction heater are found in foundries and forges all across the land; even though this small version sucks down 50 A out of a dryer or stove outlet, induction heating is very efficient. We’re actually wondering why we don’t see many home blacksmiths using induction heating, so we’ll leave that for our readers to discuss in the comments.

[sessions] reminded us of this induction heater from a few years ago. A little smaller, but still usable.