384-LED Ball Receives Animation Wirelessly And Knows Its Orientation

We get a ton of tips about Kickstarter projects. Here is a great example of what we need to see in order to feature one of them. This LED Blinky Ball developed by Null Space Labs is the target of a rather ambitious fundraising campaign. But in addition to the fundraising write-up they’ve shared extensive details about the prototype.

The ball is made up of sixteen slices; each is its own circuit board hosting an LED driver. All slices use the same PCB design, but one of them has an ATmega328 populated on the board to act as master. Optional components on the master board include an accelerometer, and a Bluetooth module to receive animation data. To get the full effect of the most recent prototype you’re going to want to see the video on their Kickstarter page.

Think this ball looks familiar to you? The original design was developed by [Nikolai] as a performance piece for a friend. This version was inspired by our feature of that earlier project.

So, use this as a template if you’re planning to submit your Kickstarter links to Hackaday’s tips line. We want to juicy details on the project!

Share A Light-up LED Heart With Your Valentine

It’s not roses or jewelry, but we hope [Erik]’s light-up USB heart will be appreciated by his significant other. When the two heart pieces come in contact with each other, each side lights up.

[Erik] started his build by cutting two half-heart shaped pieces out of polycarbonate. After drilling a few holes for LEDs and wires, magnets and reed switches were installed along the ‘broken’ side of the heart. Whenever the hearts come in contact with each other, the magnets trip the reed switches and light up both sides of the heart.

There is USB flash drive embedded in each heart half is loaded with a portable Dropbox. When the USB drive is plugged into a computer, the dropbox steps into action and synchronizes the photo album stored in each heart half. No matter how far apart they are, [Erik] and his SO can share pictures through their glowing LED hearts. Not to come off as a hopeless romantic, but this sounds like something we’d like for Valentine’s day. We’re hoping [Erik]’s SO thinks that as well.

Plotting Pictures With Light

Flashing LEDs for a persistence of vision display are on bicycle wheels, alarm clocks, and even light painting sticks to draw images in the air. What if you wanted to plot an image in the air (translation) with a single LED? That’s what [acorv] did after taking a cue from a polar plotter.

Like the polar plotter and Drawbot, [acorv]’s build began with a pair of stepper motors and fishing line (translation). [acorv]’s brother upped the stakes a bit and suggested replacing the marker with an LED and taking long exposure photographs. Armed with a DSLR and a lot of patience, a few experimental pics were taken. To plot the image, the Lightbot flashes its LED as it goes across the plot area. The process of building an image pixel by pixel takes a while – eight minutes for this image – but the brothers were encouraged enough to take their rig outside.

After setting up the polar plotter between two tripods, [acorv] and his brother made this image in the dead of night. It’s an interesting spin on the POV LED builds we’ve seen before. Check out [acorv]’s Lightbot slowly drawing something after the break.

Continue reading “Plotting Pictures With Light”

Supercap Lights Your Way In Times Of Need

You won’t find [Antoine] stumbling around in the dark. He just finished working on this LED flashlight which draws power from a super-capacitor (translated). He realized that lighting a high-efficiency LED takes so little power that there are many benefits in play when deciding to move away from batteries. When compared to a super capacitor, batteries have a shorter life span, are heavier, and take up more space.

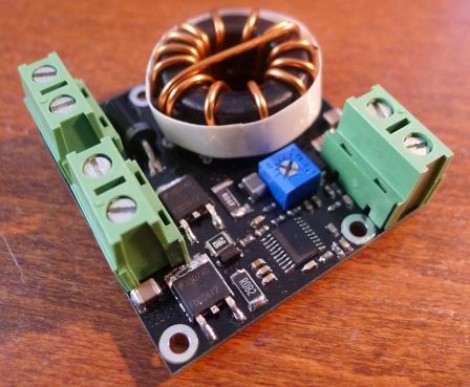
The biggest drawback of a super capacitor in this situation is the low voltage operation. The output will start at 2.7V and drop as the current is discharged. [Antoine] used one of our favorite simple circuits to overcome this issue, the Joule Thief. That circuit is commonly seen paired with an LED in order to boost input voltage to a usable level. That’s precisely what’s going on here.

The final hack in his circuit is the addition of that red LED which you can see in the middle of the board. This takes the place of a Zener diode and drops the charging voltage to a safe level. That indicator light will not come on until the cap is fully topped off. This way it tells you when the device is done charging.

Color Sensor Gives The RGB Values Of Anything

[Rick Osgood] wanted to build a color sensor that could be held up to any object to get RGB color values. He originally started with a photoresistor and a few LEDs, but couldn’t get that to work reliably. [Rick] finally completed his color sensor after finding a digital luminosity sensor on Adafruit, ending up with a pretty accurate piece of hardware to judge the color of something.

The idea behind the color sensor is to light up red, green, and blue LEDs and see how much light is reflected back from the object with a luminosity sensor. [Rick] chose an Arduino to do all the heavy lifting for the light sensor and activating the LEDs.

After a few tests [Rick] got his color sensor working, but it’s not up to par with what he had expected. This isn’t really a problem: the LEDs probably don’t have the same brightness and the luminosity sensor doesn’t respond evenly across the entire rainbow. Those things can always be fixed in software, though. It’s a nice project that could serve as part of a prototype for this color picker pen.

Building LED Walls On The Cheap

Around this time last year, [KopfKopfKopfAffe] was enlisted as a set designer and was told to build some sort of light effects for electronic music parties. The budget for the project wasn’t much at 200 Euros, but he did manage to build decent 5×5 RGB LED matrix that is fully controllable by a computer.

[KopfKopfKopfAffe] didn’t have the time or money to wait for manufactured PCBs, so a bunch of perfboard was placed in a CNC mill with a pen to act as a plotter. All the lines that needed soldered were drawn on by the mill, a feat that probably saved hours of looking at the design before committing solder to iron.

A total of five boards were constructed, each one capable of controlling five RGB LEDs. Each board can be dasiy-chained with an RS-232 serial connection for further expansion. The only thing that’s needed to control the matrix is 17 bits that includes an address and RGB color data for each LED. The system only cost about 10 Euros per node, but we think that could be significantly reduced by leaving out the Molex and DB-9 connectors. [Kopf] project turned out very nice, check it out after the break.

Continue reading “Building LED Walls On The Cheap”

Using Routers As Displays

Have you ever seen an LED display made out of routers? [Sean] took eight Netgear routers and made an 8×4 display out of them. Because that wasn’t cool enough, a very small version of Conway’s Game of Life was added to the build.

Each router is running a copy of OpenWrt, a Linux distro meant for limited hardware. Instead of an 802.11 protocol, each router runs the B.A.T.M.A.N. advanced mesh protocol. This protocol allows each router to communicate with all the other routers.

Instead of each router receiving data from a master, the routers calculate each step in the Game of Life independently.  Once the routers communicate their initial states, each router is responsible for displaying its four LEDs for each new generation. In the video after the break, you can see [Sean]’s routers calculating random Game of Life boards. Sadly, we didn’t notice a GoL oscillator being randomly generated, but with a 4×8 play field even a Glider wouldn’t last very long.

Continue reading “Using Routers As Displays”