Huge Flexible LED Matrix Can Be Worn Almost Anywhere

lightbright_led_mesh

[Erik] has been keeping extremely busy with his latest project, a flexible RGB LED matrix that he calls “Project Light Bright”. The folks at BuildLounge tell us that this is the first entry they have received so far in their “Light Contest”, in which they are giving away a free laser cutter to the best entry.

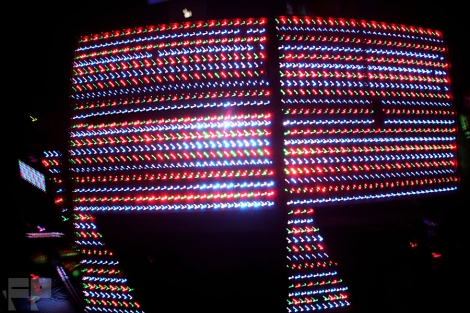
[Erik] hand soldered ten 16×16 RGB LED panels together in order to build this display, and the results are awesome. The entire thing is controlled by a WiFi-enabled Beagleboard, which drives all of the panels and then some. The Beagleboard features embedded web and DNS servers, which allows it to act as a wireless AP, enabling him to control the display using any WiFi capable device. The Light Bright displays all sorts of predefined artwork, but [Erik] can also alter the display on the fly via his phone as well. The entire thing is powered by a reasonably sized LiPo battery pack that he keeps tucked away in his pocket, which allows the display to run continuously for about 20 hours.

Check out the video below to see a quick walkthrough of [Erik’s] Light Bright suit, then be sure to stop by his site for more videos, details and updates on the project.

Continue reading “Huge Flexible LED Matrix Can Be Worn Almost Anywhere”

Singing House Lights Up Halloween Again This Year

[KJ92508] is flooding the neighborhood with light again this year. Everyone knows of that one house in town that really goes all out, but few put on a show anything like this one. The four Jack-o’-lantern faces lead the way with the opening sequence from A Nightmare Before Christmas. Each has at least four different mouth poses, and two eye orientations which are surprisingly well synchronized with the audio. The image above shows mostly orange lighting, but the home is outfitted with addressable RGB LEDs for a full color performance. In fact, it has seen an upgrade this year, increasing the channels by eight-fold to 1144! Don’t miss the performance which we’ve embedded after the break.

We had considered not featuring this, since we looked in on the same home last year. But the number of tips that rolled in made us think that a lot of you missed it, or are just delighted by the multitude of blinky lights. Either way, it’s worth the four minutes out of your day– it will either put a smile on your face, or make you glad not to live across the street from this guy.

Continue reading “Singing House Lights Up Halloween Again This Year”

Minimalist DIODER Hack Requires No External Microcontroller

pic_dioder_hack

Hackaday reader [chrysn] picked up a 3-button RGB model DIODER light from IKEA and thought he might as well take it apart to see what he could do with it. Having seen several DIODER hacks featured here, he knew it was easily hackable, but he didn’t want to simply rehash what other had already done.

All of the DIODER hacks we have come across thus far incorporate some sort of AVR chip or add-on board to expand its capabilities. [chrysn] saw that the controller already had a PIC16F684 inside, and thought that installing his own firmware onto the existing hardware would be a far more simple solution. He installed a small programming cable onto the DIODER’s control board, and using his PICkit2 programmer, flashed the chip with a custom firmware image.

His modifications worked great, and [chrysn] says that there is plenty potential in the existing hardware to have all sorts of fun with it. Even so, he notes that there are several AVR-flavored drop-in replacements that can be used if that happens to be your microcontroller family of choice.

Halloween Hacks: Flickering Jack-o’-lantern

The dollar store is always a great place to find some weird stuff, so when [jethomson] found a flickering Jack-o’-lantern, he thought it would make a great project for the 74xx logic competition.

Instead of using the flickering incandescent lightbulb that came with the blinking pumpkin, [jethomson] decided to rebuild a blinking circuit around a 74HC14 Hex inverting Schmitt trigger IC. The chip was used as a relaxation oscillator by adding a resistor and cap from the input to the ground. After a bit of component selection and some calculation, he had a red and blue LED blinking at 2,6,9, and 15 Hz.

The result is a seemingly random pattern of light that looks like a ghostly blue after image of the handheld Jack-o’-lantern. While it may not be one of the most complex builds for the 74xx competition, it gets points in our book for originality.

Although [jethomson] says his camera doesn’t pick up his project very well, he did post a video of the Jack-o’-Lantern in action. Check it out after the break.

Continue reading “Halloween Hacks: Flickering Jack-o’-lantern”

Going RGB With 7 Segment Displays

We can order seven segment displays in red, green, yellow, or blue all day long. One thing we haven’t seen is an RGB segmented display, so [Markus]’ project is really interesting. He took a stock seven segment display and modded it into an RGB display.

After taking a Dremel to the back of the stock display, [Markus] was left with a seven segment light mask. A few SMD LEDs were purchased through the usual channels. The RGB LEDs were epoxied into place on the back of the light mask one at a time. Thankfully, the LEDs came with magnet wire already attached – helpful, since these LEDs are only 1.6mm x 1.2mm big.

With 32 pieces of magnet wire, [Markus] needed some sort of socket. A small piece of perfboard and some .100″ headers handled the job very nicely. [Markus] still has to work on some way to drive the 24 cathode lines his LED display. He’d like an I2C interface, but with something like an individual seven segment display, the footprint of the circuit should be pretty small. If you’ve got any tips, drop them in the comments section. [Markus] is sure to catch them there.

Light Painting Nyan Cat With An Arduino

You too can paint your favorite meme in light with just a few tools. [Skywodd] brought together a couple of different projects to make this happen. He had already built a large POV display and now uses a DSLR with long exposure to create light paintings (translated).

The Arduino-powered display is built from a strip of 35 RGB LEDs. Now, that’s four pins per LED but one of is ground, leaving just 105 pins that need to be addressable. A couple of things make this manageable. First, he etched his own circuit boards for the LED strips. This breaks out the contacts to the edge of the boards and simplifies the soldering a bit by taking care of the ground bus. Secondly, he’s using M5450 LED display drivers for addressing. After the break you can see the video of the prototype hardware (in French but blinky action starts at about 2:30).

If you’re looking for an easier way to do this, check out the light painting that uses manufactured LED strips.

Continue reading “Light Painting Nyan Cat With An Arduino”

Rear Window LED Display Gives Other Drivers A Piece Of Your Mind

rear_window_led_matrix

[Gagandeep] was sick and tired of discourteous drivers on the highway, so he decided that he would put together a display to let them know what he thought of their poor driving skills. He planned on putting the display up in the rear window of his car, so he had to ensure that it did not obstruct his view while driving.

He decided that an LED matrix would be the best way for displaying images and text while on the go, so he got busy constructing a 40×16 mesh grid for his rear window. Using a wooden template to get the spacing and positioning just right, he spent several days soldering the 600+ LEDs to one another. He used 74HC595 shift registers to manage the LEDs in groups of 5 columns, while an ATmega AT89C51 was tasked with generating the text and images to be displayed. All of the ICs were deadbugged in place, helping achieve [Gagandeep’s] desire of keeping his view unobstructed.

While we’re not well-versed on the legality of such a display, it looks great when animated. There are plenty of pictures of the grid in various stages of construction as well as videos of it in action in his Picasa album, so be sure to check them out. If you are looking for code or Eagle files, you can find those here.