The $50 DMX Tester

DMX

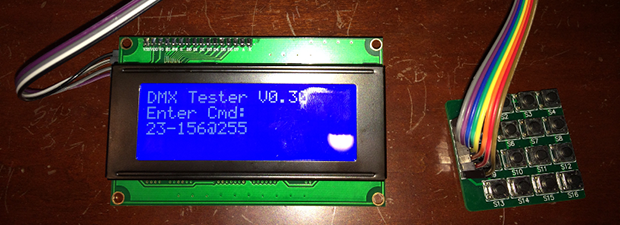
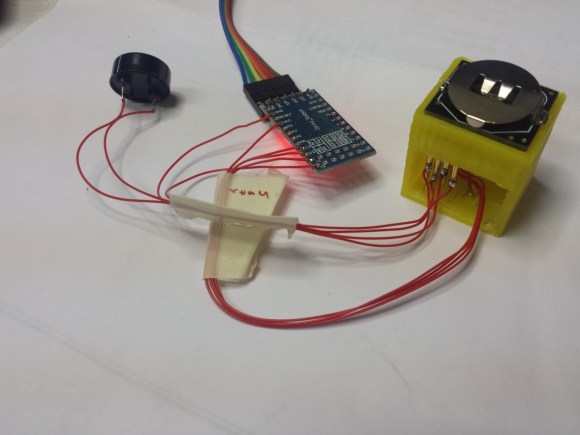
Despite being around for about as long as MIDI, DMX, the industry standard for controlling stage lighting and smoke machines, is still an astonishing expensive protocol to work with. Where MIDI can be banged out with a simple microcontroller – with odd bit rate requirements, no less, DMX testers cost hundreds of dollars. Of course this means the market is wide open for a DIY DMX tester, and over on the projects site [Tony] has just the thing.

For the hardware, [Tony] is using few 4×4 matrix keypads for user input, and a character LCD for the display. With this, he can set any of the 512 lighting channels in a DMX setup to any one of the 256 intensity values. Setting a range of channels to any intensity is a snap, with an extremely cut down command protocol. All the processing is handled by an Arduino, which seems more than capable of handling the DMX protocol thanks to the Conceptionetics DMX library.

While it’s not a full-blown lighting console you’d find in the back of a theatre, it’s more than sufficient to test a lighting rig. It also seems pretty simple to use, just the thing if you’re trying to wrap your brain around some theatrical lighting.

Developing The Grillino In 24 Hours

grillino

[Mastro Gippo] hit Shenzhen back in April and organized a challenge for himself: could he develop an electronic device from idea to product in only 24 hours? The result is the Grillino, a simple clone of the Annoy-a-Tron: a small, concealable device that makes chirping sounds at random intervals. It’s name was derived from a mix of the Italian word for a cricket—”grillo”—and, of course, “Arduino.”

Shenzhen was the perfect setting for his experiment, especially because [Mastro Gippo] was in town for the Hacker Camp we mentioned a few months ago. The build is pretty simple, requiring only a microcontroller, a battery, and a piezo speaker. What follows is a detailed journey of dizzying speed through the production process, from bags stuffed full of components, to 3D-printing a test jig, to searching for a PCB manufacturer that could fulfill his order overnight. Video and more below.

Continue reading “Developing The Grillino In 24 Hours”

Homemade Alarm System Doesn’t Lack Features

alarm system

To many of us, our garage (or workshop) is probably one of the most important parts of the house. If a burglar broke in, we’d likely be more worried about our tools! [Ron Czapala] decided he needed an alarm system in his garage to keep his stuff safe, so he decided to build one from scratch.

The system makes use of a Parallax 4×4 keypad membrane, a MCP23008 port expander, a Parallax Propeller, a LCD screen, and a few switches to represent future magnetic reed switches located in the door and window.

Using circular buffers, the propeller has several states for monitoring the garage.

  • Not armed — ignore all sensors
  • Armed — system will react to changes in the sensors
  • Exit delay — system has been armed, 45 second countdown has begun to allow you to exit the garage
  • Window trigger — if the window is opened, the alarm will go off immediately (siren and strobe light)
  • Door trigger — alarm will go off in 60 seconds if correct code has not been entered on the keypad

For a complete demonstration, check out the following video where [Ron] explains it all!

Continue reading “Homemade Alarm System Doesn’t Lack Features”

Firmware For Cheap Bluetooth Modules

Ibluetooth
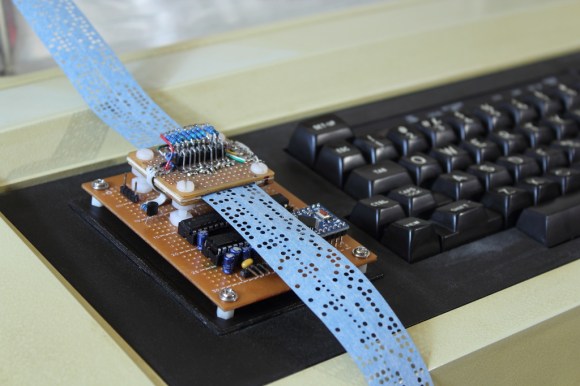
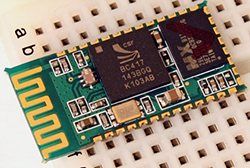
f you’ve ever built anything with a microcontroller, some sort of sensor, and a connection to the outside world, you’re probably wondering how those places in China can pump out cheap electronics for a mere percentage of what it costs you to pull a DIY. It’s not just volume – it’s engineering; if something has Bluetooth, you find a Bluetooth module with a built-in microcontroller so you can write firmware to it.

The BC417 is the System on Chip found in the very popular BlueCore4-Ext Bluetooth module featuring 8Mbits of Flash (75% of which is used for Bluetooth related stuff), somewhere around 12 kB of RAM, with everything run in a virtual machine. [pfalcon] wrote an extremely experimental firmware for this device that allows anyone to create a wireless sensor node for peanuts. These devices are almost as cheap as a bare ATMega, so the possibilities are interesting, to say the least.

At this point, the hardest part of putting custom firmware on these devices is programming them. For that, [Elastic Sheep] comes to the rescue with a parallel port to SPI interface. There’s also a firmware dumper and some breakout boards available. These modules are pretty cheap, and the pitch isn’t too bad, so you might be able to etch your own boards should you want to experiment a little.

Thanks [Peter] for sending this in.

Reading Paper Tapes From Scratch!

Home made tape reader

Feeling a little nostalgic? Dying to read some paper ticker tapes? You can do it manually, but that’d take forever! [NeXT] decided to make a little PCB to help him out.

Having searched for paper tape readers for years, and even getting halfway through building the mechanical portion of it in his high-school tech class, [NeXT] decided to take a serious stab at it — and by golly, it works!

The reason he finally decided to go down this route is because you just can’t buy them (well, for cheap), and even the DIY or hobby ones out there are notoriously slow — what better reason to design it from scratch?

Continue reading “Reading Paper Tapes From Scratch!”

Tag Connect Programming Headers

A Small Replacement For Large Programming Headers

No matter how small you make your embedded projects, you still need a way to program the MCU. Standard programming headers can be annoyingly large for those very small projects. [Danny] wrote in to tell us how we can save room on our PCB designs using special spring loaded connectors, rather than large headers.

There are so many small embedded development systems, such as the Trinket that still rely on standard headers. Reducing the size of the programming headers and interface headers is an issue that deserves more attention than it currently receives. Based on Tag-Connect, a proprietary connector built around pogo-style pins, your PCB does not actually require any on-board mating connector. The PCB footprint simply has test-pads that connect with the pogo-pins and holes that allow for a rock solid connection. While the Tag-Connect header is a bit expensive (it costs about $34), you only need to buy it once.

It would be great to see even smaller Tag-Connect cables. Do you have a similar solution? What about something even smaller and more compact? Write in to tell us about any ultra-compact connector solutions you have been using!

Send Wireless TXT Between Two TI Calculators


TI calculators with wireless circuitry

One day while sitting in class in a Cornell University schoolroom, [Will] and [Michael] thought how cool it would be to send text messages to each other via their Texas Instruments calculators.  Connecting the two serial ports with a serial cable was out of the question. So they decided to develop a wireless link that would work for both TI-83 and TI-84 calculators.

The system is powered by a pair of ATmega644’s and two Radiotronix RF Modules that creates a wireless link between the two serial ports. The serial ports are 3 wire ports, which can be used for several things, including acting as a TV out port. [Will] and [Michael] reverse engineered the port’s protocol and did an excellent job at explaining it in full detail. Because they are dealing with the lowest level of the physical protocol, there is no need for them to deal with higher levels like checksums, header packets, ext.

Be sure to stick around after the break to see a video of the project in action. It’s quite slow for today’s standards. If you have any ideas on how to speed it up, be sure to let everyone know in the comments.

Continue reading “Send Wireless TXT Between Two TI Calculators”