ESP32 Adds New Features To 1990s Home Alarm System

Given how fast technology is progressing, some consumer gadgets lend themselves to being replaced every few years. Mobile phones are a particularly good example of a device that you probably won’t want to hold onto for more than 4 years or so, with TVs not far behind them. On the other hand, something like a home alarm system can stay in the fight for decades. As long as it still goes off when somebody tries to pop a window, what more do you need?

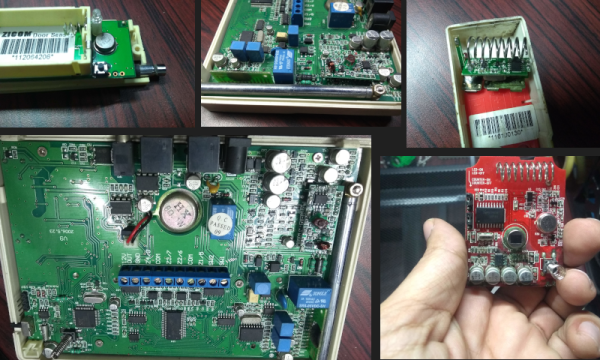
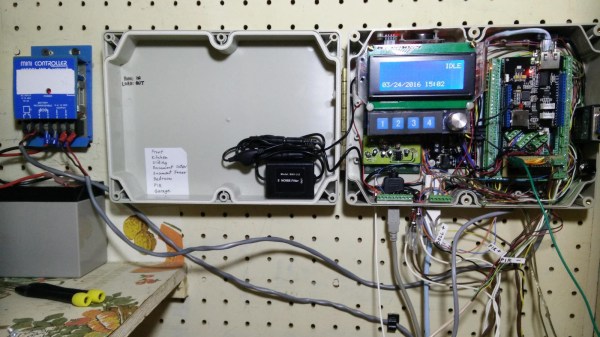
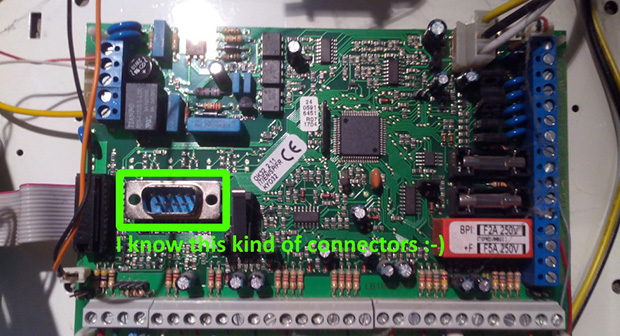
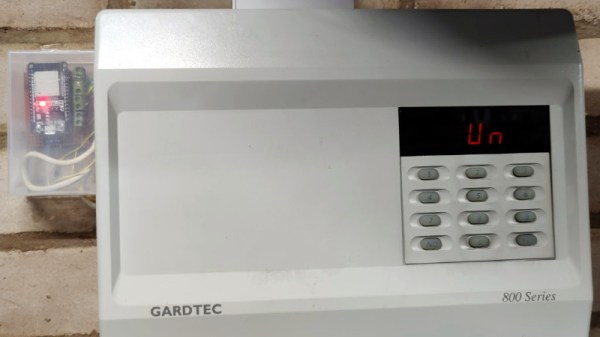
Well if you’re like [Brett Laniosh], you might want the ability to arm the system and check its current status from your phone. But instead of getting a whole new system, he decided to upgrade his circa 1993 Gardiner Gardtec 800 alarm with an ESP32. As it so happens, the original panel has an expansion connector which he was able to tap into without making any modifications to the alarm itself. If you’ve got a similar panel, you might even be able to use his source code and circuit schematics to perform your own modification.

Optocouplers link the ESP and alarm panel.

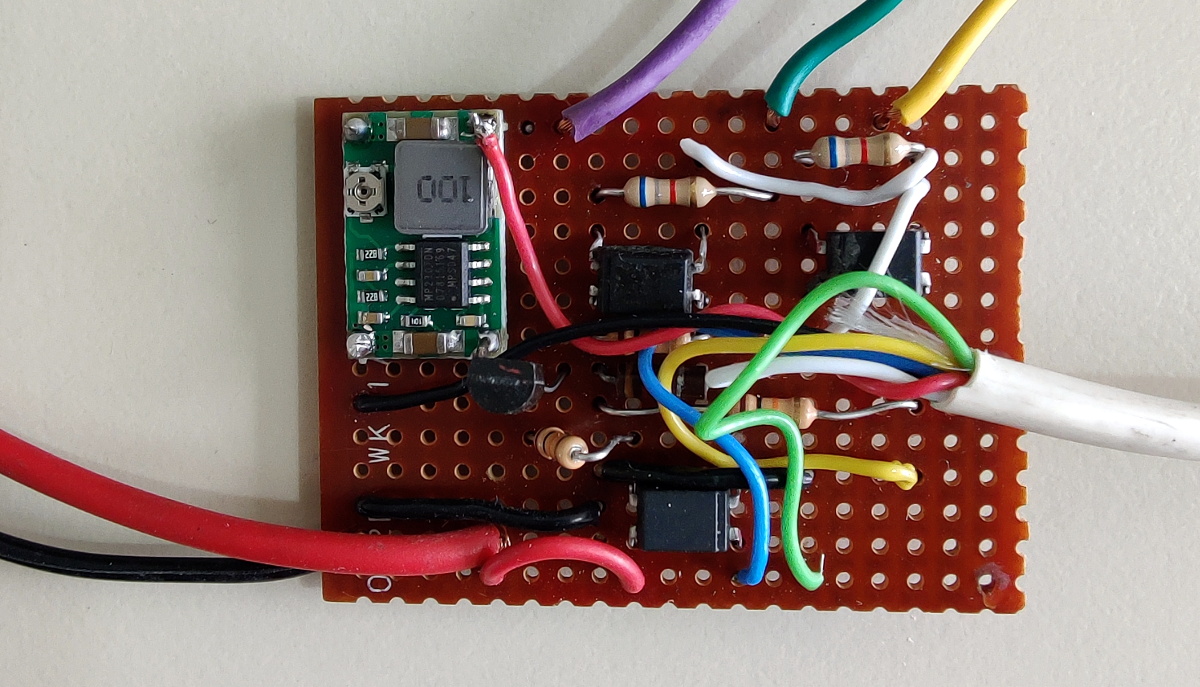
Now we know what you’re thinking. Surely there’s a risk involved when trusting an ESP32 connected to the Internet with the ability to disarm your home alarm system. [Brett] has considered this, and made sure that the web server running on the microcontroller can only be accessed from the local network. If he does want to connect from beyond WiFi range, he does so through a VPN. In other words, his code is never directly exposed to the wilds of the Internet and is always hiding behind some kind of encryption.

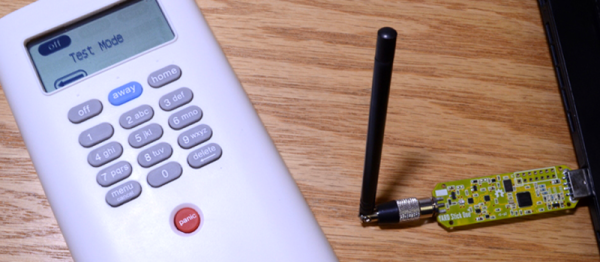
The WiFi connection allows [Brett] to arm and disarm the alarm system remotely, check if it’s been triggered, and reset it if necessary, all from his smartphone. But he’s also added in a 433 MHz receiver so he can use simple handheld fobs to arm the system if he doesn’t want to go through the phone. Even if you dropped out the Internet connectivity, this alone is a pretty nice upgrade.

For those not afraid to take the more invasive route, you could potentially reverse engineer and reprogram your old alarm panel. Or you could even so the full DIY route and create your own low-cost alarm system using the ESP32 and off-the-shelf modules.

Teardown: The Guts Of A Digital Sentry

I have a home alarm system that has me wondering if I can make it better with my maker Kung-fu. Recently we had to replace our system, so I took the time to dissect the main controller, the remote sensors, and all the bits that make a home security system work.

To be precise, the subject of today’s interrogation is a Zicom brand Home Alarm that was quite famous a decade ago. It connects to a wired telephone line, takes inputs from motion, door, and gas sensors, and will make quite a racket if the system is tripped (which sometimes happened accidentally). Even though no circuits were harmed in the making of this post, I assure you that there are some interesting things that will raise an eyebrow or two. Lets take a look.

Continue reading “Teardown: The Guts Of A Digital Sentry”

Alarm System Upgrade Tips The Functionality Scale

Residential-grade commercial alarm systems are good at a few things but terrible at others, like keeping pace with telephone technology. So what to do when a switch to VOIP renders your alarm system unable to call in reinforcements? Why not strip out the old system and roll your own value-added alarm and home automation system?

Generally, the hardest part about installing an alarm system is running the wires to connect sensors to the main panel, so [Bill Dudley] wisely chose to leverage the existing wiring and just upgrade the panel. And what an upgrade it is. [Bill]’s BOM reads like a catalog page from SparkFun or Adafruit – Arduino MEGA 2560, Ethernet shield, a sound board, stereo amplifier, X10 interface, and a host of relays, transformers, and converters. [Bill] is serious about redundancy, too – there’s an ESP8266 to back up the wired Ethernet, and a DS3231 RTC to keep the time just in case NTP goes down. The case is a bit crowded, but when closed up it’s nicely presentable, and the functionality can’t be beat.

Rehabilitating old alarm systems is a popular project that we’ve covered plenty of times, like this Arduino upgrade for a DSC 1550 panel. But we like the way [Bill] really went the extra mile to build add value to his system.

Breaking SimpliSafe Security Systems With Software Defined Radio

The SimpliSafe home security system is two basic components, a keyboard and a base station. Sensors such as smoke detectors, switches, and motion sensors can be added to this system, all without a wired installation. Yes, this security system is completely wireless. Yes, you can still buy a software defined radio for ten dollars. Yes, the device has both “simple” and “safe” in its name. We all know where this is going, right?

Last week, [Andrew Zonenberg] at IOActive published a security vulnerability for the SimpliSafe wireless home security system. As you would expect from an off-the-shelf, wireless, DIY security system, the keypad and base station use standard 433 MHz and 315 MHz ISM band transmitters and receivers. [Dr. Zonenberg]’s attack on the system didn’t use SDR; instead, test points on the transmitters were tapped and messages between the keypad and base station were received in cleartext. When the correct PIN is entered in the keypad, the base station replies with a ‘PIN entered’ packet. Replaying this packet with a 433 MHz transmitter will disable the security system.

[Michael Ossmann] took this one step further with a software defined radio. [Ossmann] used a HackRF One to monitor the transmissions from the keypad and turned to a cheap USB SDR dongle to capture packets. Replaying keypad transmissions were easy, but with a little bit more work new attacks can be found. The system can be commanded to enter test mode even when the system is armed bypassing notifications to the owner.

It’s a hilarious failure of wireless security, especially given the fact that this exploit can be performed by anyone with $100 in equipment. With a little more effort, an attacker can execute a PIN replay from a mile away. Sadly, failures of security of this magnitude are becoming increasingly common. There will assuredly be more attacks of this kind in the future, at least until hardware manufacturers start taking the security (of their security products) seriously.

Stupid Security In A Security System

alarm

[Yaehob]’s parents have a security system in their house, and when they wanted to make a few changes to their alarm rules – not arming the bathroom at night – an installer would come out, plug a box into the main panel, press a few buttons, and charge 150 €. Horrified at the aspect of spending that much money to flip a few bits, [yaehob] set out to get around the homeowner lockout on the alarm system, and found security where he wasn’t expecting.

Opening the main panel for the alarm system, [yaehob] was greeted with a screeching noise. This was the obvious in retrospect tamper-evident seal on the alarm box, easily silenced by entering a code on the keypad. The alarm, however, would not arm anymore, making the task of getting ‘installer-level’ access on the alarm system a top priority.

After finding a DE-9 serial port on the main board, [yaehob] went to the manufacturer’s website thinking he could download some software. The website does have the software available, but only for authorized distributors, installers, and resellers. You can register as one, though, and no, there is no verification the person filling out a web form is actually a distributor, installer, or reseller.dist

Looking at the installer and accompanying documentation, [yaehob] could see everything, but could not modify anything. To do that would require the installer password, which, according to the documentation was between four and six characters. The system also responded quickly, so brute force was obviously the answer here.

After writing up a quick script to go through all the possible passwords, [yaehob] started plugging numbers into the controller board. Coming back a bit later, he noticed something familiar about what was returned when the system finally let him in. A quick peek at where his brute force app confirmed his suspicions; the installer’s code was his postal code.

From the installer’s point of view, this somewhat makes sense. Any tech driving out to punch a few numbers into a computer and charge $200 will always know the postal code of where he’s driving to. From a security standpoint, holy crap this is bad.

Now that [yaehob]’s parents are out from under the thumb of the alarm installer, he’s also tacked on a little bit of security of his own; the installer’s code won’t work anymore. It’s now changed to the house number.

Homemade Alarm System Doesn’t Lack Features

alarm system

To many of us, our garage (or workshop) is probably one of the most important parts of the house. If a burglar broke in, we’d likely be more worried about our tools! [Ron Czapala] decided he needed an alarm system in his garage to keep his stuff safe, so he decided to build one from scratch.

The system makes use of a Parallax 4×4 keypad membrane, a MCP23008 port expander, a Parallax Propeller, a LCD screen, and a few switches to represent future magnetic reed switches located in the door and window.

Using circular buffers, the propeller has several states for monitoring the garage.

  • Not armed — ignore all sensors
  • Armed — system will react to changes in the sensors
  • Exit delay — system has been armed, 45 second countdown has begun to allow you to exit the garage
  • Window trigger — if the window is opened, the alarm will go off immediately (siren and strobe light)
  • Door trigger — alarm will go off in 60 seconds if correct code has not been entered on the keypad

For a complete demonstration, check out the following video where [Ron] explains it all!

Continue reading “Homemade Alarm System Doesn’t Lack Features”

Directing An Alarm System Straight To The Internet

[Scott] has a pretty nice alarm system at his house – it will give the operator at his alarm company enough information to determine if it’s a fire alarm, burglary, or just a cat walking in front of a sensor. [Scott] wanted to cut out the middle man and receive notifications from his alarm system on his phone. He did just that, with the help of a trusty Arduino and the very cool Electric Imp.

[Scott]’s build began with an Arduino attach to a Raspi to monitor state changes in the alarm system. Because the designers of the alarm system included a very helpful four-wire bus between the alarm panels and the part connected to the phone line, [Scott] found it fairly easy to tap into these lines and read the current alarm status.

Dedicating a Raspberry Pi to the simple task of polling a few pins and sending data out over WiFi is a bit overkill, so [Scott] picked up an Electric Imp Arduino shield to transmit data over WiFi. We’ve played around with the Imp before, and [Scott] would be hard pressed to come up with a cleaner solution to putting his alarm monitor on the Internet.

Now [Scott] has a very tidy alarm monitor that sends updates straight to his cell phone, no middle man required. A very neat build, and an excellent use of a very cool WiFi device.