Inverted Quadcopter? That generally means a crash is soon to follow. Not so for a new crop of quadcopter fliers. These new quadcopters are capable of sustained inverted flight. We’ve seen inverted quadcopters before here on hackaday. However, previous inverted quadcopters always used collective pitch to control the thrust produced by the blades. Collective pitch on a quadcopter is much simpler than it is on the main rotor of a traditional helicopter. R/C and full-scale helicopters mix collective and cyclic pitch to articulate the main rotor blades. A quadcopter only needs the collective portion, which is similar to a traditional helicopters tail rotor mechanism, or a variable pitch prop on an airplane.
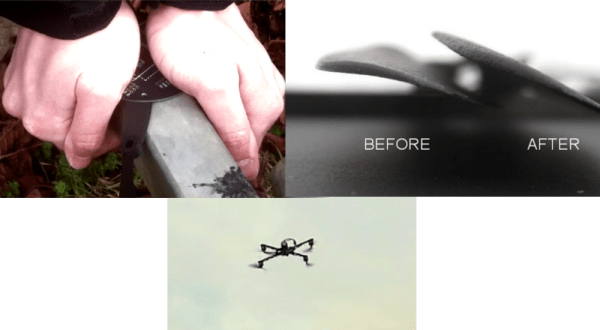
These new quadcopters are using a much simpler method of flying inverted: Spin the motors backwards. Quadcopters control their flight by quickly varying the speed of rotation of each motor. Why not completely reverse the motor then? Today’s brushless outrunner motors have more than enough power to quickly reverse direction. The problem becomes one of propellers. Standard propellers are designed to create thrust in one direction only. Every quadcopter uses two clockwise rotation and two counterclockwise rotation propellers. Propellers will generate reverse thrust if they are spun backwards, however they will not be as efficient as they would when spinning the direction they were designed for. The quad fliers have found a partial solution to this problem: Remove the curve from the blade. R/C propeller blades are sold by diameter and blade pitch. The pitch is a measure of the angle of attack of the blades. R/C blades also have an airfoil style curve molded into them. Removing this curve (but not changing the pitch) has helped the problem.
This final problem is control systems. Since quadcopters already are relying on computer control for basic flight, it’s simply a matter of loading custom firmware onto your flight board to support motor rotation reversal. Speed controls also have to be capable of reverse rotation, which means new firmware as well. We’re curious to see how the quadcopter community settles on the control systems for inverted flight. The R/C helicopter community went through several iterations of control systems over the years. At one point they were using “Invert switches” which reversed controls as well as handled the collective pitch changes. As time went on, these switches fell out of favor and are now known as “Crash switches” due to the result of accidentally hitting one while flying, or before engine start.
Continue reading “Quadcopters Go Inverted By Reversing Their Motors”