Spamming A Label Printer With #cookiehammer

[John] has always loved stock ticker machines. These machines are highly collectible, so short of finding one that wasn’t hurled from a Manhattan skyscraper in 1929, a stock ticker is out of reach for the casual enthusiast. There is another way to get a stock ticker-like device though: hack a label printer to print out stuff from Twitter.

The build is really quite simple. A Dymo thermal label printer was modified to accept standard 2.25″ point of sale receipt paper. Now that the printer can shoot out line after line of text, [John] wrote a little bit of Ruby code using a Twitter API, RMagick for graphics processing and a Dymo printer driver.

Every 30 seconds, the code does a Twitter search for a specific hashtag and prints those tweets. #cookiehammer was the first thing that came to mind, so it stuck. Right now there’s a few tweets for #cookiehammer, but we expect [John] will have to put a new roll of paper in his printer fairly soon.

It may not be as informative as a stock ticker machine, but we think [John]’s twitter printer build sure beats watching CNN. Check out the walk through after the break.

Continue reading “Spamming A Label Printer With #cookiehammer”

Cocktail Machine Minces Words

For those living in a magical land of candy, with orange-faced helpers to do their bidding, the ability to taste your words is nothing new. But for the rest of us, the ability to taste what you type in cocktail form is a novelty. [Morskoiboy] took some back-of-the-envelope ideas and made them into a real device that uses syringes as keys, and facilitates the injection of twenty-six different flavorings into a baseline liquid. He figures that you can make each letter as creative as you want to, like representing different alcohols with a letter (T for tequila) or matching them to colors (R for red). Check out the video after the break to see an ‘Any Word’ cocktail being mixed.

This setup is entirely mechanical, and makes us wonder if [Morskoiboy] works in the medical equipment design industry. Each letter for the keyboard is affixed to the plunger on a syringe. When depressed, they cause the liquid in an external vessel (not seen above) to travel through tubing until it fills the proper cavities on a 15-segment display to match the letter pressed. From there the additive is flushed out by the gravity-fed base liquid into the drinking glass. We can’t imagine the time that went into designing all of the plumbing!

Continue reading “Cocktail Machine Minces Words”

Using Polycarbonate Filament With A RepRap

[Rich] couldn’t find any instances where RepRap owners had used polycarbonate as a 3D printing source material. He’s filled that knowledge gap by running multiple polycarbonate printing tests. Polycarbonate is a plastic that is highly resistant to shattering yet it’s still rather soft. With enough effort it can be bent and stretched, but it’s fairly difficult to break the material.

The test spool of polycarbonate was special ordered for this project. [Rich] sourced 1.6mm filament since 3mm material would have been difficult to spool. It melts at a temperature range of 280-300 degrees Celsius, which he reaches with a hot-end extruder design. The printed material comes out a bit cloudy, which may be due to the heating process itself, or due to extruder reversals (he’s not quite sure what’s causing it). But as you can see above and in the video after the break, it’s certainly a viable printing medium.

Continue reading “Using Polycarbonate Filament With A RepRap”

Remote-controlled USB Switch

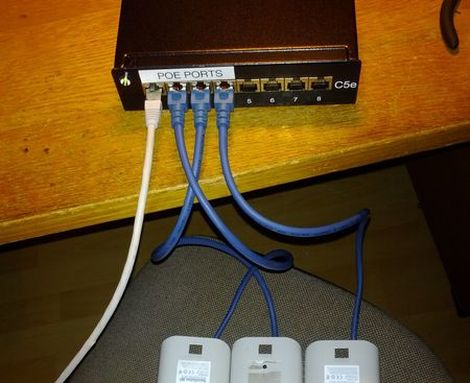
When [beerninja] wanted to swap his USB keyboard from one game console to another without mucking about with wires, he asked the Hack A Day forums for some help. [Meseta] (AKA [UAirLtd]) came to the rescue and built [beerninja] a remote-controlled USB switch.

After opening up a no-name USB switch, [Meseta] discovered that the switching is done with simple relays and switches. A hugely overpowered Forebrain ARM dev board was used to pull each switch low for a few hundred milliseconds to switch the output USB port.

For the infrared remote control, [Meseta] dug into Lady Ada’s IR sensor tutorial and decoded buttons 1 through 4 on a Sky TV remote. Each button from one to four corresponds to the buttons on the USB sharing switch. The ‘0’ button was also decoded as a convenience to put the Forebrain into its reprogramming mode. After drilling a small hole for the IR receiver, the finished project was stuffed back into the original steel enclosure.

Check out the video of the switch in action after the break.

Continue reading “Remote-controlled USB Switch”

Battery-less Electronic Dice For All Your D&D Needs

electronic_20_sided_die

[Anthony] is a big fan of Dungeons & Dragons, but he thought the game would be far more fun to play with an electronic die rather than the traditional fare. Electronic dice are nothing new around here, though we can’t help but like his design.

He wanted to keep his electronic die as small as possible while ensuring it would last an entire gaming session, so rather than use a battery to power it, he opted for a super capacitor instead. His 1F 5.5V cap keeps the PIC18 and 22 SMD LEDs chugging along quite nicely without ever requiring a break in the action for a charge.

The electronic die looks great, and give him the choice of rolling a 4, 6, 8, 10, 12, and 20 sided die with a simple push of a button. While a bit less interactive than tossing a die on the table, we certainly wouldn’t mind having one.

Which Resistor Values Should You Order For All Circumstances?

A hard drive crash, and some other happenings that aren’t entirely clear to us, led [Devbisme] to put in a parts order. As he wanted to make the most of his shipping costs, he decided to fill out the order with parts that he’ll use eventually. He’s been working with surface mount designs and wanted to move from using resistors with 0805 packages to the 0603. Having nothing on hand, he devised a way to account for almost all standard values with the fewest number of different resistors.

That’s a mouthful, but what he actually did was figure out what combinations of resistors can best be wired in parallel to achieve a different standard resistance value. This way, if he doesn’t have a specific value he can solder one 0603 surface mount resistor on top of another one to get there. He ended up writing a Python program to best calculate this set of values. It came up with a set that lets him synthesize 159 of the 168 standard resistor values within +/- 4% using just 19 actual resistor values. His method requires anywhere from one to three resistors to get to each value. Soldering three 0603 packages on top of each other might not be the most fun, but it makes for easy parts inventory management.

Turn Your Wireless Keyboard Into A MAME Controller!

For those of you that have a wireless keyboard laying around, you might be tempted to turn it into something else, like a wireless MAME controller. For those not familiar with it, MAME stands for “Multiple Arcade Machine Emulator” and is generally used to run older arcade games on a computer.

Encoders are available for this purpose, however, intending to save some money, and having an unused wireless keyboard, I decided to try to make one myself.  As far as I know there are no wireless encoders available for this purpose, so that was part of the motivation for trying this.

In this post I go over my mechanical design for the cabinet as well as the electrical process of going from keyboard to MAME controller. I did eventually get the thing working, but if more than a couple buttons were pressed simultaneously, some presses were omitted. The conclusion I eventually came to was that it was better to use an encoder to control everything. Not wireless, but much more reliable. If I absolutely needed a wireless controller in the future, I would think modding an actual wireless controller (or two) in a similar manner would have worked better for my purposes.