The $50 Ham: Dummy Loads, Part 2

In the last installment of “The $50 Ham” I built a common tool used by amateur radio operators who are doing any kind of tuning or testing of transmitters: a dummy load. That build resulted in “L’il Dummy”, a small dummy load intended for testing typical VHF-UHF handy talkie (HT) transceivers, screwing directly into the antenna jack on the radio.

As mentioned in the comments by some readers, L’il Dummy has little real utility. There’s actually not much call for a dummy load that screws right into an HT, and it was pointed out that a proper dummy load is commercially available on the cheap. I think the latter observation is missing the point of homebrewing specifically and the Hackaday ethos in general, but I will concede the former point. That’s why at the same time I was building L’il Dummy, I was building the bigger, somewhat more capable version described here: Big Dummy.

Continue reading “The $50 Ham: Dummy Loads, Part 2”

Pluto (SDR) Goes Ethernet

Pluto may no longer be a planet, but it is still a fun software defined radio (SDR) set up from Analog Devices. The inexpensive radio uses a USB connector and looks somewhat like a network connection to your PC. But what if you want to really use it with a network? [SignalsEverywhere] shows you how to do it using a USB network adapter and a USB connection adapter.

Just plugging a USB dongle into the box isn’t sufficient, an extra power supply is required as well as a minor bit of configuration. The IP address will be static so you might want to use an IP that your DHCP server won’t hand out, or reserve the IP on your local network.

Continue reading “Pluto (SDR) Goes Ethernet”

Clock Radio Receives Upgrade

Before everyone had a cell phone alarm to wake them up in the mornings, most of us used clock radios that would faithfully sit by our beds for years. You could have either a blaring alarm to wake you up, or be gently roused from slumber by one of your local radio stations. These devices aren’t as commonly used anymore, so if you have one sitting in your parts drawer you can make some small changes and use it to receive radio stations from a little further away than you’d expect.

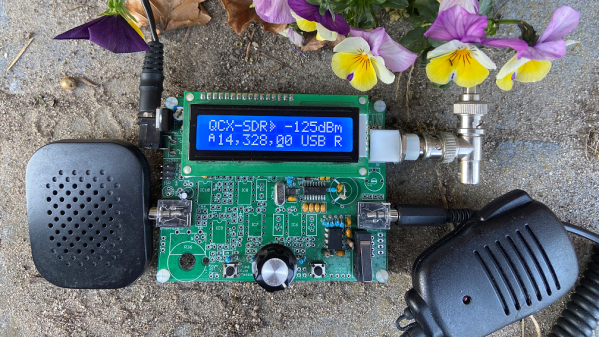
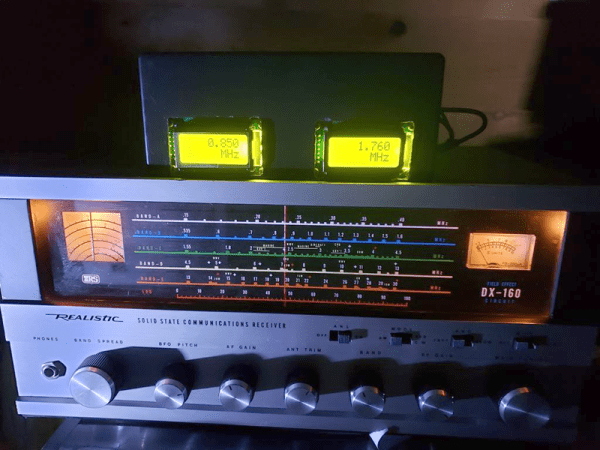
This Panasonic clock radio from [Ryan Flowers] has several upgrades compared to the old clock radio hardware. For one, it now can receive signals on the 7 and 14 MHz bands (40 and 20 meters). It does this by using separate bandpass filters for each frequency range, controlled by a QRP Labs VFO kit which can switch between the two filters automatically once programmed. The whole thing is powered by 8 AA batteries, true to form with a clock radio from the ’90s.

[Ryan] notes that his first iteration was a little quiet but he’s now able to receive radio stations from as far away from Japan with this receiver. Even without a license, you can make these changes and listen in to stations from all around the world, as long as you don’t start transmitting. If you want to make a small upgrade from this clock radio though, it’s not that hard to get into.

Continue reading “Clock Radio Receives Upgrade”

Full Earth Disc Images From GOES-17 Harvested By SDR

We’ve seen lots of hacks about capturing weather images from the satellites whizzing over our heads, but this nicely written how-to from [Eric Sorensen] takes a different approach. Rather than capturing images from polar satellites that pass overhead a few times a day, this article looks at capturing images from GOES-17, a geostationary satellite that looks down on the Pacific Ocean. The fact that it is a geostationary satellite means that it captures the same view all the time, so you can capture awesome time-lapse videos of the weather.  Continue reading “Full Earth Disc Images From GOES-17 Harvested By SDR”

RFID Payment Ring Made From Dissolved Credit Card

RFID payment systems are one of those things that the community seems to be divided on. Some only see the technology as a potential security liability, and will go a far as to disable the RFID chip in their card so that it can’t be read by a would-be attacker. Others think the ease and convenience of paying for goods by tapping their card or smartphone on the register more than makes up for the relatively remote risk of RFID sniffers. Given the time and effort [David Sikes] put into creating this contactless payment ring, we think it’s pretty clear which camp he’s in.

Alright, so the whole ring making part sounds easy enough, but how does one get an RFID chip that’s linked to their account? Easy. Just call the bank and ask them for one. Of course, they won’t just send you out a little RFID chip and antenna to mount in your hacked up project. (If only things were so simple!) But they will send you a new card if you tell them your old one is getting worn out and needs a replacement. All you have to do when it gets there is liberate the electronics without damaging them.

[David] found that an hour or so in an acetone bath was enough to dissolve the plastic and expose the epoxy-encased RFID chip, assuming you scrape the outer layers of the card off first. He notes that you can speed this part of the process up considerably if you know the exact placement and size of the RFID chip; that way you can cut out just the area you’re interested in rather than having to liquefy the whole card.

Once you have your chip, you just need to mount it into a ring. [David] has designed a 3D printable frame (if you’ve got a high-resolution SLA machine, that is) which accepts the chip and a new antenna made from a coil of 38 AWG magnet wire. With the components settled into the printed frame, its off to a silicone mold and the liberal application of epoxy resin to encapsulate the whole thing in a durable shell.

If a ring is not personal enough for you, then the next step is getting the RFID chip implanted directly into your hand. There are even folks at hacker cons who will do that sort of thing for you, if you’re squeamish.

Continue reading “RFID Payment Ring Made From Dissolved Credit Card”

The $50 Ham: Dummy Loads

This is an exciting day for me — we finally get to build some ham radio gear! To me, building gear is the big attraction of amateur radio as a hobby. Sure, it’s cool to buy a radio, even a cheap one, and be able to hit a repeater that you think is unreachable. Or on the other end of the money spectrum, using a Yaesu or Kenwood HF rig with a linear amp and big beam antenna to work someone in Antartica must be pretty cool, too. But neither of those feats require much in the way of electronics knowledge or skill, and at the end of the day, that’s why I got into amateur radio in the first place — to learn more about electronics.

To get my homebrewer’s feet wet, I chose perhaps the simplest of ham radio projects: dummy loads. Every ham eventually needs a dummy load, which is basically a circuit that looks like an antenna to a transmitter but dissipates the energy as heat instead of radiating it an appreciable distance. They allow operators to test gear and make adjustments while staying legal on emission. Al Williams covered the basics of dummy loads a few years back in case you need a little more background.

We’ll be building two dummy loads: a lower-power one specifically for my handy talkies (HTs) will be the subject of this article, while a bigger, oil-filled “cantenna” load for use with higher power transmitters will follow. Neither of my designs is original, of course; borrowing circuits from other hams is expected, after all. But I did put my own twist on each, and you should do the same thing. These builds are covered in depth on my Hackaday.io page, but join me below for the gist on a good one: the L’il Dummy.

Continue reading “The $50 Ham: Dummy Loads”

A DIY EMC Probe From Semi-Rigid Coax And An SDR

Do you have an EMC probe in your toolkit? Probably not, unless you’re in the business of electromagnetic compatibility testing or getting a product ready for the regulatory compliance process. Usually such probes are used in anechoic chambers and connected to sophisticated gear like spectrum analyzers – expensive stuff. But there are ways to probe the electromagnetic mysteries of your projects on the cheap, as this DIY EMC testing setup proves.

As with many projects, [dimtass]’ build was inspired by a video over on EEVblog, where [Dave] made a simple EMC probe from a length of semi-rigid coax cable. At $10, it’s a cheap solution, but lacking a spectrum analyzer like the one that [Dave] plugged his cheap probe into, [dimtass] went a different way. With the homemade probe plugged into an RTL-SDR dongle and SDR# running on a PC, [dimtass] was able to get a decent approximation of a spectrum analyzer, at least when tested against a 10-MHz oven-controlled crystal oscillator. It’s not the same thing as a dedicated spectrum analyzer – limited bandwidth, higher noise, and not calibrated – but it works well enough, and as [dimtass] points out, infinitely hackable through the SDR# API. The probe even works decently when plugged right into a DSO with the FFT function running.

Again, neither of these setups is a substitute for proper EMC testing, but it’ll probably do for the home gamer. If you want to check out the lengths the pros go through to make sure their products don’t spew signals, check out [Jenny]’s overview of the EMC testing process.

[via RTL-SDR.com]