It’s pretty important in 2024 to be able digitize documents quickly and easily without necessarily having to stop by the local library or buy an all-in-one printer. While there are plenty of commercial solutions out there, [Caelestis Cosplay] has created a simple document scanner that takes documents, as [Caelestis Cosplay] puts it, from papers to pixels.
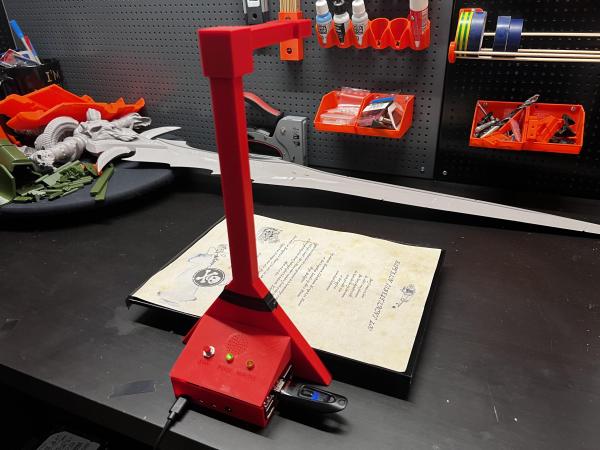
The build is probably what you’re expecting — it’s essentially a Raspberry Pi (in this case a 4B), a V2 Pi camera, and a handful of custom 3D-printed parts. [Caelestis Cosplay] says they had never designed anything for printing before, and we think it looks great. There’s also a buzzer to indicate that the scan is starting (one beep) or has completed (two beeps), a ‘ready’ indicator, and a ‘working’ indicator.
Everything you’d need to build your own is available over on Instructables, including document scanner and controller scripts. Be sure to check it out in action after the break, and see it quickly scan in a document and put it on a thumb drive.
Looking for a 3D scanner? Check out the OpenScan project.
Continue reading “Raspberry Pi Scanner Digitizes On The Cheap”