Custom MOTD For The Raspberry Pi

motd

With so many uses for a Raspberry Pi in a headless configuration – especially with the impending release of the Raspi Model A – we’re surprised it has taken so long for someone to send in a way to create a custom message of the day that is displayed whenever you SSH into everyone’s favorite Linux board.

A MOTD is used by servers to display messages to new users, or simply system information for server admins. It’s a simple text file stored in /etc/motd, but with some proper beardly Unix wizardry it’s possible to display uptime, free memory, and even the weather wherever the Raspi is located.

[yanewby] over on the Raspberry Pi forums created a nice little MOTD that grabs weather data from the Internet and displays it alongside an ASCII rendering of the Raspberry Pi logo. Of course like everything in Unix, this MOTD can be modified to do just about anything, from checking your Twitter to sending a text message to your phone.

Manuel The Scottish Moose Speaks Your Tweets

tod1

The folks over at Torchbox needed a Christmas card this year. Previously, the most poplar holiday card was a web page that gave their visitors a chance to activate a ‘snow machine’ and spray confetti on a random employee, all while being streamed online. They wanted to replicate this bridge between virtual and real life interactions this year, and Manuel the talking moose was born.

Manuel needed a personality and interaction from random people on the Internet so the Torchbox team decided to make the fake moose head speak tweets in real-time with the help of a Raspberry Pi. The code running on the Raspi gets tweets with a #tbxmoose hashtag, sends that through a node.js script, and finally sent to the Festival speech synthesis system.

A few modifications needed to be done to Manuel before he was presented to the Internet. His jaw was chopped in half and a servo and animatronic controller were added for a proper presentation on Torchbox’s stream of Manuel’s random musings.

Using Arcade Monitors With The Raspberry Pi

mame

Along with the growing popularity of the Raspberry Pi, we’ve also seen a related uptick in MAME arcade cabinet builds. Putting this $35 computer in an arcade cabinet makes a lot of sense, but connecting it to one of the monitors found in old arcade cabinets is a bit of a pain. Luckily, [Celso] figured out how to connect a Raspi to one of these 15kHz RGB monitors, making for a much more accurate emulation of old arcade classics.

The Raspi only has two video outputs – an HDMI port and an RCA composite jack. The old arcade CRTs have an RGB input, so directly connecting a Raspi to one of these CRTs is a no-go.

The solution comes from two converters: one to convert the HDMI output to VGA, and another video downscaler that takes the 31kHz VGA signal and translates it into a 15kHz RGB signal. [Celso] settled on the GBS-8100 video converter, a rather uncommon piece of kit that can fortunately be found on a few Chinese eBay auctions.

After connecting the old arcade cabinet power supply to the Pi, hooking up an audio amp, and converting the controls to USB, [Celso] has a very accurate MAME machine.

Raspberry Pi Used To Automate A Dimmable Light Bulb

raspberry-pi-controlled-dimmer

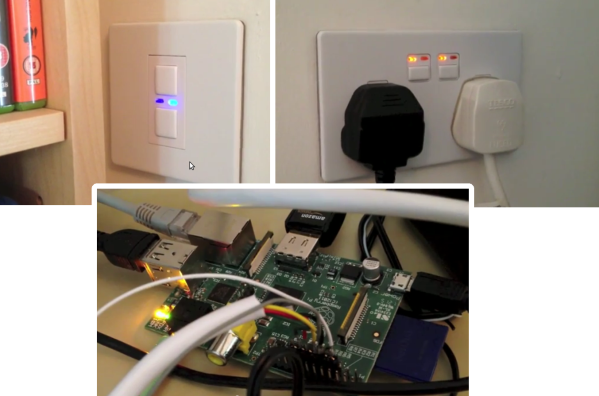
[Stephen] took the safe route when getting his Raspberry Pi to dim an AC light bulb. He didn’t roll his own outlet box with a mains-rated relay inside, going with a mechanical connection instead of electrical. By attaching a servo motor to the dimmer knob the RPi can adjust the light level without risk of electric shock.

He is using the ServoBlaster package to drive the servo motor with the Raspberry Pi GPIO pins. That’s all fine and good by itself, but he went the extra mile and designed a few different levels of functionality around the pairing. The motivation behind the hack was to build a sunrise clock that had a lot of power when it comes to luminosity. But he also plied the RPi’s networking features to serve up a web-based control. It has a slider to set the light level, as well as breath (like a slow fade) and flash features.

The servo is a bit noisy when moving quickly, but the sunrise alarm takes 30 minutes so the gears don’t really make any noise at all. Check it out in the clip after the break.

Continue reading “Raspberry Pi Used To Automate A Dimmable Light Bulb”

Twitter Radio

twitter-radio

This anthropomorphized wood bowl will read Tweets out loud. It was built by [William Lindmeier] as part of his graduate work in the Interactive Telecommunications Program (ITP) at New York University. View the clip after the break to see and hear a list from his Twitter feed read in rather pleasant text-to-speech voices.

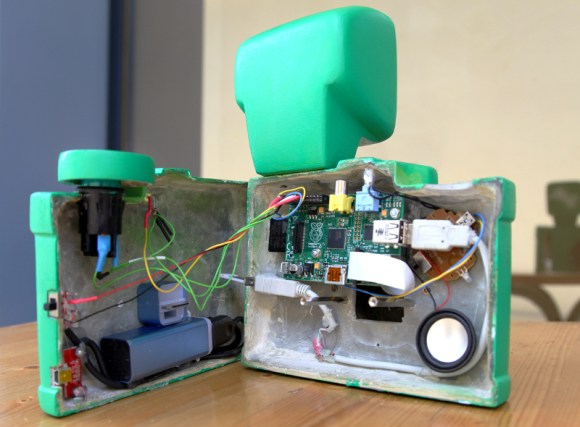
The electronics involved are rather convoluted. Inside the upturned bowl you’ll find both an Arduino and a Raspberry Pi. But that’s not the only thing that goes into this. The best sounding text-to-speech program [William] could find was for OSX, so there is a remote computer involved as well. But we think what makes this special is the concept and execution, not the level of hardware inefficiency.

The knob to the left sets the volume and is also responsible for powering down the device. The knob of the right lets you select from various Twitter lists. Each turn of the knob is responded to with a different LED color in the nose and a spoken menu label. You can get a quick overview of the project from this summary post.

Continue reading “Twitter Radio”

Raspberry Pi Hacking, Commando Style

raspberry-pi-and-notebook

If you’re lacking useful equipment for your Raspberry Pi hacking adventure, such as an HDMI monitor or power supply, this handy write-up will show you how to continue your hacking. All you’ll need is a laptop, the Raspberry Pi itself, an SD card, and an Ethernet and micro-USB cable. As noted in the article, it’s not really recommended to power the ‘Pi off of USB only, so this could potentially be a source of problems.

This hack begins by installing Linux on an SD card per this setup page, then using a Virtual Network Computing [VNC] setup to work with your Raspberry Pi. There are a few steps in between being able to do this, like setting up network sharing, and sleuthing out the IP address of the new processor, but everything is explained in detail for Mac and Linux. Windows users will have to do a bit of “sleuthing” of their own, but if you have some more information on this process, we’d love to hear about it in the comments!

Garage Door Opener Using Siri And Raspberry Pi

Screenshot from 2012-12-11 09:54:36

[DarkTherapy] wrote in to tell us about his garage door opener that works with Siri and a Raspberry Pi. It’s pretty hard to find a picture that tells the story of the hack, but here you can see the PCB inside the housing of the garage door opener. He patched the grey wires into the terminal block. On the other end they connect to a relay which makes the connection.

On the control side of that mechanical relay is a Raspberry Pi board. This seems like overkill but remember the low cost of the RPi and the ability to communicate over a network thanks to the WiFi dongle it uses. We think it’s less outrageous than strapping an Android phone to the opener. To make the RPi work with Siri he chose the SiriProxy package. We’ve seen this software before but don’t remember it being used with the Raspberry Pi.

There is certainly room to extend the functionality of a system like this one. It would be trivial to add a combination lock like this one we build using an AVR chip. It would also be nice to see a sensor used to confirm the door is closed. Even if you don’t need to control your garage this is a great reference project to get the RPi to take commands from your iOS devices.

Continue reading “Garage Door Opener Using Siri And Raspberry Pi”