CNC Ping Pong Printer Uses Simple Construction

spherebot

This is one of the simplest CNC builds we’ve seen but it still functions quite well. It’s a clone of the EggBot, but is aimed at printing on spherical Ping Pong balls rather than oblong eggs. [Chad] calls it the Spherebot, but you should be careful not to confuse it with the morphing sphere robot which can walk around like a hexapod.

The project is both mechanically and electronically simple. The body of the printer is made up of three acrylic plates, which we’re sure were clamped together when drilling holes to guarantee proper alignment. Threaded rod and nuts are used to mount the plates to one another, as well as to hold the sphere in place while printing. One stepper motor turns the ball while the other pivots the pen mount. A servo motor is responsible for lifting the pen. The entire thing is driven by an Arduino along with two stepper motor driver boards. Don’t miss [Chad’s] presentation embedded after the break.

Continue reading “CNC Ping Pong Printer Uses Simple Construction”

ATtiny2313 Frequency Meter Measures 1Hz-10MHz

attiny2313_frequency_meter

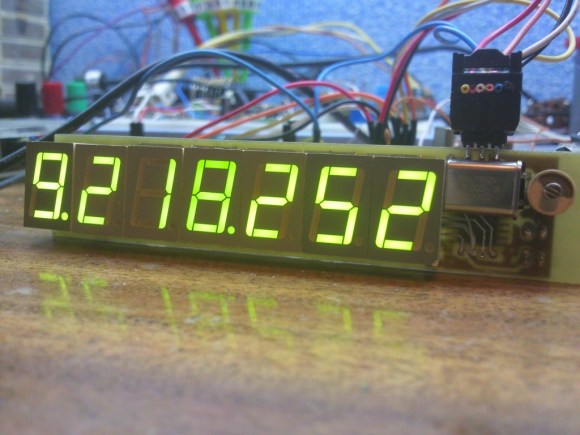
This frequency meter project squeezes a lot of performance out of the ATtiny2313 microcontroller. That chip does all of the work, measuring the frequency on the input pin as well as multiplexing the set of 7 seven-segment displays which read out the measurement.

The system is only as accurate as the clock crystal used by the AVR chip, so [Manekinen] recommends using one with the best tolerances available. It is also necessary to choose a value which is divisible by 1024 to get the best combination of accuracy and resolution. In this case he’s using a 22.1184 MHz crystal oscillator which is a slight overclocking of the chip which is spec’d to run at 20 MHz max.

We didn’t totally follow his explanation of how the two timers are used for counting. But if we really wanted to drill down for a full understanding his code (written in BASCOM-AVR) is available. If you’re just interested in the hardware we embedded a screenshot of the schematic after the break.

Continue reading “ATtiny2313 Frequency Meter Measures 1Hz-10MHz”

Fixing Tools With 3D Printers

saw

Over at the Manchester Hackerspace, [Bob] has been busy getting a 30-year-old bandsaw up and running. The saw worked great, but it was missing a fence, making straight cuts difficult to say the least.  The solution, of course, was to build a new fence, and [Bob] decided to capitalize on his hackerspace’s workshop by making a new fence with a 3d printer.

[Bob] began by taking careful measurements of the saw’s table and the channel running down the length of it. These measurements were plugged into OpenSCAD, and after a few iterations, [Bob] had an extremely well-fitting profile a fence could be attached to.

With the profile down, [Bob] created a new part in OpenSCAD that would hold an aluminum angle piece. This was attached to the plastic parts with screws, and the entire assembly clamps down to the saw with the help of a few 5mm bolts. For a machine that is usually dedicated to making 3D printer parts and Yoda heads, [Bob] did a great job making good use of his 3D printer.

A Homebrew Binary Wristwatch

watch

There are 2 types of people in the world; those who know binary, those who don’t, and those who know ternary. [Emanuele] thought a binary wristwatch is the pinnacle of nerd and set out to build his own. The resulting binary clock not only screams nerd as intended, but is also a functional time piece, as well.

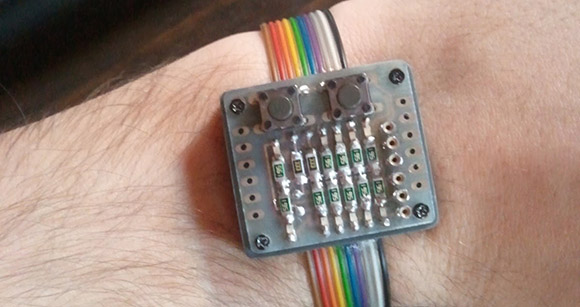
The idea of a binary wristwatch came to [Emanuele] while he was working with PICs at school. Not wanting to let that knowledge go to waste, he used a PIC16F628 microcontroller for this build. There are four LEDs for the hours and six LEDs for the minutes, each attached to a separate microcontroller pin for easy programming.

To keep time, [Emanuele] kept the PIC in sleep mode most of the time, only waking it up when a an internal timer’s register overflows. The watch spends most of its time sleeping, sipping power from a coin cell battery with a battery life that should last weeks, at least.

The entire circuit is tucked away in a PVC enclosure with a wonderful rainbow ribbon cable band. We’re not so sure about how that feels against the skin all day, but it does exude the nerd cred [Emanuele] was looking for.

Rogue Pi: A RPi Pentesting Dropbox

Rogue Pi

A pentesting dropbox is used to allow a pentester to remotely access and audit a network. The device is dropped onto a network, and then sets up a connection which allows remote access. As a final project, [Kalen] built the Rogue Pi, a pentesting dropbox based on the Raspberry Pi.

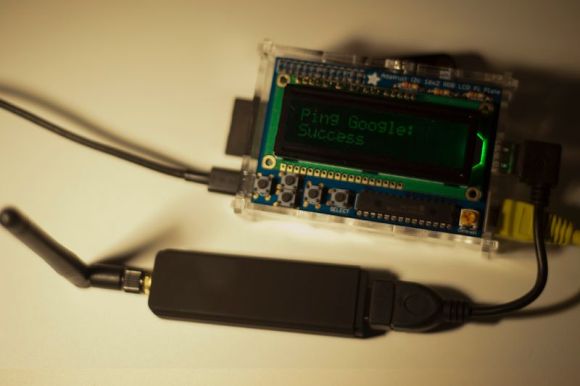
The Rogue Pi has a few features that make it helpful for pentesting. First off, it has a power on test that verifies that the installation onto the target network was successful. Since the install of a dropbox needs to be inconspicuous, this helps with getting the device setup without being detected. A LCD allows the user to see if the installation was successful without an additional computer or external display.

Once powered on, the device creates a reverse SSH tunnel, which provides remote access to the device. Using a reverse tunnel allows the device to get around the network’s firewall. Aircrack-ng has been included on the device to allow for wireless attacks, and a hidden SSID allows for wireless access if the wired network has issues. There is a long list of pentesting tools that have been built to run on the Pi.

Check out a video demonstration of the dropbox after the break.

Continue reading “Rogue Pi: A RPi Pentesting Dropbox”