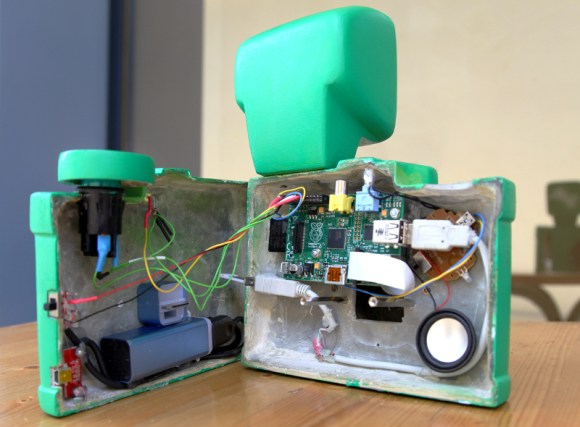
Here’s yet another example of well targeted advertising. This camera built around a Raspberry Pi is a giveaway from Sprite. The “lucky” winner of the camera will have the pleasure of seeing the Sprite logo as a watermark on all of the images they snap with it. But in the right hands it’s a simple hack to remove that “feature” (they published the Python script that adds the watermark) or to just scrap the parts for another project. Either way, Sprite got us to say their name three times in this paragraph so the campaign worked.
The most obvious part of this build is the custom cast resin case that they came up with which is a gaudy cartoon-like monstrosity. It protects the case-less Raspberry Pi board, and mounts the Pi Camera board so that the lens is positioned correctly. The lipstick-sized module mounted in the lower back half of the case is a 2400 mAh portable power supply with a USB charging port sticking out the side. This makes us wonder, do you have to wait for the RPi to power up before snapping a picture? If the size and color didn’t get you noticed by everyone the shutter sound will. it shouts the name of the soda company whenever you press the shutter release button.
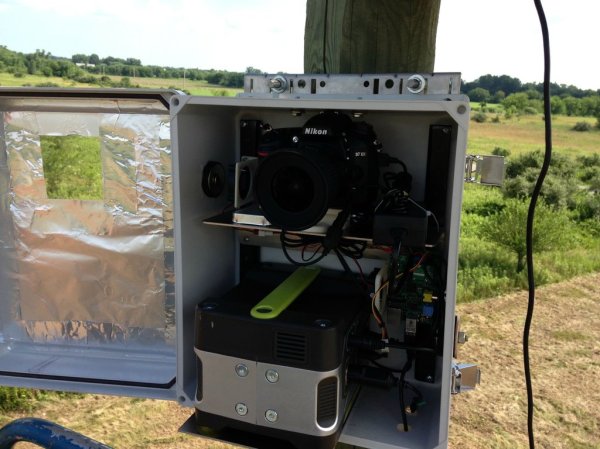
If you’re more of a high-end photography enthusiast this DSLR wedded with an RPi will be of more interest.