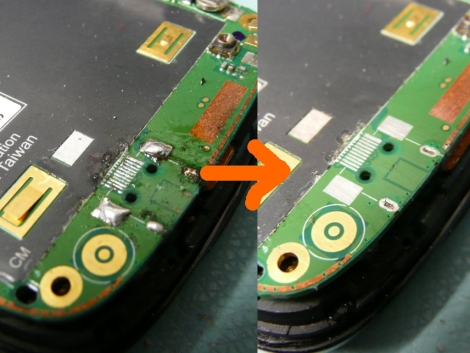
Revive Your Tired Dremel Battery Pack

It turns out there’s nothing more than six Nickel Cadmium AA rechargeable batteries inside of that cordless Dremel battery pack. Yep, standard rechargeable AA’s that you can buy most anywhere, and now you can revive that aging battery pack by following [Stuuf’s] guide. Since you’re already at it, a few more bucks will yield a real upgrade by using the superior Nickel Metal Hydride batteries which should yield around three times as much use between charging. We totally understand having a battery pack, since the shape of the case is part of the handheld tool, and it should be easy to interchange the battery as one unit. We just wish that the battery pack had been designed to have the AA cells swapped out by the user once they had reached the end of the line.

Do you have other cordless tools in need of a pick-me-up? Check out this Makita battery pack repair hack for a point in the right direction.

[Thanks Bluewraith]

Reverse Engineering A PCB

Occasionally when a device breaks, the defect is obvious. Whether it is a blown fuse or a defective capacitor, generally the easy to see stuff is easy to fix. When a problem is more subtle, or when doing some more advanced tasks like adding functionality to a device, greater knowledge about a circuit board is required. While there might be details hidden in lower levels of PCB, often just knowing the mounted components and layout of the outside layers can be enough to create a rough schematic of a device. [Throbscottle] has put together an excellent guide for procedurally breaking down a photo of a board and turning it in to something useful. The guide utilizes some open source image processing software such as the GIMP, Inkscape, and Dia, all of which are widely available. Keep in mind this reverse engineering can be a time consuming process, but will almost definitely reward those patient enough to work through it.

[Thanks to everyone who sent this in!]

Fixing The Rovio Battery Charging Circuit

[Chris] was unhappy with the battery performance of his Rovio. It seems that he’s not alone, so he set out to reverse engineer the battery charging circuit to see if there was a fix. Boy is there, what he found is the diode above, apparently installed backwards when compared to the silk screen diode symbol. Now it’s entirely possible that the silk screen is wrong and this was fixed during assembly. We think that’s unlikely because if the closer of the two diodes was supposed to have the same polarity as the one next to it there should have been room to install them both in exactly the same orientation. [Chris] pulled out a soldering iron and changed the diode to match the silk screen. That fixed his problem and he’s now getting better performance than he ever has.

[From our comments section]

Repairing A Broken RC Ceiling Fan

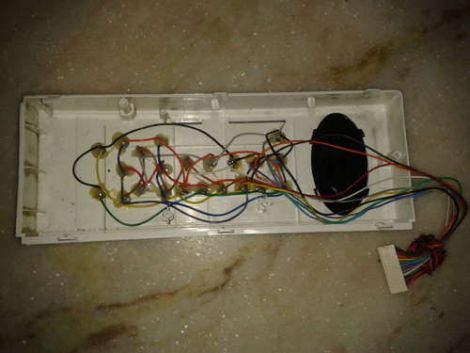
The ceiling fan in [Steve Vigneau’s] bedroom started giving him trouble. It is normally operated using a remote control but that functionality had become pretty spotty. He cleaned the contacts on the remote but still had troubles that could only be fixed by power-cycling the fan itself. When it finally died he set out to repair the unit himself. Above you can see the controller board from the fan. It was a bit too complicated for [Steve] to troubleshoot so he figured why not just stop using the remote control and make it work with a couple of switches? A bit of research led him to some basic fan schematics that he used for a reference. He need to remove a couple of capacitors and wire them up with one switch for the fan and another for the light. Sure, there’s no settings for speed or direction, but [Steve] thinks he doesn’t need to change them and always has the option to add them in the future.

Fixing The Future

[iFixit] (who we’ve posted about many times before) has launched a passionate manifesto promoting the skills and knowledge of repair as a solution to technological consumerism and waste. They use powerful footage of electronic waste dumps in Ghana to make the point that we must collectively change the way we use and relate to our high technology–take a look after the break.

The manifesto rallies against the practice of withholding repair knowledge such as manuals, error codes and schematics–putting responsibility in the hands of manufacturers–but also makes it clear that it is up to every one of us to inform ourselves and to value functionality over novelty.

Considering the many-faceted resource crisis that we are headed towards, any efforts to push our behavior towards a sustainable and considerate way of life should be considered. As hackers we repair, reuse and rethink technology as part of our craft–but we are also privileged by our enthusiasm for technical challenges. The real battle is to disseminate the kind of knowledge and skills we possess into the general population. This is where the heart of [ifixit]’s message comes into play: the creation of an open, editable online repair manual for every electronic device. If you have something to teach, why not pop over and help expand their database?

Continue reading “Fixing The Future”

Step By Step Antique Radio Repair And Upgrade

I actually have a 3 very similar radios. I think I need to do this.[M3talhead] takes us through a very informative repair of an old tube radio. In this case, his radio was from the late 30s. He was able to find the original data from Radiomuseum.org. He painstakingly dismantles the radio components and the cabinet. Instead of completely modernizing the internals, he replaces the bad parts and brings it back to functionality. He wanted to do an MP3 upgrade, but rather than wire directly into the radio, he built an AM transmitter for his mp3 player.

Servicing An Epson Projector

[Socket7] got his hands on a projector that had some color calibration problems. Of course the servicing manual says that there are no technician serviceable parts inside, but he cracked it open and fixed it anyway. This is an Epson PowerLite 5500c which was showing blue and yellow bands around the outside of the projected image. He could hear something rattling around inside which happened to be the lenses. It turns out there are foam pads that hold them in place that had shriveled over time. After a bit of careful work he replaced them and now has a working projector.

We’d love to have a projector of our own; there’s a lot of cool stuff you can do with them. Fixing a broken one is a great way to get one cheap, [Socket7’s] was free!