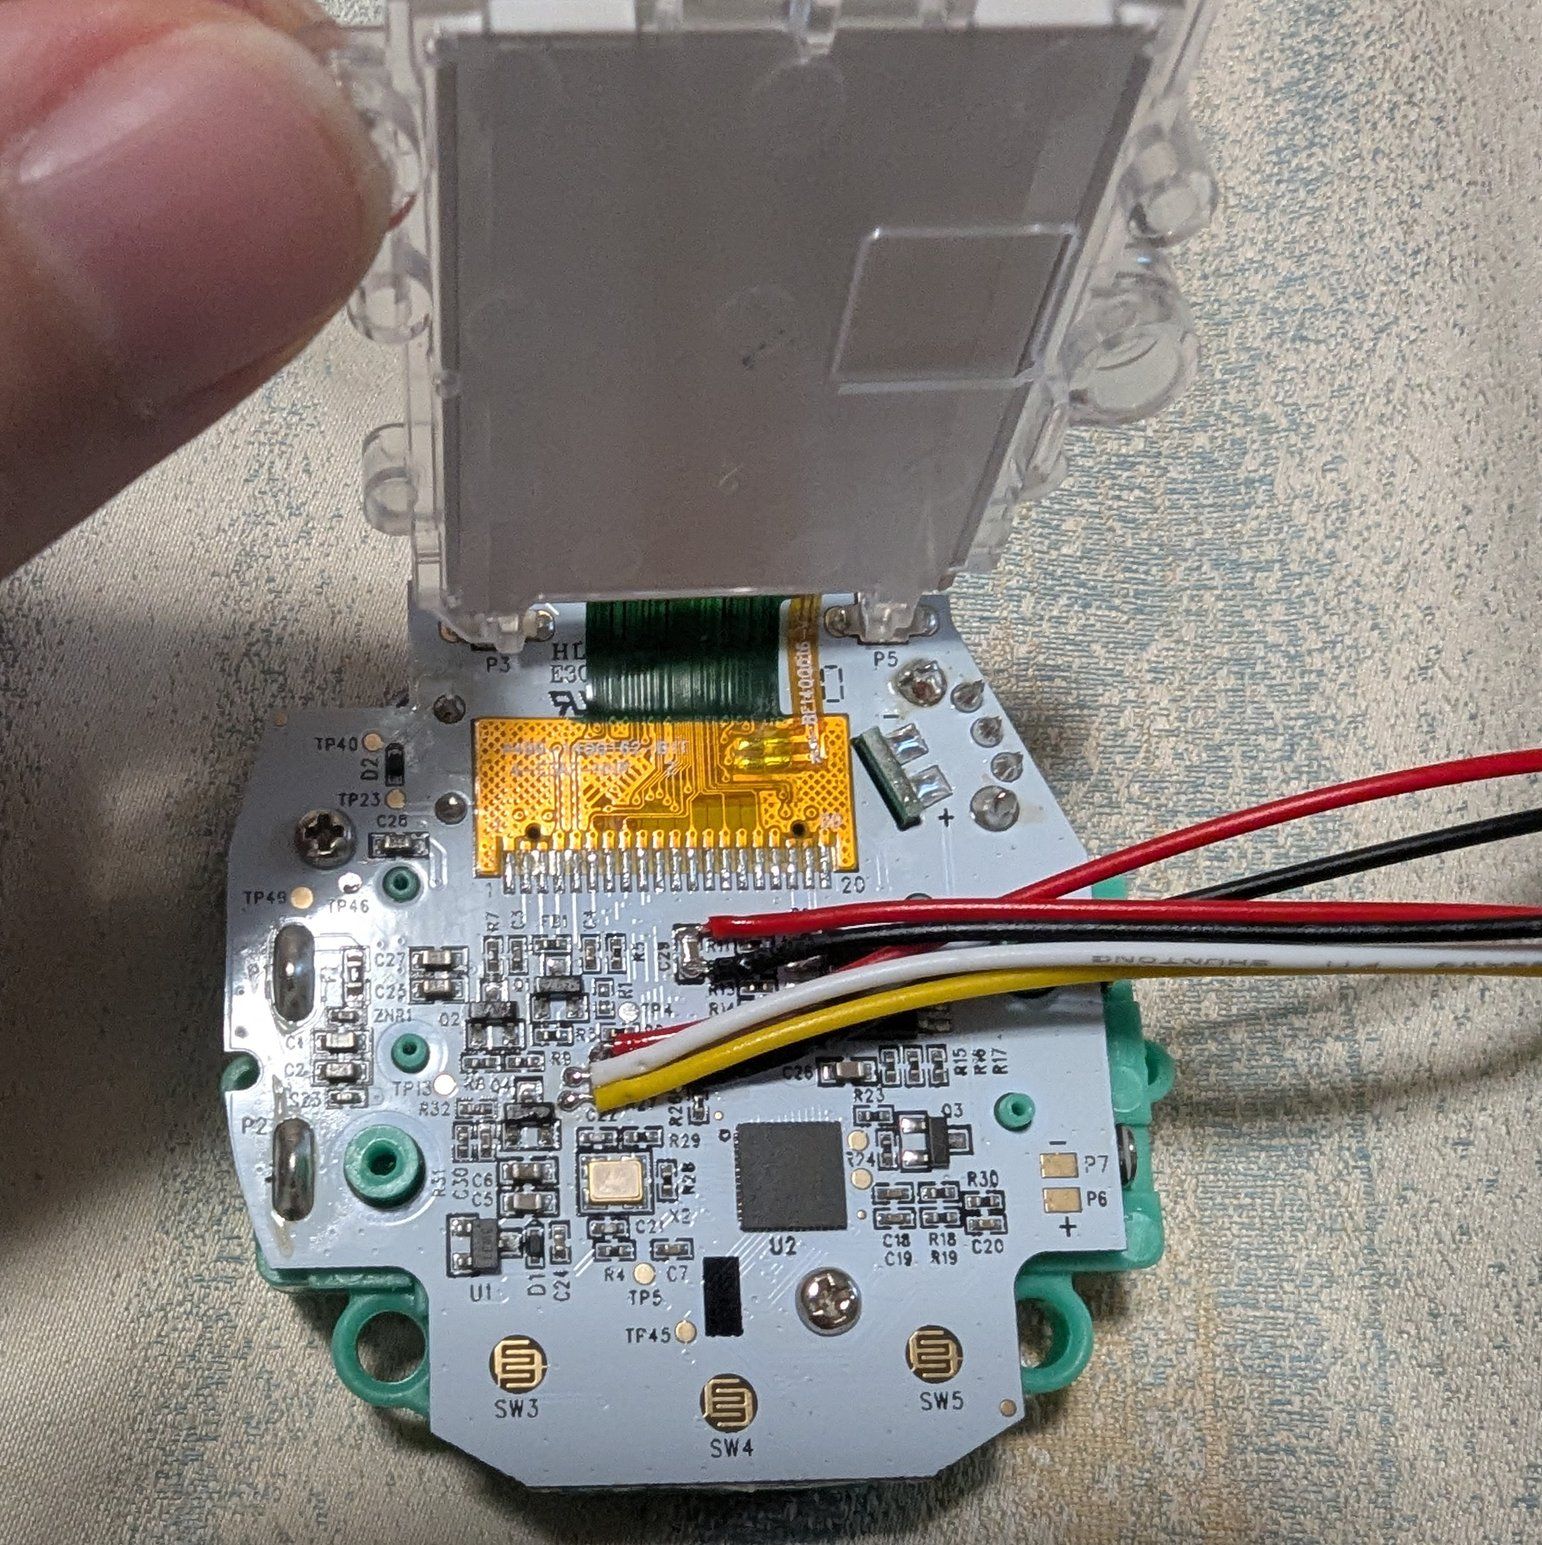
Perpetual motion devices are either a gag, a scam, or as in the case of this particular toy that [Big Clive] bought on AliExpress, a rather fascinating demonstration of a contact-free inductive sensor combined with a pulsed magnet boost for the metal ball. A cool part about the device is that it comes with a completely clear enclosure, so you can admire its internals while it’s operating. Less cool was that after unboxing the device wasn’t working as the detector wasn’t getting the 12 V it needs to operate, requiring a bit of repairing first.
Based on the label on the bottom of the device with the creative model identifier P-toy-002, its standby current is 10 µA which ramps up to 3 A when it’s operating. This makes sense when you look at the two core components: the industrial inductive detector, and a rather big electromagnet that’s driven by a bank of three 10 mF, 35V capacitors, turning it into something akin to a coilgun. Annoyingly, an attempt was made to erase most of the IC package markings.
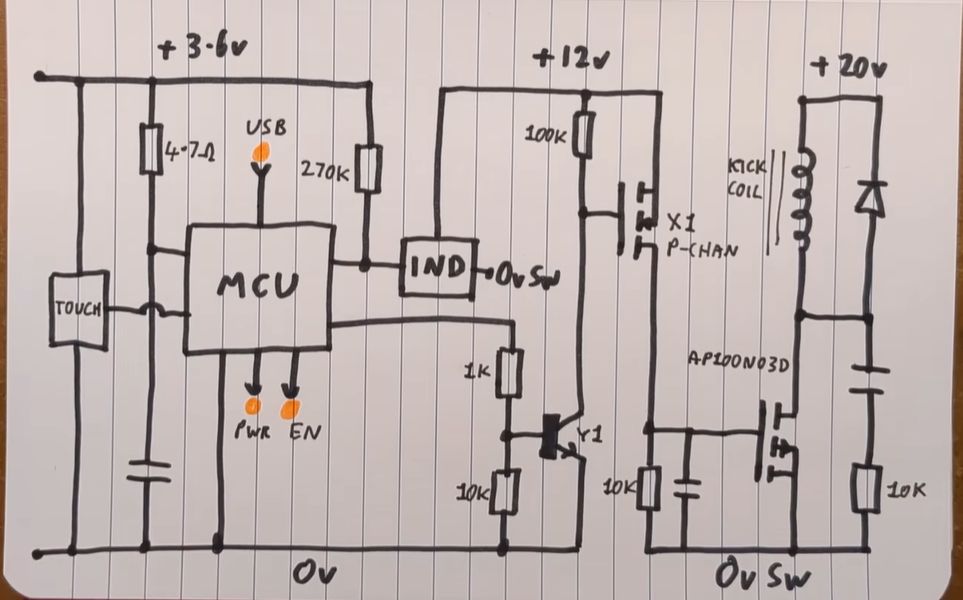
The circuitry isn’t too complex, fortunately, with an adjustable electromagnet coil voltage circuit combined with a MOSFET to provide the pulse, and a 78L12 regulator to generate the 12 VDC from the coil’s voltage rail for the sensor that is monitored by a MCU.
Continue reading “Surprisingly Refined Perpetual Motion Device Teardown”