 While most homebrew video game development has focused on the original NES, Atari consoles, and has produced a few SNES games, there is another console out there that hasn’t seen much love. Sega’s classic console, the Genesis or Mega Drive, depending on where you’re from, was an extremely capable machine with amazing capabilities for its time. [Chris] figured the Mega Drive would make a good target for an all-in-one development kit, and with a lot of work he managed to put one together.
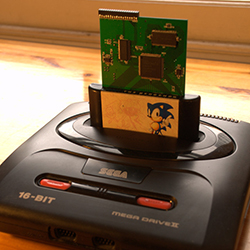
The standard cartridge for the Genesis or Mega Drive is just a simple ROM chip wired directly into the console’s address space. [Chris] took a cheap FPGA and some dual port ram to create a seamless interface between the modern world and the inside of this ancient console, allowing him to load every Mega Drive game off an SD card, as well as use modern tools to modify old games, or even create new ones.
To demonstrate his dev kit, [Chris] took a copy of Sonic 1, and using the debugger and GDB, gave himself infinite lives. It’s a very cool demonstration, searching through all the commands executed by the Megadrive CPU with the standard Linux debugging tools.Going through the trace, [Chris] found the instruction that decremented that value representing Sonics lives, replaced it with NOPs, in effect giving himself infinite lives. This is a lot like how the Game Genie works, only using much, much better tools.
Of course a USB dev kit wouldn’t be much use if it could only modify existing games. The real power of [Chris]’ work comes from being able to develop your own demos, games, and homebrew apps.
[Chris] needed to write a small homebrew Mega Drive app for the ROM loader portion of his dev kit using SGDK. Disassembling his own code with the dev kit, he was able to take a look at the instructions, and potentially even modify his loader.
It’s a really impressive technical accomplishment, and something that could be a boon to the extremely small homebrew scene for the Mega Drive. All the boards, code, and everything else are available over on [Chris]’ github, with the entire project written up on hackaday.io. Videos below.