Spin FV-1 Emulator Simplifies Sound Pedal Development

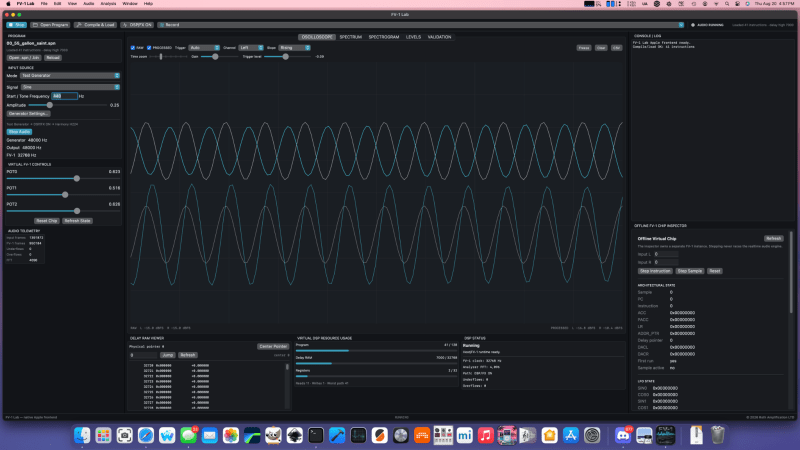
If you’ve never heard of the Spin Semiconductors FP-1 digital signal processor chip, don’t worry– that just means you haven’t been deep into guitar petals and audio effects hardware lately. [adamjvr], a.k.a. [avr] has, and he’s gone to the point of creating a PC-based emulator of this sound chip to simplify development.

If you don’t see the utility, stop and think about the development cycle without a simulation like this: you program, you flash to a board, and you test there. Not only does the ‘flash to the board’ step add time and friction, you do also have a limited number of flashes on the board’s memory. With an emulator on your PC, the workflow tightens to ‘code, test’ and you don’t flash the board until the simulated DSP is doing the sounds you want it to.

As for the FV-1 itself, it’s an interesting little chip in that it’s quite a full-featured DSP– rather, it’s small instruction set is focused entirely on audio effects. If you’re into that world– be it guitar pedals or otherwise– you may find this project very useful. There are releases for Linux, MacOS and Windows, and it’s all open-source on GitHub, under the Mozilla Public License. It’s not the most common choice, but we’re hardly going to complain about licenses to anyone willing to share their hard work.

If you like the idea of testing your work before you go to the bench, we’ve seen software that offer the same functionality for Arduino projects, as well as other AVR and PIC micros. It’s been a while since we featured a programmable guitar pedal, so we hope this tool enables others to rock out.
An Electronic Explanation Of 1960s Fuzz Boxes

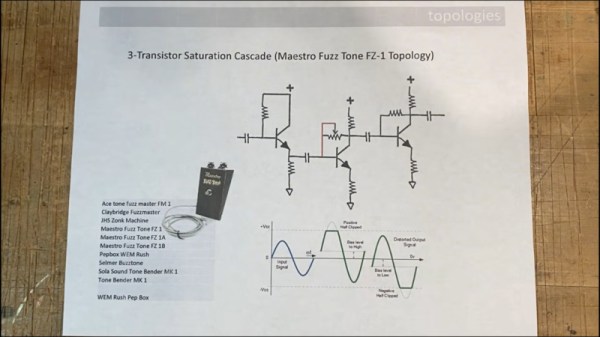
It’s likely that even those of us who have never picked up a guitar in our lives will recognize the sound of an electric guitar with a fuzz box effects pedal. The raspy distorted sound has been at the heart of so many very well known recordings. Behind it is a distortion circuit, or as [Bill Jehle’s Mad Scientist Guitar Lab] is here to tell us, eight different circuit topologies.

The result is a fascinating trip through the evolution of rock music through the 1960s, as he examines circuits from simple diode clippers through to frequency doublers and phase shifters. He’s provided a playlist as an accompaniment so you can even have an immediate listen to each sound. It’ll mess up our YouTube recommendations, but worth it for the informative journey.

It’s also a window into a lost period in electronics where all they practically had was the transistor, so each device had to put in the maximum work for a living. Designing circuits like these called for intimate knowledge of the device characteristics, and just how they could be safely exceeded. The video is below the break, and well worth a watch.

If clever transistor music circuits interest you, you’ll love the flawed devices that gave the Roland 808 its sound.

Continue reading “An Electronic Explanation Of 1960s Fuzz Boxes”

DIY Programmable Guitar Pedal Rocks The Studio & Stage

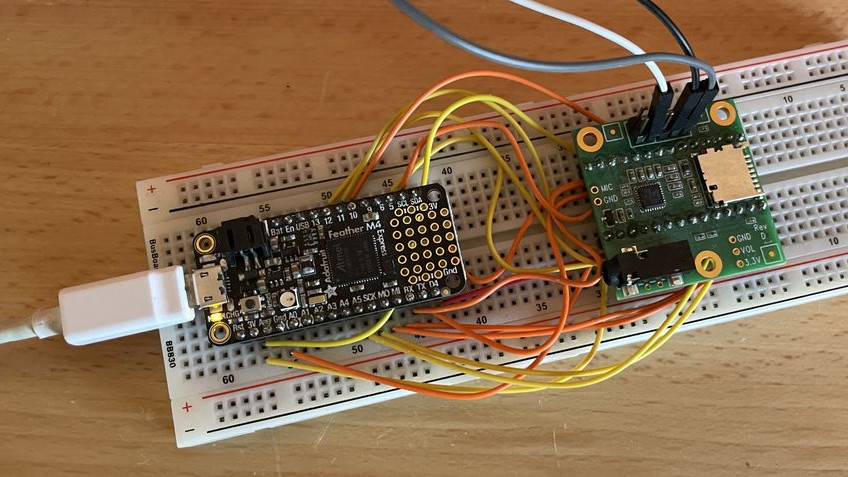
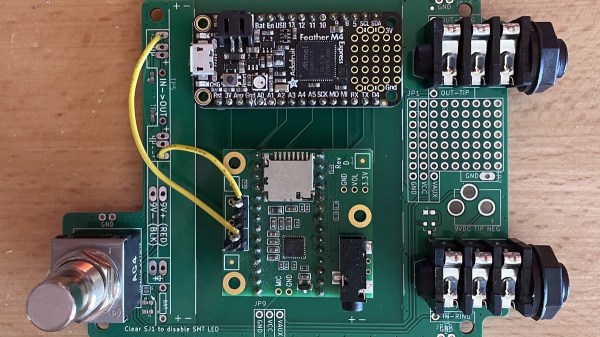
Ever wondered how to approach making your own digital guitar effects pedal? [Steven Hazel] and a friend have done exactly that, using an Adafruit Feather M4 Express board and a Teensy Audio Adapter board together to create a DIY programmable digital unit that looks ready to drop into an enclosure and get put right to work in the studio or on the stage.

The bulk of the work is done with two parts, and can be prototyped easily on a breadboard.

[Steven] also made a custom PCB to mount everything, including all the right connectors, but the device can be up and running with not much more than the two main parts and a breadboard.

On the inside, the Adafruit Feather M4 Express board works with the audio board over I2S, a standard for sending serial digital audio between chips. Working with the audio itself is done with the Teensy Audio Library, providing a fantastic array of easy-to-use functions for processing and manipulating digital audio streams.

Together, all the right pieces are in place and [Steven] provides the code for a simple tremolo effect as a glimpse of what’s possible with the unit. Interested in going a bit further? [Steven] shares additional details about what’s involved in writing a custom effect from scratch using the Teensy Audio Library.

As mentioned, I2S is where it’s at when it comes to working with digital audio at the chip level, and our own Jenny List can tell you everything you need to know about I2S, a useful protocol that has actually been around since 1982!

The Beat Goes On With This ESP32 Page Turner

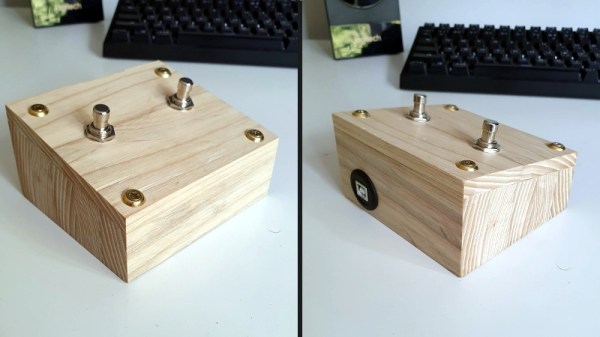
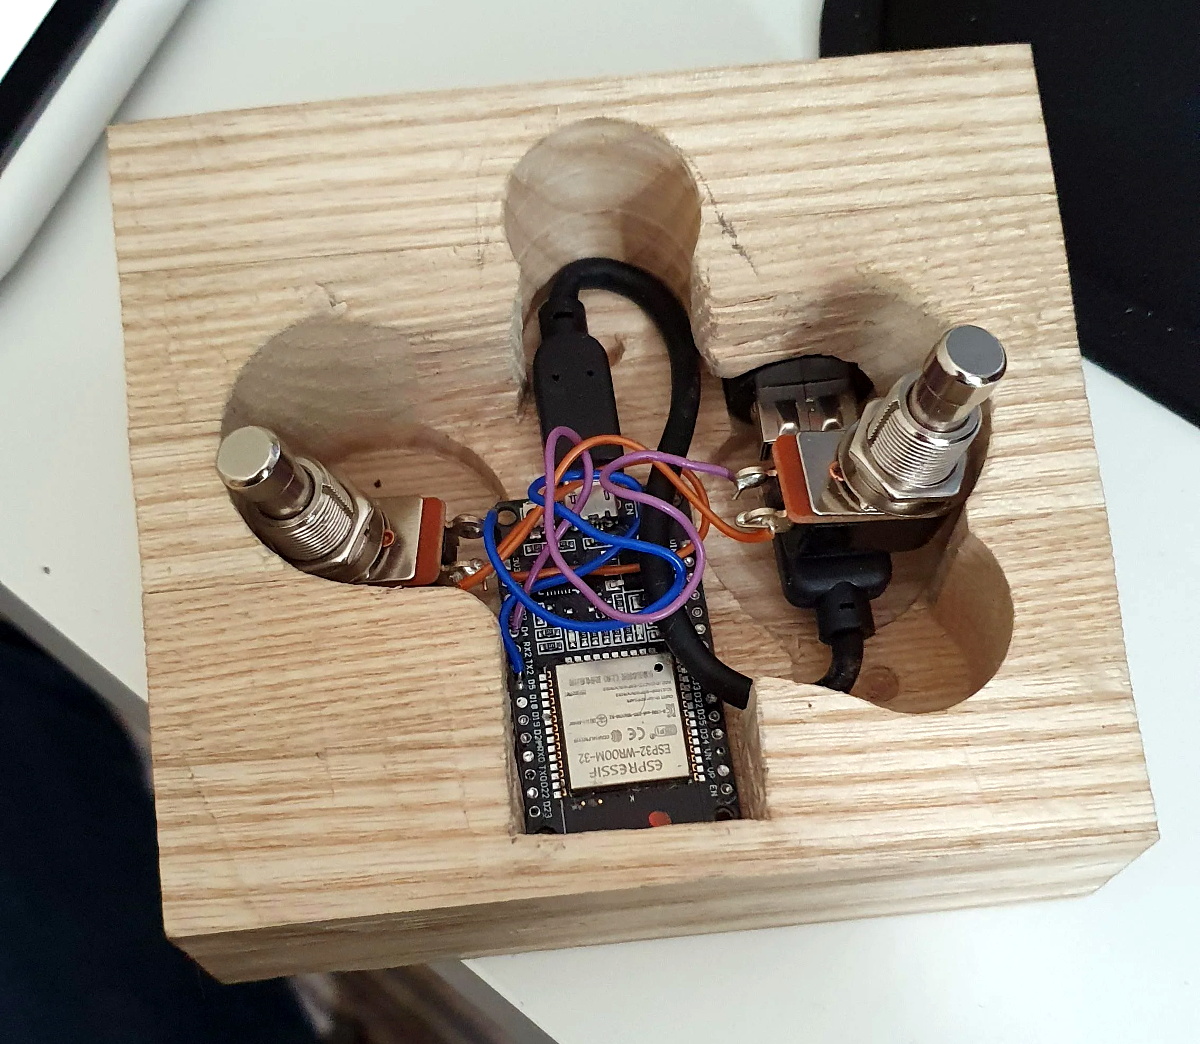
Looking for a hands-free way to page through sheet music on an iPad, [The_Larch] came up with this simple Bluetooth input device based on the ESP32. The microcontroller just needed to have two switches wired into the GPIO pins, in this case the same heavy-duty plungers you’d find on a guitar pedal, and a USB bulkhead pass-through to provide power. Thanks to the excellent ESP32-BLE-Keyboard library, it only took a few lines of code to fire off the appropriate key strokes when the left or right button was pressed.

While undeniably a simple project from an electronics standpoint, the wooden enclosure [The_Larch] built is an interesting change of pace from the 3D printed fare we normally see around these parts. It started life as strips of oak reclaimed from an old kitchen table, which were laminated together to make a solid block. A large spade bit was then used to bore into the block to make a void for the electronics, and a second flat piece of oak was fashioned into a front panel.

Creating Bluetooth input devices with the ESP32 is so incredibly straightforward that we’re honestly a little surprised we don’t see the trick used more often. Especially when you consider all of the custom made keyboards that have graced these pages over the last couple of years. The tools are available for anyone who wants them, so you have to wonder if hackers just aren’t fond of using Bluetooth for something as important as a keyboard?

Raspberry Pi Crazy Guitar Rig Turns You Into A Hard ‘N Heavy One-Man Band

It’s a common problem: you’re at a party, there’s a guitar, and your plan to impress everyone with your Wonderwall playing skills is thwarted by the way too loud overall noise level. Well, [Muiota betarho] won’t have that issue ever again, and is going to steal the show anywhere he goes from now on with his Crazy Guitar Rig 2.0, an acoustic guitar turned electric — and so much more — that he shows off in three-part video series on his YouTube channel. For the impatient, here’s video 1, video 2, and video 3, but you’ll also find them embedded after the break.

To start off the series, [Muiota betarho] adds an electric guitar pickup, a set of speakers, and an amplifier board along with a battery pack into the body of a cheap acoustic guitar. He then dismantles a Zoom MS-50G multi-effect pedal and re-assembles it back into the guitar itself with a 3D-printed cover. Combining a guitar, effect pedal, amp and speaker into one standalone instrument would make this already an awesome project as it is, but this is only the beginning.

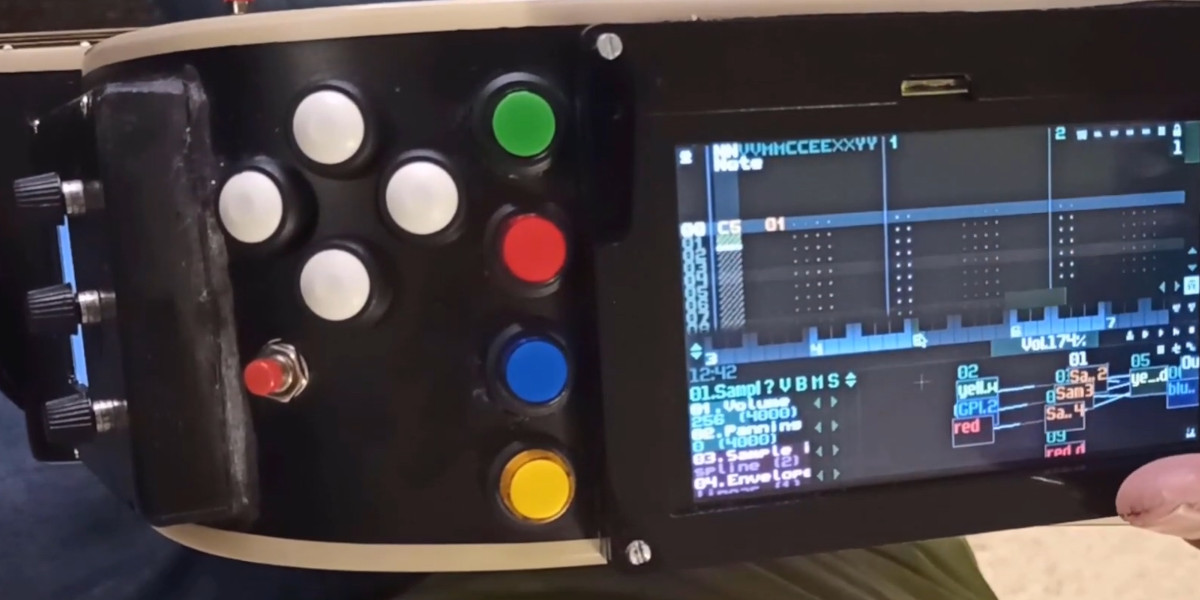
Touch screen and controls closeup
RPi touch screen running SunVox, plenty of buttons, and integrated multi-effect pedal on the left

So, time to add a Raspberry Pi running SunVox next, and throw in a touch screen to control it on the fly. SunVox itself is a free, but unfortunately not open source, cross-platform synthesizer and tracker that [Muiota betarho] uses to add drum tracks and some extra instruments and effects. He takes it even further in the final part when he hooks SunVox up to the Raspberry Pi’s GPIO pins. This allows him to automate things like switching effects on the Zoom pedal, but also provides I/O connection for external devices like a foot switch, or an entire light show to accompany his playing.

Of course, adding a magnetic pickup to an acoustic guitar, or generally electrifying acoustic instruments like a drum kit for example, isn’t new. Neither is using a single-board computer as effect pedal or as an amp in your pocket. Having it all integrated into one single device on the other hand rightfully earns this guitar its Crazy Guitar Rig name.

(Thanks for the tip, [alex]!)

Continue reading “Raspberry Pi Crazy Guitar Rig Turns You Into A Hard ‘N Heavy One-Man Band”

Guitar Effect Built From An Old Record Player

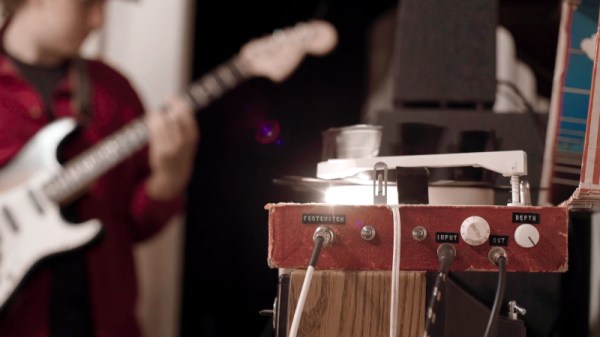
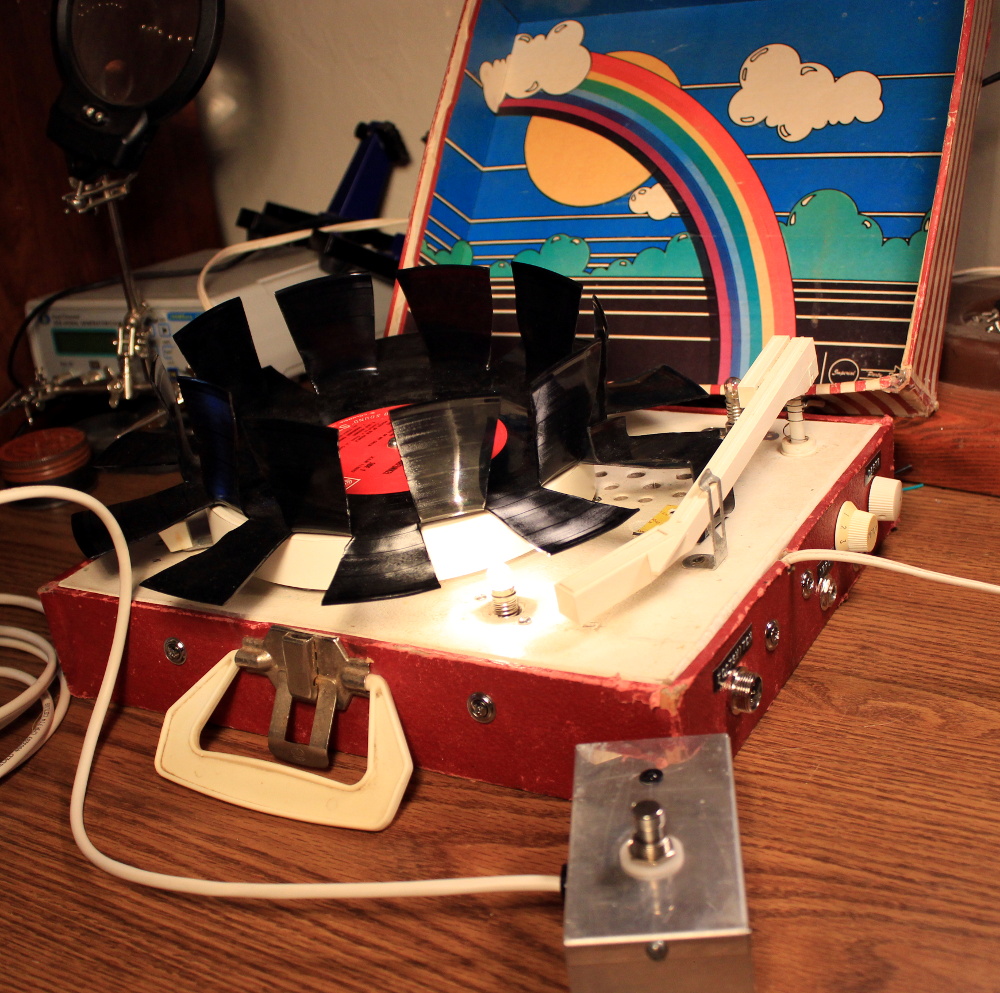
With little more than a gutted record player, a light bulb, and the legendary 555 timer IC, [Jacob Ellzey] has constructed this very slick optical tremolo effect for his guitar. By modulating the volume of the input signal, the device creates the wavering effect demonstrated in the video after the break.

The key is a vinyl record with large tabs cut out of it. As the record spins, these voids alternately block and unblock a small incandescent bulb. A common GL5537 photoresistor, mounted on the arm that originally held the player’s needle, picks up the varying light levels and passes that on to the electronics underneath the deck. An important note here is that different spacing and sizing of the cutouts will change the sound produced by the effect. [Jacob] has already produced a few different designs and plans on experimenting with more now that the electronics are completed.

Under the hood there’s a voltage divider and low gain amplifier connected to the photoresistor, and also a 555 timer circuit that’s driving the incandescent bulb. Once he was done fiddling with them, the circuit was moved to a neat little protoboard. A pair of potentiometers mounted through the side of the record player allow for adjusting the depth of the effect itself, as well as the output volume. Naturally, there’s also an external foot pedal that allows keying the effect on and off without taking your hands from the guitar.

As is usually the case, everything was going well on this project until the final moments, when [Jacob] found that the circuit and bulb were both browning out when powered from the same transformer. As a quick fix, he gutted a Keurig and used its transformer to drive the light bulb by itself. With independent power supplies, he was ready to rock.

Of course this isn’t the first time we’ve seen a piece of consumer electronics modified into a guitar effect, but if you’re looking for something a bit more built for purpose, there’s plenty of high-tech options to keep you busy.

Continue reading “Guitar Effect Built From An Old Record Player”

A Hard Rocking Arduino Visualization Shield

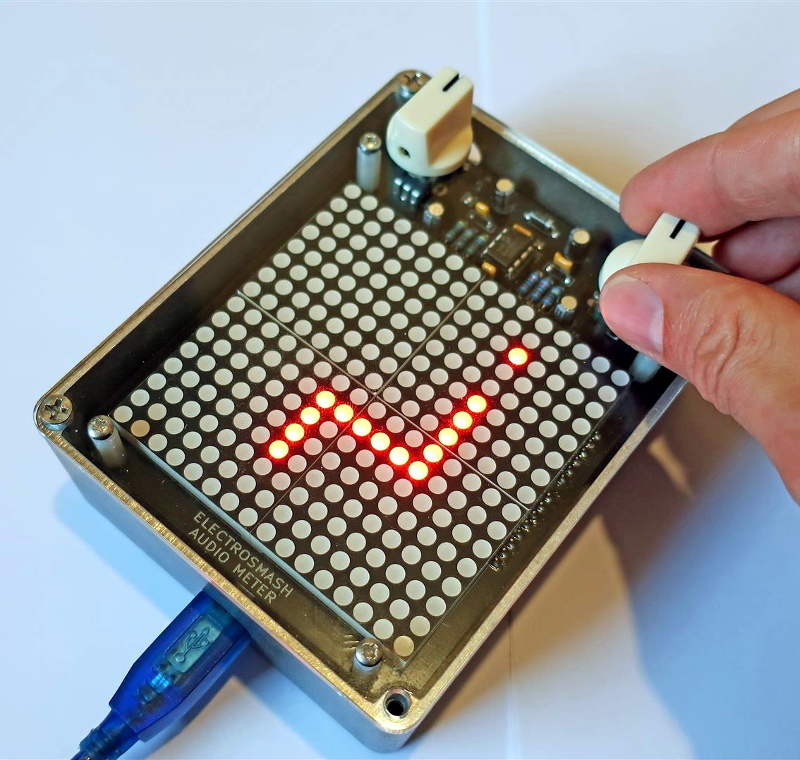
Over the summer [ElectroSmash] put the finishing touches on the Arduino Audio Meter, a shield for the Arduino Uno that visualizes various aspects of an incoming audio signal on a set of four 8×8 LED dot matrices. Obsentisibly it’s for use on a guitar pedalboard, but thanks to the incredible documentation and collection of example code provided by the team, the project promises to be an excellent platform for all sorts of audio experimentation.

Incoming audio is amplified with an MCP6002 and fed into the Uno’s Analog to Digital Converter, where it’s processed via whatever Sketch the user has uploaded. User input is provided by a digital encoder with push-button. A set of four MAX7219 chips control the entire 256-pixel matrix with just three pins on the Arduino. The resolution of the display allows the Arduino Audio Meter to show more than just a simple VU meter, it can even do text and basic graphics.

[ElectroSmash] provides various Sketches for use with the Arduino Audio Meter that provide the expected repertoire of audio visualizations, but they also provide a number of interesting Sketches to expand the capabilities of the device in unexpected ways. Some of them could be useful for a stage musician, such a tool to tune your guitar, whereas others are fun uses of the hardware such as a game of “Snake”.

With the entire project released as open source, users are free to run wild with the Arduino Audio Meter. Writing your own custom software is an obvious first step to making the project your own, but adding additional hardware features and functions certainly aren’t out of the question either.

Our very own [Lewin Day] once walked us through the effort involved in building boutique guitar pedals, and while the Audio Audio Meter’s capabilities are somewhat limited as it doesn’t have the ability to change the audio going through it, we’re still interested in seeing what the community will come up with once they have an easy way to bring their ideas to life.

Continue reading “A Hard Rocking Arduino Visualization Shield”