A Capacitive Discharge Welder/cutter For All Your Lightweight Needs

microspot-welder

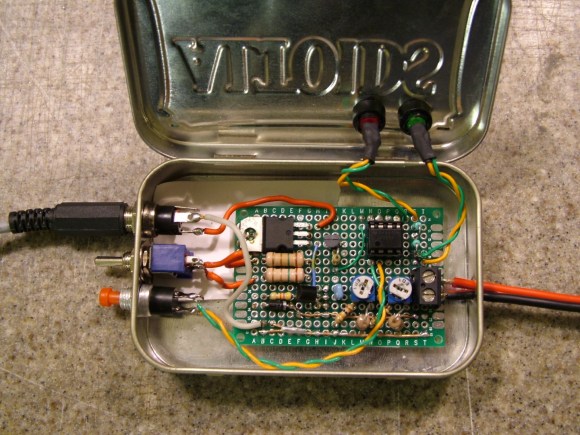
[Radu Motisan] wrote in to share a cool project he has been working on lately, a pulsed microspot welder/cutter.

The device is capable of spot welding thin metals such as foils and battery tabs by sending a pair of high current pulses between the two electrodes whenever [Radu] presses the trigger button. The cutting portion of his device uses the same general mechanism, though it requires a far greater number of pulses to get the work done.

The welding/cutting process is controlled by an ATMega16, which is also tasked with taking input from the user and displaying information on the LCD panel. The microcontroller creates quick (in the ten to several hundred microsecond range) pulses for both welding and cutting, with the latter obviously requiring a long series of pulses.

[Radu] started out using a relatively small capacitor array to power the device, but has recently upgraded to a 1.6 Farad car audio capacitor, which works (and looks) much better than before. His blog seems to update every few days with more pictures and details about his welding station, so be sure to check back often for updates.

Be sure to stick around to see a short video of [Radu] adding metal tabs to batteries and tearing down an aluminum can with his cutter.

Continue reading “A Capacitive Discharge Welder/cutter For All Your Lightweight Needs”

Toaster Oven Reflow Soldering Roundup

SMD components have a lot of advantages over the through-hole parts our fathers and grandfathers soldered. Working with these tiny surface mount components requires a larger investment than a soldering iron and a wire-wrap gun, though. Here’s a few reflow ovens that were sent in over the past week or two.

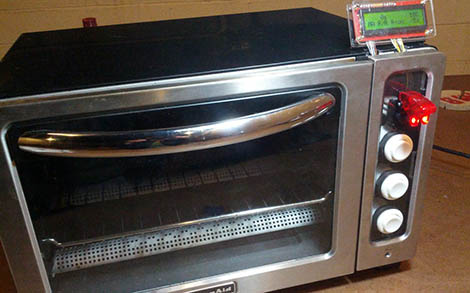
[ramsay] bought a 110 V toaster oven off of eBay. Even though [ramsay] is in England and has 230 V mains, everything in the oven is mechanical and works just fine with a higher voltage. His first test didn’t go quite as planned; the solder paste wasn’t melting at 120° C, so he cranked up the temperature and learned that the FR in FR-4 stands for flame retardant. Never deterred, [ramsay] decided to build a controller so the temperature ramps up and cools off at the right rates for the flux and paste to do their thing.

Solder paste has a temperature profile that requires the board to be kept at a temperature between 150° and 180° C for a minute or so before climbing up to 220° for a second so the solder will melt. [Nicolas] had the interesting idea of putting a USB port in his toaster oven and storing the heating profiles on his desktop. The build uses an MSP430 microcontroller to turn the relays powering heating elements on and off. [Nick] is working on a C# desktop app to monitor and regulate the oven temperature from his computer, so we’re fairly interested in seeing the final results.

Watching the SMD self-alignment videos on YouTube is a lot more fun than messing around with tweezers, stereo microscopes, and extremely fine soldering irons. If you’ve got a better idea for a toaster/reflow oven, send it in on our tip line and we’ll check it out.

oscope-reverse-engineering

Reverse Engineering An Oscilloscope Circumvents Vendor Crippleware

The crew over at the Hungarian Autonomous Center for Knowledge (H.A.C.K.) say they aren’t the most well-funded organization out there, so they were stoked when they found they could afford to bring a slightly used UNI-T UT2025B digital oscilloscope into the shop. As they started to tinker with it, the scope revealed one major shortcoming – screenshots were only accessible via a USB connection to a Windows computer.

Since they didn’t have any Windows boxes in house, [András Veres-Szentkirályi] decided he would try reverse-engineering the protocol so they could get access to this useful feature.

He set up a Windows VM, and using Wireshark on the host Linux box, [András] sniffed the data passing over the scope’s USB interface. He was able to identify what looked like image packets being sent to the VM, which he was able to decode using a small Python script. The resultant images were monochrome and they didn’t look quite right, but it was a start. As he dug further [András] found that he was overlooking some of the color data packed into the images, and after a bit of fiddling he got the sharp, colorful image you see above.

It turns out that while the scope has a monochrome LCD, it sends 16-bit color images over the USB interface – images that the Windows’ client degrades before displaying them on the screen. So in the end, he was not only able to get the scope working on any OS with the ability to run Python, he was able to grab far better images than the manufacturer ever intended – A very nice hack if we do say so.

Be sure to swing by the H.A.C.K. wiki as well as the project’s github repository if you have one of these scopes and are looking to wring some better images out of the hardware.

SpeechJammer Puts An End To Annoying Speakers

If you’ve ever had to deal with people disturbing your peace and quiet by yammering on with their cell phones, you might be interested in the SpeechJammer.

The idea behind the SpeechJammer is fairly simple: It’s very hard to speak if your words are recorded and played back to you a fraction of a second later. This is a real psychological phenomenon known as delayed audio feedback that also has a beneficial effect on stuttering.

According to the researcher’s writeup (PDF warning), the SpeechJammer works by measuring the distance to the ‘target’ with an ultrasonic distance sensor and records the speaker’s voice with a shotgun mic. The recording of the spearker’s voice is delayed for about a fifth of a second and then played on a speaker on the front of the gun.

The researchers tested two conditions: ‘reading news aloud’ and a ”spontaneous monologue.’ Subjects who were reading news aloud had their speech jammed more often than those with the monologue, but the results look fairly promising. There’s only one video of the SpeechJammer in action (available after the break), so we’d like to see a few Hackaday readers build their own ‘shut up gun’ and send in a demo with an annoying talker to validate the results.

Continue reading “SpeechJammer Puts An End To Annoying Speakers”

DyIO Is A Huge Robotics Development Board

[Kevin] wrote in to tell us about the robotics development platform he’s been working on for the last few years. He calls his device the DyIO, and looks like an extremely easy way to get a robot up and running quickly.

Because the DyIO stands for Dynamic Input & Output, [Kevin] thought it was important to put 24 separate IO pins in his build. These pins can serve as 24 digital inputs or outputs, a few analog inputs and PWM outs, or even DC motor controls.

What’s really interesting is the SDK that [Kevin] and his team chose to build. With this SDK, you can program the DyIO in Java or just about any other language you would want. Already, [Kevin] and his team have built a few interesting projects around the DyIO, like a hexapod robot and animatronic pokemon. While we’re sure something awesome beyond imagination is waiting to be built with the DyIO platform, you can check out these already-completed builds after the break.

Continue reading “DyIO Is A Huge Robotics Development Board”

Using The Parallel Port As A Logic Sniffer

[Fernando] wrote in to share his take on building a logic analyzer. He’s using the parallel port to capture data and feed it to the display software of your choice.

The method depends on a custom kernel which alters the way the parallel port works. The kernel he compiled includes a method of intercepting the signals coming in from the hardware, passing that data to the /dev/parport* as it should, but also sending a copy to /dev/parportsnif*. It also creates a log file which is in the OpenBench Logic Sniffer format for easy use with various display software.

Of course this is easiest to use with a Linux system, but can also be run as a virtual machine under Windows. We’d plan on using a virtual machine within Linux as well since this is a custom kernel and will probably only see occasional use.

Another Take On Using ‘dead’ Batteries

Here’s another circuit that can be used to squeeze the remaining potential from supposedly dead batteries. Just like the AASaver, we see this as a useful prototyping tool, providing juice for a breadboard even though it’s not reliable enough for long-term use (the batteries are just about through after all).

First off, the image above shows rechargeables instead of alkalines. We don’t recommend this as the circuit has no cutoff feature and the 0.7V input for the boost converter surely is below the recommended low-voltage limit for those cells. But that aside, we like the diminutive board which solders onto the end of a battery pack. It uses an SC120SKTRT which is a variable boost regulator capable of outputting 1.8-5V depending on resistor choices. You can leave the resistors off and it will default to 3.3V, set the output explicitly, or roll in some potentiometers and use your multimeter to tune the output.

This regulator costs more than the MCP1640 used in the AASaver, but it appears to use less passive components making for a smaller footprint. At a total of $3.50 plus the PCB (which will be a snap to etch at home) this is another great option to top off your next parts order.

[Thanks Uwe]