Sometimes, as hackers and makers, we can end up with messy lashed-together gear that is neither reliable nor tidy. Rackmounting your stuff can be a great way to improve the robustness and liveability of your setup. If you find this appealing, you might like CageMaker by [WebMaka].
This parametric OpenSCAD script can generate mounts for all kinds of stuff. Maybe you have a little network switch that’s just a tangle of wires on your desk, or a few pieces of audio gear that are loosely stacked on top of each other and looking rather unkempt. It would be trivial with this tool to create some 3D printed adapters to get all that stuff laced up nice and neat in a rack instead.
Self-hosting a few services on one’s own hardware is a great way to wrest some control over your online presence while learning a lot about computers, software, and networking. A common entry point is using an old computer or Raspberry Pi to get something like a small NAS, DNS-level adblocker, or home automation service online, but the hobby can quickly snowball to server-grade hardware in huge racks. [Dennis] is well beyond this point, with a rack-mounted NAS already up and running. This build expands his existing NAS to one which can host a petabyte of storage out of consumer-grade components.
The main reason for building this without relying too much on server-grade gear is that servers are generally designed to run in their own purpose-built rooms away from humans, and as a result don’t generally take much consideration for how loud that environment becomes. [Dennis] is building a lot of the components from scratch for this build including the case, the backplanes for the drives, and a backplane tester. With backplanes installed it’s time to hook up all of the data connections thanks to a few SAS expanders which provide all of the SATA connections for the 45 drives.
There are two power supplies here as well, although unlike a server solution these aren’t redundant and each only serves half the drives. This does keep it running quieter, along with a series of Noctua fans that cool the rest of the rack. The build finishes off with an LED strip which provides a quick visual status check for each of the drives in the bay. With that it’s ready for drives and to be connected to the network. It’s a ton of wiring and soldering, and great if you don’t want to use noisy server hardware. And, if you don’t need this much space or power, we’ve seen some NAS builds that are a bit on the smaller side as well.
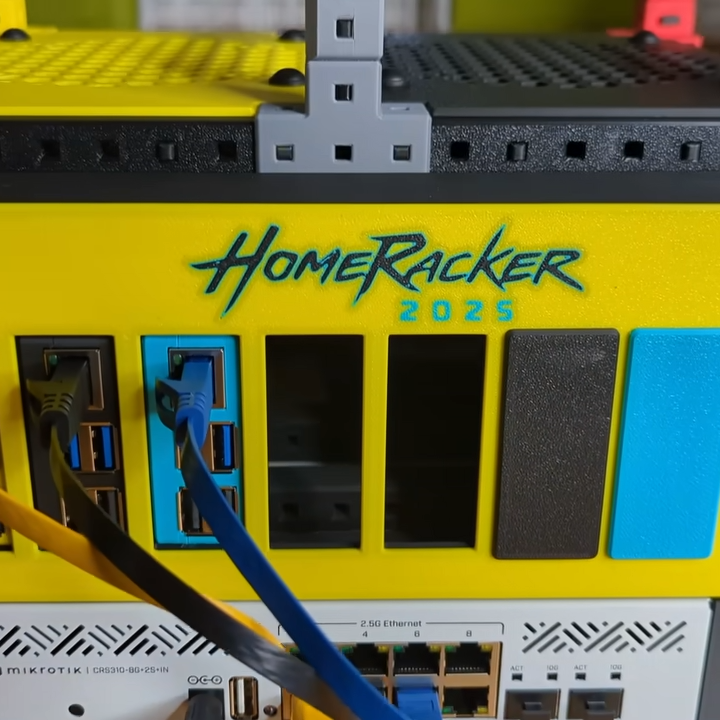
Things are cooler when rack-mounted, and [KellerLab] aims to make that all far more accessible with the HomeRacker, a modular and 3D-printable rack building system designed to let you rack-mount to your heart’s content. While it can handle big things, it seems especially applicable to tasks like mounting one’s home network equipment and Raspberry Pi machines.
A rack is a great place for those Raspberry Pi servers and home networking equipment, but it can also handle bigger jobs.
The basic system (or core) consists of three different parts: supports, connectors, and lock pins. The supports are the main structural bars, the connectors mostly go at the corners, and the lock pins ensure everything stays put. The nominal sizing is a 15 mm x 15 mm profile for the supports, with lengths being a multiple of 15 mm.
All is designed with 3D printing in mind, and requires no tools to assemble or disassemble. There are design elements we really appreciate, like how parts are printed at an angle, which improves strength while eliminating the need for supports. The lock pins (and the slots into which they go) are designed so that they are effective and will neither rattle nor fall out.
But the core system is just the foundation. There’s plenty of modularity and expansions to handle whatever one may need, from Gridfinity shelves and drawers to various faceplates and other modules. There are some example applications available from [KellerLab]’s HomeRacker models page, like CD shelf, under-desk drawer, or filament rack.
One last point to make about the value of printing objects like this at an angle: not only can the resulting layer lines provide better strength and reduce or eliminate the need for supports, but printing at an angle can help hide layer lines.
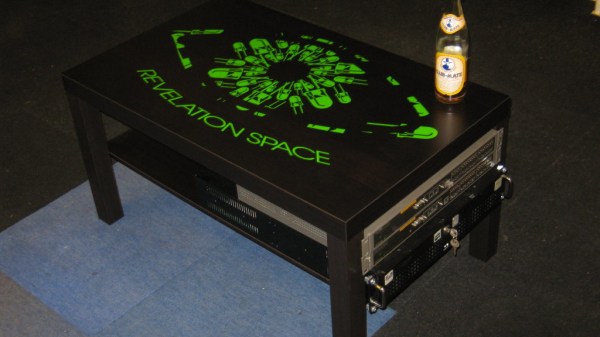
[hackbyte] reminds us about a classic hack that, even though we’ve seen floating around for over a decade, has somehow never quite graced our pages before. Many of us keep small home labs and even, at times, collections of servers that we’d be comfortable be calling mini-datacenters. However, if you use the ever-abundant 19″ switches, servers and other hardware, keeping these mounted and out of the way can be a thorny experience. Which leads us to, undoubtedly, unintentional – but exceptionally handy – compatibility between IKEA LACK table series and 19″ rackmount hardware.
The half-humorous half-informative wiki page on Eth0Wiki talks about this idea in depth, providing a myriad of examples and linking to pages of other hackerspaces and entities who implemented this idea and improved upon it. These tables look nice and fit anywhere, stack neatly when not in use, and you can put a bottle of Club-Mate on top. Aka, they’re the exact opposite of cheap clunky cabinets actually designed for rackmount you can buy, and cost a fraction of the price. What’s not to love?
You can buy a whole lot of cheap hardware in 19″, and arguably, that’s where you can get the best hardware for your dollar. Many a hackerspace has used these tables for makeshift infrastructure, permanent in all but intent. So, in case some of us missed the memo, now you are aware of yet another, underappreciated solution for mounting all these servers we get for cheap when yet another company replaces its equipment – or undergoes a liquidation. If LackRack hasn’t been on your radar – what have you been using for housing your rackmount hardware collection?
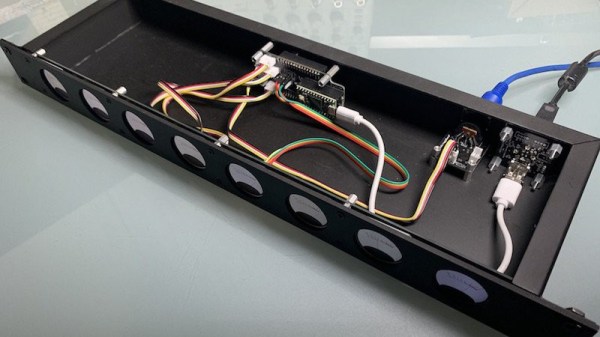
Like many of you, we’re intrigued by the possibilities offered by the availability of affordable round LCD panels. But beyond the smartwatches they were designed for, it’s not always easy to come up with an appropriate application for such non-traditional displays. Digital “steam gauges” are one of the first ideas that come to mind, so it’s perhaps no surprise that’s the direction [Tom Dowad] took his project. But rather than just one or two gauges, he decided to go all out and put eight of them in a 1U rack mountable unit.
What do you need eight faux-analog gauges for? Beats us, but that’s not our department. Now [Tom] has a whole row of indicators that can be used to show whatever it is he likes to keep an eye on. The fact that the device is actually controlled via MIDI may provide us a clue that there’s a musical component at play (no pun intended), but then, it wouldn’t be the first time we’d seen MIDI used simply as a convenient and well supported way of synchronizing gadgets. Continue reading “Round LCDs Put To Work In Rack Mount Gauge Cluster”→
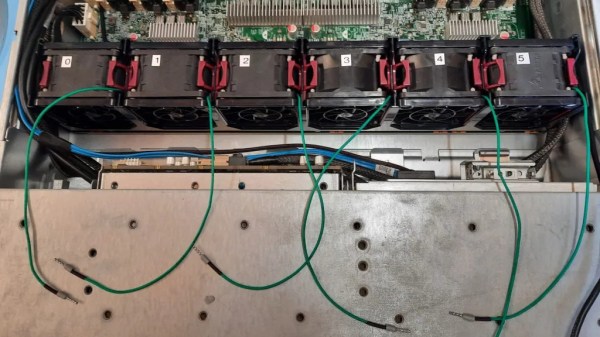
Our own [Dave Rowntree] started running into bottlenecks when doing paid work involving simulations of undisclosed kind, and resolved to get a separate computer for that. Looking for budget-friendly high-performance computers is a disappointing task nowadays, thus, it was time for a ten-year-old HP Proliant 380-g6 to come out of Dave’s storage rack. This Proliant server is a piece of impressive hardware designed to run 24/7, with a dual CPU option, eighteen RAM slots, and hardware RAID for HDDs; old enough that replacement and upgrade parts are cheap, but new enough that it’s a suitable workhorse for [Dave]’s needs!
After justifying some peculiar choices like using dual low-power GPUs, only populating twelve out of eighteen RAM slots, and picking Windows over Linux, [Dave] describes some hardware mods needed to make this server serve well. First, a proprietary hardware RAID controller backup battery had to be replaced with a regular NiMH battery pack. A bigger problem was that the server was unusually loud. Turns out, the dual GPUs confused the board management controller too much. Someone wrote a modded firmware to fix this issue, but that firmware had a brick risk [Dave] didn’t want to take. End result? [Dave] designed and modded an Arduino-powered PWM controller into the server, complete with watchdog functionality – to keep the overheating scenario risks low. Explanations and code for all of that can be found in the blog post, well worth a read for the insights alone.
If you need a piece of powerful hardware next to your desk and got graced with an used server, this write-up will teach you about the kinds of problems to look out for. We don’t often cover server hacks – the typical servers we see in hacker online spaces are full of Raspberry Pi boards, and it’s refreshing to see actual server hardware get a new lease on life. This server won’t ever need a KVM crash-cart, but if you decide to run yours headless, might as well build a crash-cart out of a dead laptop while you’re at it. And if you decide that running an old server would cost more money in electricity bills than buying new hardware, fair – but don’t forget to repurpose it’s PSUs before recycling the rest!
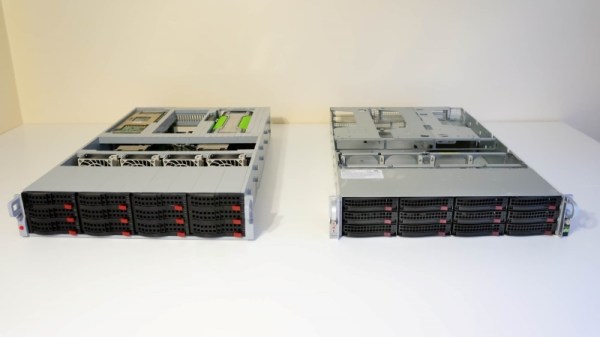
The picture above appears to show two unremarkable 2U rack servers, of the kind that are probably hosting the page you’re reading right now. Nothing special there – until you look carefully and realize that the rack server case on the left is made entirely from Lego. And what’s more, the server even works.
When it comes to building Lego computers, [Mike Schropp] is the guy to call. We’ve previously featured his Lego gaming computer, a striking case wrapped around what was a quite capable machine by 2016 standards, as well as an earlier case that reminds us a little of a NeXT. His reputation for Lego-clad computers led server maker Silicon Mechanics to commission a case for a trade show, and [Mike] jumped at the challenge.
Making a home-grade machine is one thing, but supporting all the heavy drives, power supplies, and fans needed to make the machine work is something else. He used a combination of traditional Lego pieces along with a fair sampling of parts from the Lego Technics line to pull off the build, which looks nearly perfect. Sadly, the Lego unit sizes make the case slightly taller than 2U, but that’s a small quibble when everything else matches so well, even the colors. And the fact that the server works, obviously important for a trade show demo, is pretty amazing too. The power supplies are even hot-swappable!
Congratulations to [Mike] on yet another outstanding Lego creation.