Workbench With Built-In Solder Fume Extractor

Solder

There’s nothing quite like getting an eye full of solder fumes, but when it comes to solder fume extraction, the most common solution take up a whole lot of work area. Here’s a very clever solder fume extractor that doesn’t get in the way, and can be perfectly positioned over the acrid brimstone of a soldering station.

The build consists of a cheap bathroom vent fan built into the back of the workbench feeding into a long PVC pipe that blows the exhaust to the floor a few feet away. The fan is controlled by a simple wall switch, but the intake is where this build really shines. It’s a series of hard, flexible plastic segments that allow the intake to be precisely oriented above the work piece, or wherever it’s most convienent to suck solder fumes from.

This solder fume extractor is just a part of a really amazing electronics workbench. A lot of thought went into this workspace, from threaded inserts in the work surface to mount a panavise to an amazingly thoughtful equipment rack for computers, monitors, and other assorted heavy equipment.

via Hacked Gadgets

Smart Reflow Oven Is Over-Engineered

reflow

[Linas] reverse engineered an AMOLED HTC 800×480 screen and interfaced it with an STM32 micro-controller, along with some other components, to make a gorgeously over engineered reflow oven.

Under the hood there is a PSoC5LP PID controller to control the 800W IR heating coil and two K-type thermocouples for sensing.

The real beauty is in the relatively small STM32 chip powering the HTC AMOLED screen. The AMOLED screen is high contrast and has a wide viewing angle, giving it a clear crisp view from all front facing viewpoints. Though pushing the limits of what the STM32F429i can do, [Linas] managed to make a very nice “home-grown” user interface, complete with user configurable settings and current temperature graphs.

The user interface looks very responsive and using some clever programming, [Linas] was able to make use of the potential of the screen to provide beautiful plots and interface widgets.

[Linas] goes into quite a bit of detail about the programming involved with rendering to the screen, so be sure to check out the video after the jump.

Continue reading “Smart Reflow Oven Is Over-Engineered”

DIY Router Base For Your Dremel

dremel-attachment-main

Dremel rotary tools are handy. Some of the attachments are convenient.  [vreinkymov] felt the convenience wasn’t worth the cost, so he decided to make a Router Base for his Dremel. These types of attachments are used to hold the Dremel perpendicular to the work surface.

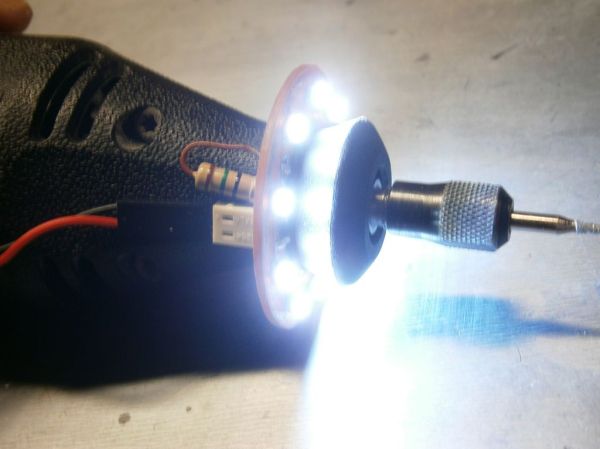
Underneath the little nut/cover near the spindle of the Dremel, there is a 3/4″-12 threaded feature used to attach accessories. A quick trip down the hardware store’s plumbing aisle resulted in finding a PVC reducer with the correct female thread to fit the Dremel. Once on the rotary tool, the reducer threads into a PVC nipple that is glued to a piece of acrylic. The acrylic acts as the base of the router attachment.

Continue reading “DIY Router Base For Your Dremel”

Scrappy Lil’ Circular Saw

Like a lot of us, [Andrea] has a habit  of disassembling everything he runs into. He recently came across a fairly substantial motor he’d salvaged and envisioned its new life as a small circular saw.

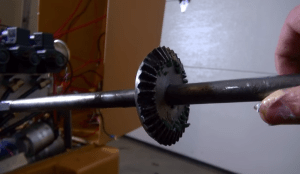
[Andrea] bought new cutting discs, but the rest is salvage and scrap. He had already mounted the motor, pivot, belt, and gear to a wood block, so he added two more wood scraps for a base and a cutting surface. He screwed a metal L beam to one side of the surface block to keep the disc adjacent to the edge. A couple of washers keep the disc rotating freely. [Andrea] used a piece of hydraulic pipe and a cylindrical nut to attach the disc to the pivot. This assembly can be easily tightened by hand, so changing discs is a quick operation.

He kept the electrical as-is and mounted the box to the saw body. This 30W motor runs at ~600-1000RPM which isn’t fast enough to cut wood. Undeterred, [Andrea] plans to use it to cut steel bolts, copper circuit boards, and metal plates. If you need to cut through anything and everything, try this 700W DIY table saw.

Building A Better Sewing Machine

sewing

After making a few fabric RFID tags, [Micah] had a sewing machine sitting in her workshop completely unused. This was due at least in part to how crappy this entry-level sewing machine was; it stalled easily, unusable at low speeds, and noises like a robot with bronchitis. The solution, of course, was to replace the motor and add electronic control, turning a terrible sewing machine into one that should cost several hundred dollars more.

After some experimentations with an AC motor, [Micah] came upon a small DC motor. This, combined with an LMD18200 H-bridge, Propeller microcontroller, and a beefy power supply gave [Micah] enough torque to run the sewing machine without mechanical wheezing and grinding.

The new update to the motor allowed [Micah] several control modes for the machine, all controlled by the foot pedal: an open-loop mode is pretty much the same as the stock machine, a closed-loop mode keeps a constant RPM on the motor regardless of resistance. There are a few more interesting modes that moves the needle down when the pedal is released, perfect for detailed work.

A small addition to this project was an LCD attached to the front of the machine, allowing [Micah] to toggle modes without the microcontroller being connected to the computer.

Continue reading “Building A Better Sewing Machine”

SMD Soldering On… Hot Sand?

Need to do some SMD soldering? No tools? No problem! Here’s a creative method that could be a handy tool to add to your belt: SMD soldering using hot sand.

[Oliver Krohn] recently released this little video demonstrating how to perform re-flow soldering using hot sand. He’s using a bunsen burner to heat up a ceramic pot of sand to use as a kind of hot plate. It seems to work pretty well, and it’s a very unique way of doing it — if you wanted to get a bit more technical, you could also throw a temperature probe in the sand to get a much finer heat control!

Of course there are lots of other ways of doing re-flow soldering, like using a re-purposed toaster oven, frying up some circuits on a skillet after you’ve had your bacon, or if you want to be fancy, you could even build your own toolkit for it!

Anyway, stick around for the epic video of SMD soldering on hot sand.

Continue reading “SMD Soldering On… Hot Sand?”

Mini-Forge On A Budget

7

Feeling a little black-smithy? Ever wanted to hammer some red-hot steel into a new shape? Turns out, it’s well within your reach!

We’ve seen soup can forges, paint can forges, and even full blown coal fired forges — but none quite as simple as this. All you need is a fire brick — and some tools.

The problem is, fire bricks are kind of fragile. In order to drill into it without cracking the brick [Mike] advises us to clamp it in a wooden jig to help support it. Slowly drill a long hole lengthwise in it, slightly oblong to allow for your work piece to go inside. Flip the brick sideways, and add a second perpendicular hole in order to insert your gas torch of choice.

Now before you go heating it up, it is wise to reinforce the brick by wrapping some wire around it to prevent it from falling apart when it inevitably cracks due to temperature changes. A more permanent solution is to encase the entire brick in concrete to make it more durable, which [Mike] plans on doing next time. Continue reading “Mini-Forge On A Budget”